Appearance
Data Lists
Data Lists allow you to store, manage, and display multiple items of data that match a common shape or pattern, and then display them in your apps as a list or table.
Data Lists are an extremely powerful feature of App Maker, and are one of the key ways to build genuinely valuable tools inside your Jira site.
Example Use-case:
Imagine you want to display a dashboard in your Jira project of all the open deals/opportunities from your CRM instance, so that you can keep an eye on the progress of deals from the same place you manage work.
With standard webhooks or even App Maker's own Data Object feature, the best you would be able to do is display data from whatever the most recent deal to be updated was. This is because as each new event or piece of data comes in, it would overwrite the previous data that you had stored in the Data Object.
With Lists, you can store each deal as a separate record as they are created, update those records when the data in your CRM changes, and remove them when the deal closes or is lost. Once you have the data being correctly managed in the list, you can display all those deals in a table in your app in real-time, showing the most up-to-date data from the external tool.
Working with Lists:
Lists feel just like Data Objects to work with, but with a few key differences.
When working with a list, you don't really ever need to think about the list itself, just the individual records within it. Each action you complete with a list is done on a single record, either adding/updating that record in the list, or removing the record from the list.
If you add a record to a list that doesn't exist yet, App Maker automatically creates the list for you. Similarly, if you remove the last record from a list, App Maker will automatically delete the list for you.
List Update requests (The JSON object used to add/remove items from a Data List) have three main differences compared to Data Objects:
- The
actionproperty does not usesetordelete, instead it usesaddorremove, to indicate whether you are adding or removing the record from the list.- Note that the
addaction will also update the record if it already exists in the list.
- Note that the
- There is a top level property called
listItemKey, this is the name of the property in the List Item itself that App Maker will use as the unique identifier for each record in the list.- This is used to identify whether an item already exists in the list when the
addaction is used, or to identify which item in the list to remove when theremoveaction is used.
- This is used to identify whether an item already exists in the list when the
- Finally, there is the
listItemitself, which is the actual data object that you want to add or update in the list.- This property is basically identical to the
dataObjectproperty in a Data Object request, except there will be multiple similar shaped objects within each list.- Every item added to a list should be the same "shape" (meaning they have the same set of properties with the same keys, but different values).
- Every item added to a list must also have a property with a key that matches the value set in
listItemKey. Otherwise, App Maker won't be able to identify the item in the list.
- This property is basically identical to the
Example Workflow:
- We're going to implement a basic system that mimics the CRM Deals dashboard example from above.
- For simplicity, we won't be using real CRM webhooks or data, but we will create our own fake versions of them, to demonstrate how you would work with Lists in a real-world scenario.
- The technique we use here can be applied to any external tool that you want to display data from in your Jira site.
What You Will Need
Creating the CRM Deals UI Component:
- First, we need to make a UI Component in Jira to set up the Table that will display the deal data.
- If you're not sure how to do this, check out the Getting Started guide.
- We're going to add this component to the
jira:globalPagemodule so we can access it from anywhere in the Jira site.- You might also want to add this to a project specific module if you wanted to have different CRM setups for different projects.
- We'll use a
DynamicTablecomponent, and define the columns we want to display. - We'll also use the
list:Template Functionto parse the deal data from the Data List, and display it in the table.
Heads Up
- We're skipping over some details here regarding both the Dynamic Table component and the concept of Template Functions.
- Don't worry, we'll cover those in detail in the following sections, for now just follow along and it will all come together at the end.
CRM Deals Table Component
json
{
  "action": "set",
  "resourceType": "site",
  "title": "deal-table",
  "module": "jira:globalPage",
  "componentData": {
    "type": "TabPanel",
    "tabTitle": "CRM Deals Dashboard",
    "children": [
      {
        "type": "FullPageSection",
        "title": "CRM Deals Dashboard",
        "children": [
          {
            "type": "ParagraphMedium",
            "content": "This table displays all the open Deals in our CRM instance."
          },
          {
            "type": "DynamicTable",
            "columnHeaders": [
              {
                "type": "TableHeader",
                "title": "Deal Title",
                "valuePath": "title",
                "linkPath": "link"
              },
              {
                "type": "TableHeader",
                "title": "Owner",
                "valuePath": "owner"
              },
              {
                "type": "TableHeader",
                "title": "Status",
                "valuePath": "status",
                "fieldType": "lozenge",
                "appearanceMap": {
                  "discovery": [
                    "Open",
                    "open"
                  ],
                  "success": [
                    "Closed",
                    "closed"
                  ]
                }
              }
            ],
            "tableRows": "{{list: dataLists.site.crm-deals}}"
          }
        ]
      }
    ]
  }
}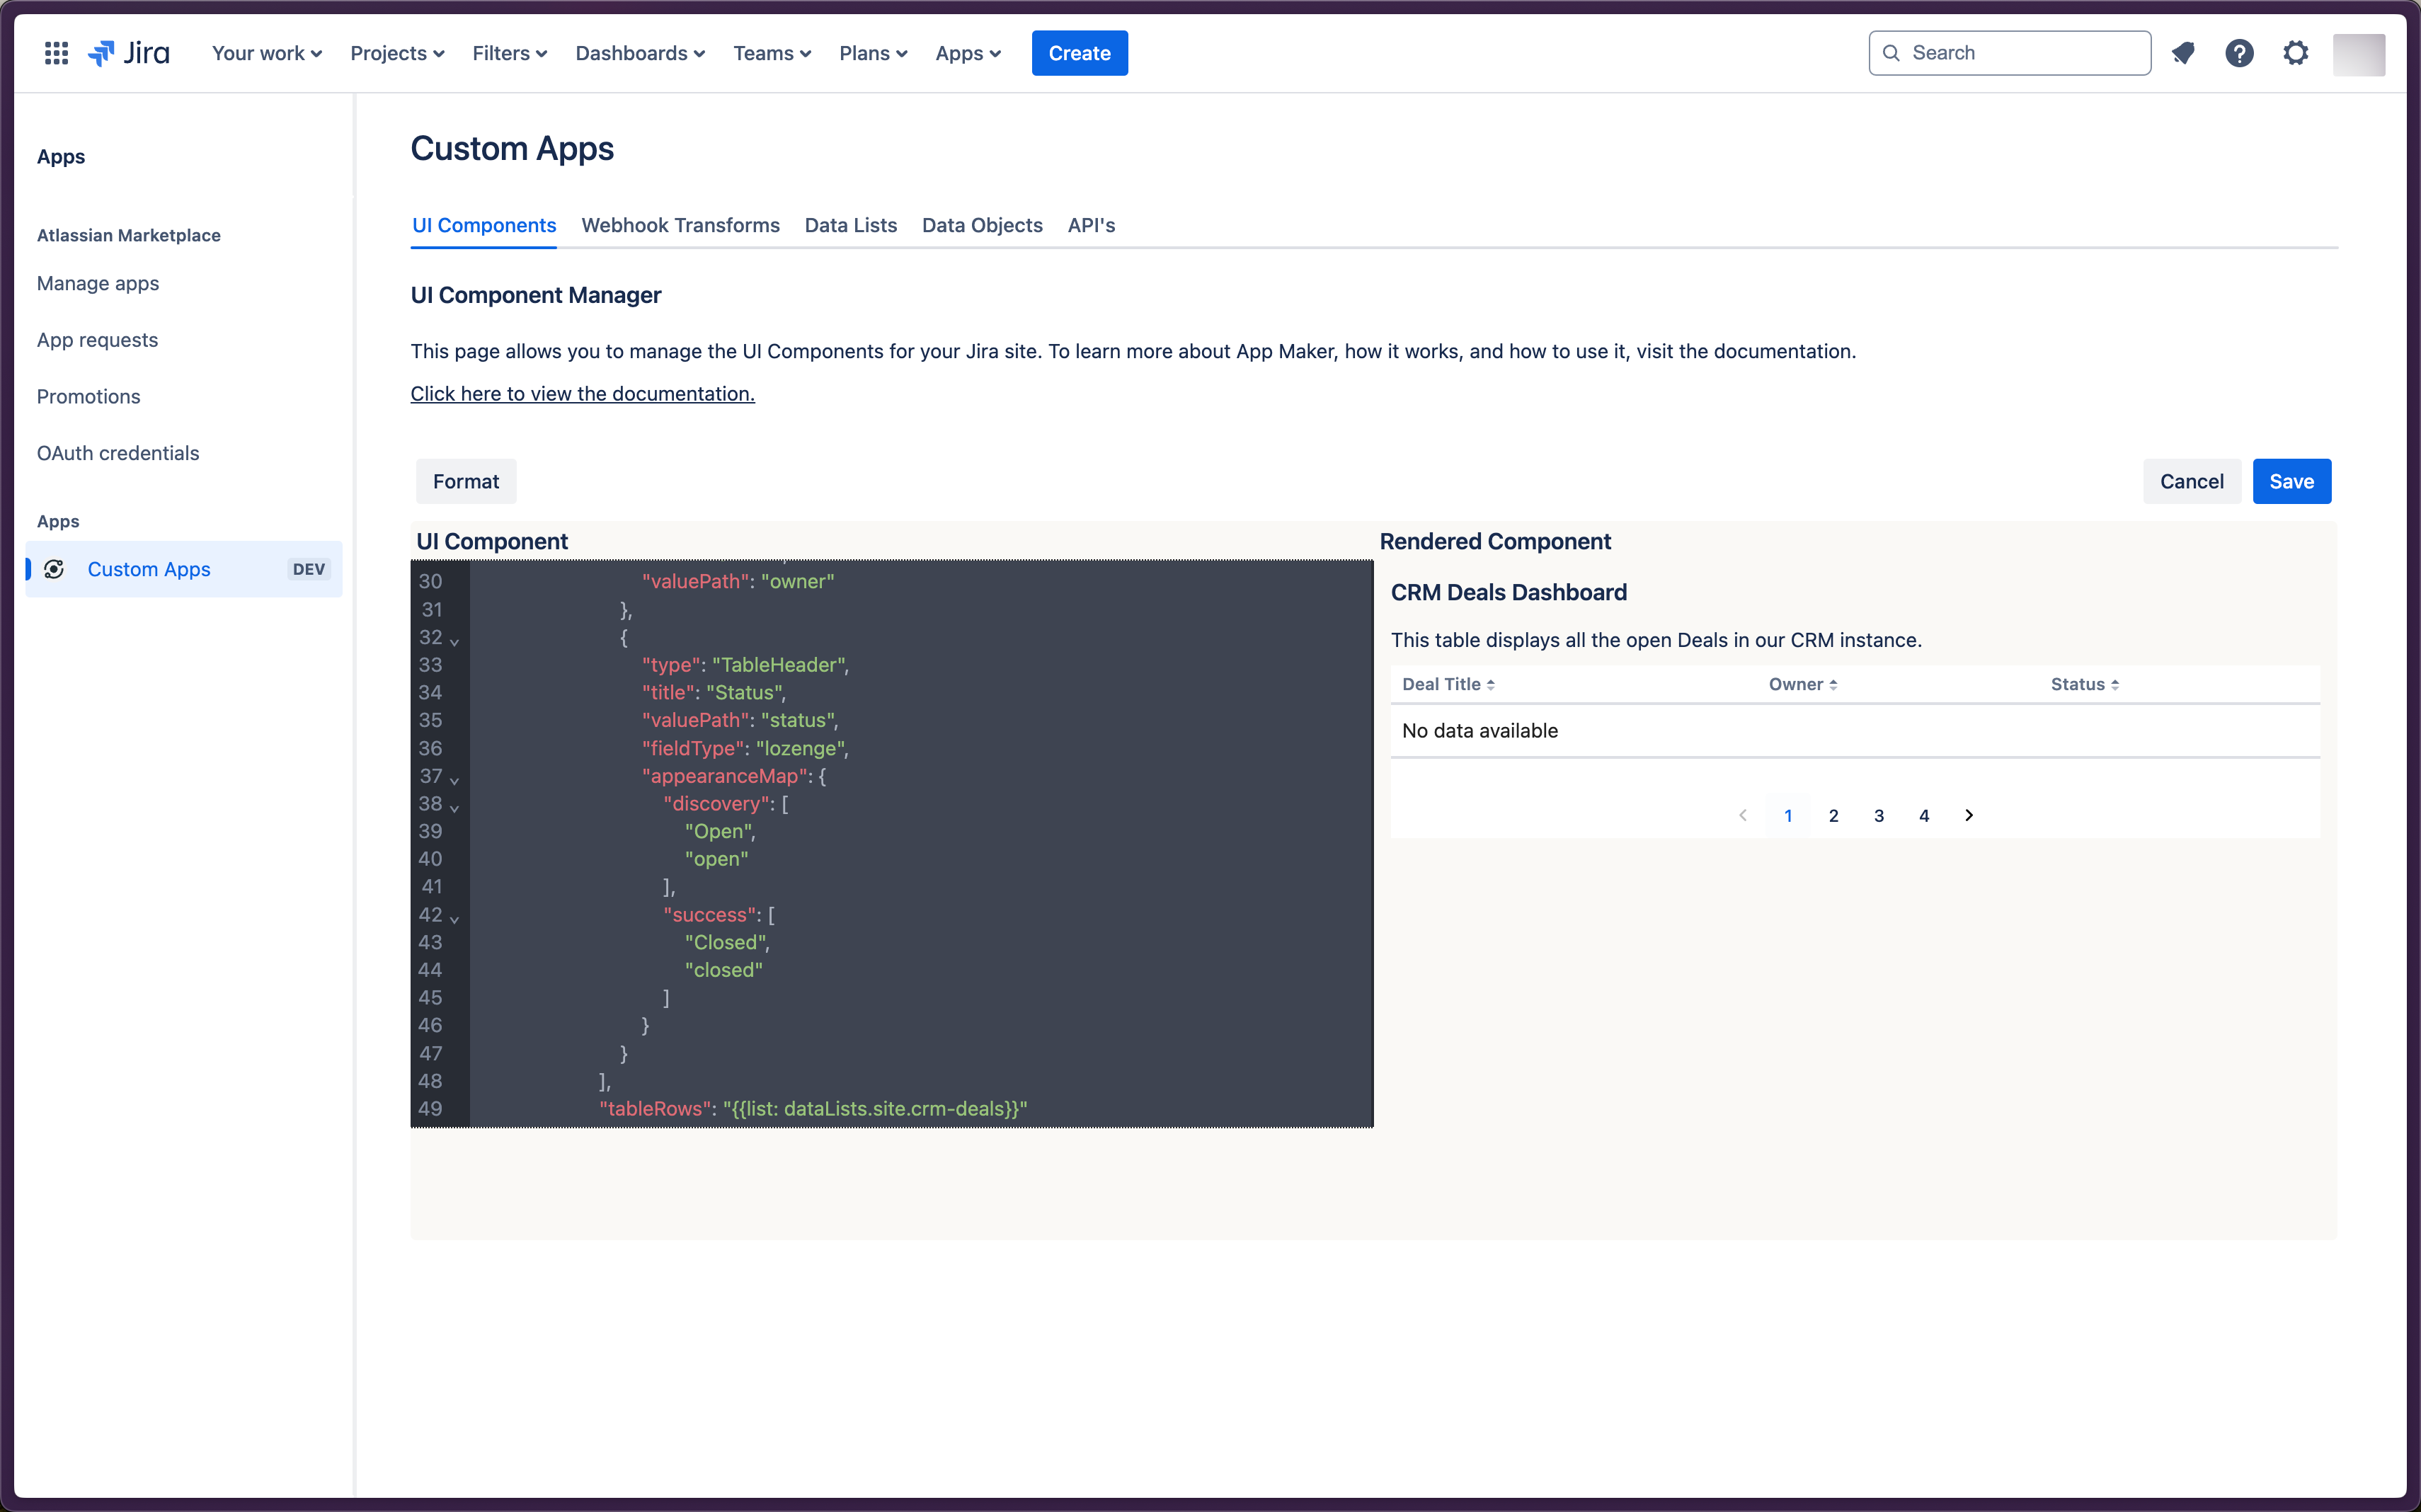
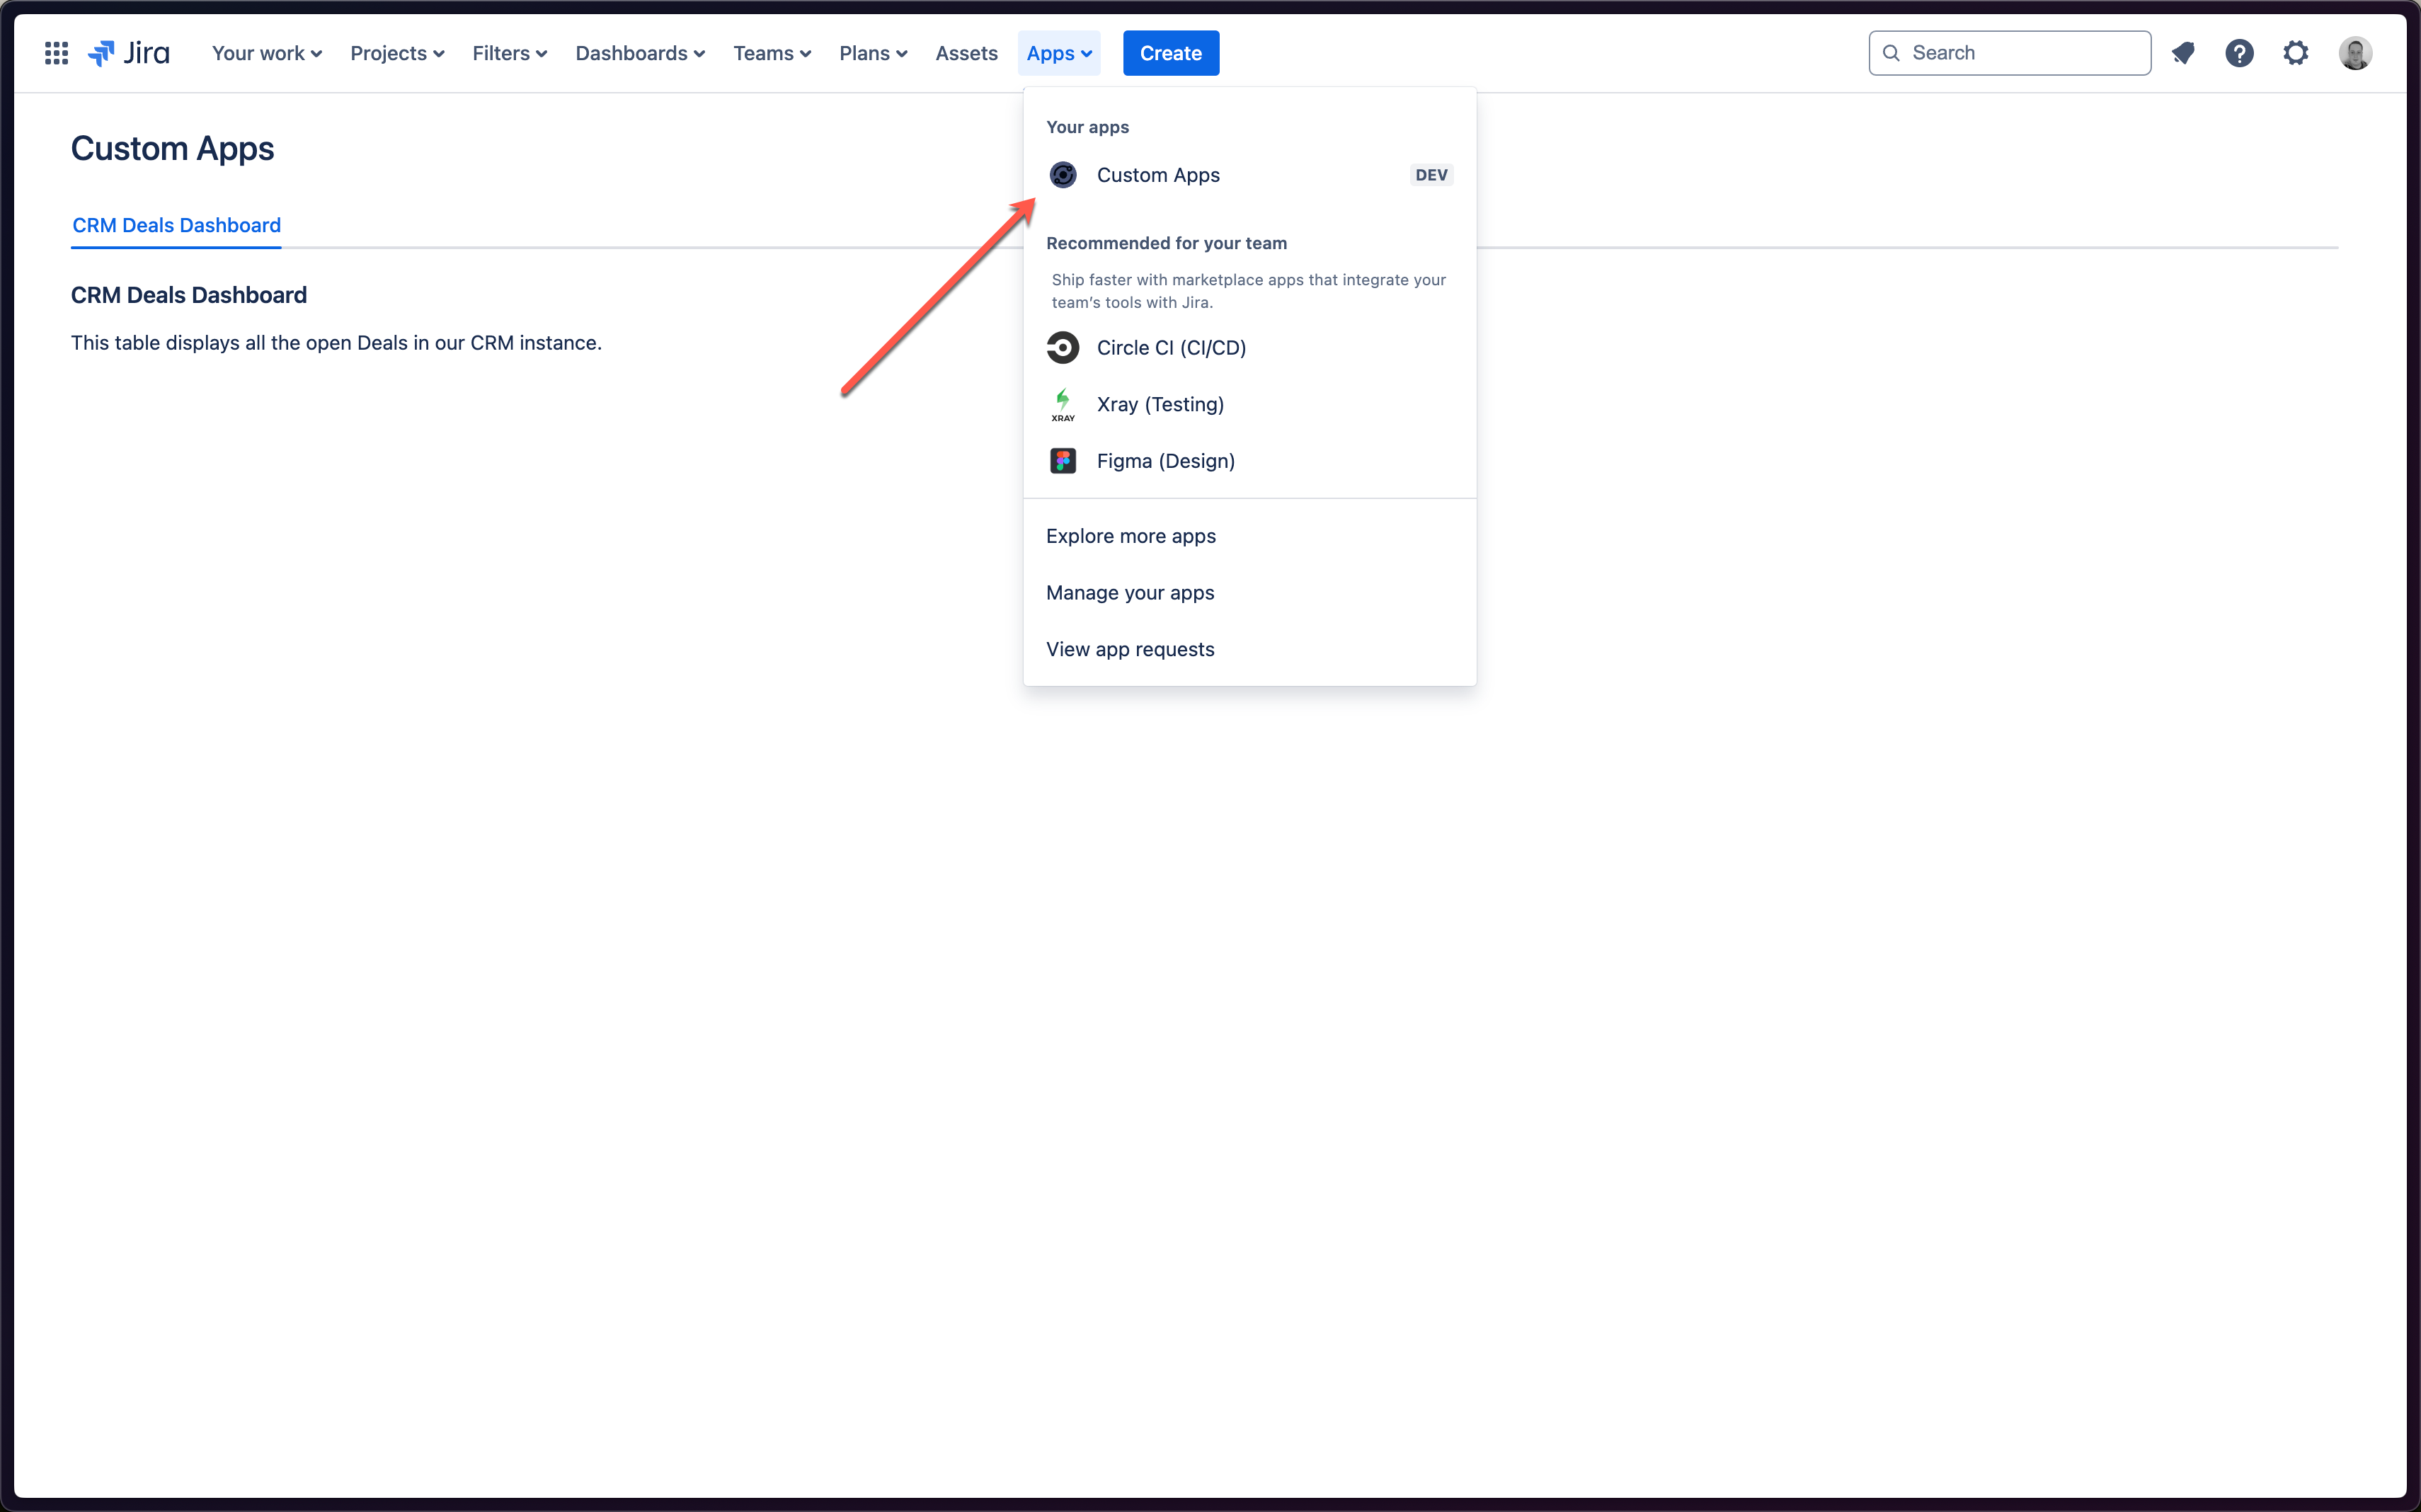
- Once complete, head over to Jira and click on the "Apps" dropdown in the top navigation bar, and then click on the "Custom Apps" option to load App Maker in the "Jira Global Page".
- You should see on that page, a new tab called "CRM Deals", with an empty table that has no data in it yet.
Jira Global Page with empty CRM deal table
Adding Deal Data to the List:
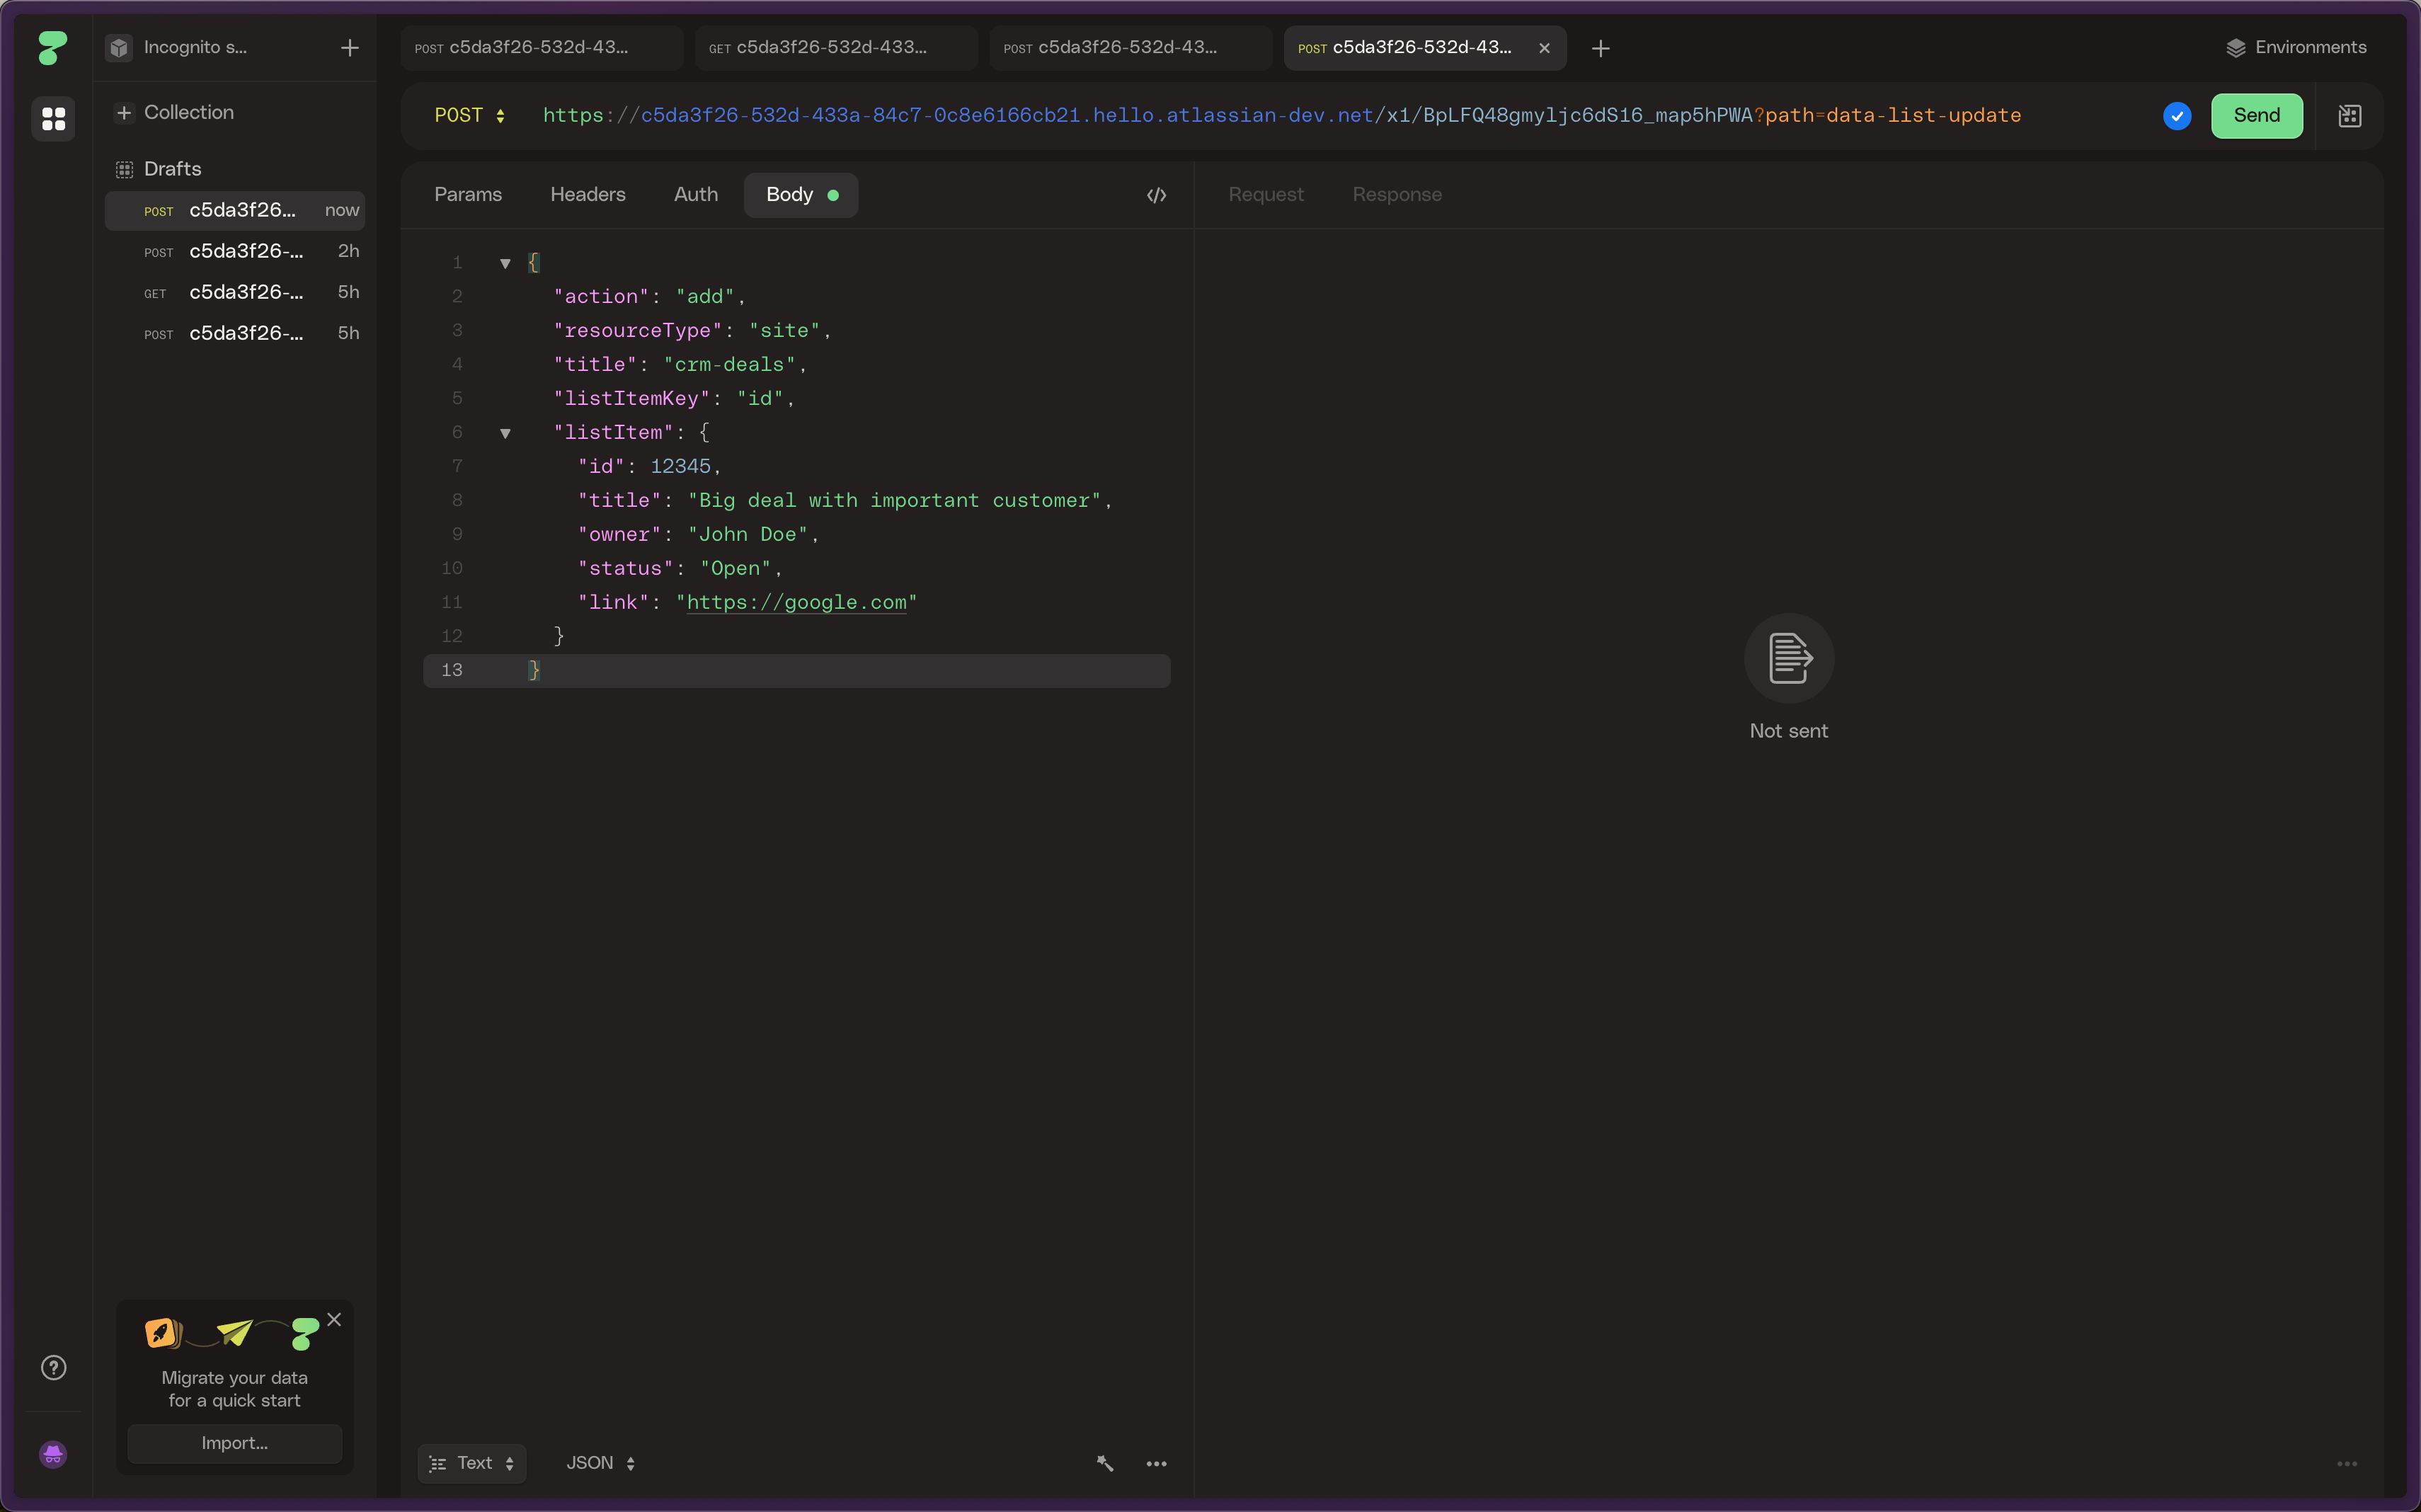
- Next, we're going to manually create some fake CRM data and add it to the list via the "Update Data List" API.
- If you were using real CRM Deal data, you would be doing this via a webhook that sends the data to App Maker whenever deals are updated.
- You would also want to use a Webhook Transform to transform the incoming data into the shape that you want to store in the list (assuming you don't want to use the raw CRM webhook objects, which is also an option).
- Head to the App Maker settings page, then click on the "API's" tab and copy the URL from the field labelled "Update Data List (POST)".
- Then head over to your API Client and set the URL path to the URL you just copied.
- e.g
https://some-big-uuid.hello.atlassian-dev.net/x1/some-app-id?path=data-list-update
- e.g
- Now, in the body of the request, we're going to add a new Deal record to the list.
- We're going to use the
addaction because we want to add something to the list. - We're going to set the
titleascrm-dealsand theresourceTypeassite, to match the value we templated into our table. - We're also going to specify the
listItemKeyasid, so that we can give each Deal a unique identifier, so we can make changes to them later. - Finally, we're going to provide a
listItemobject that contains the data for the Deal we want to add (with properties matching thecolumnHeadersfrom our table).
- We're going to use the
Deal Data List item
json
{
  "action": "add",
  "resourceType": "site",
  "title": "crm-deals",
  "listItemKey": "id",
  "listItem": {
    "id": 12345,
    "title": "Big deal with important customer",
    "owner": "John Doe",
    "status": "Open",
    "link": "https://google.com"
  }
}
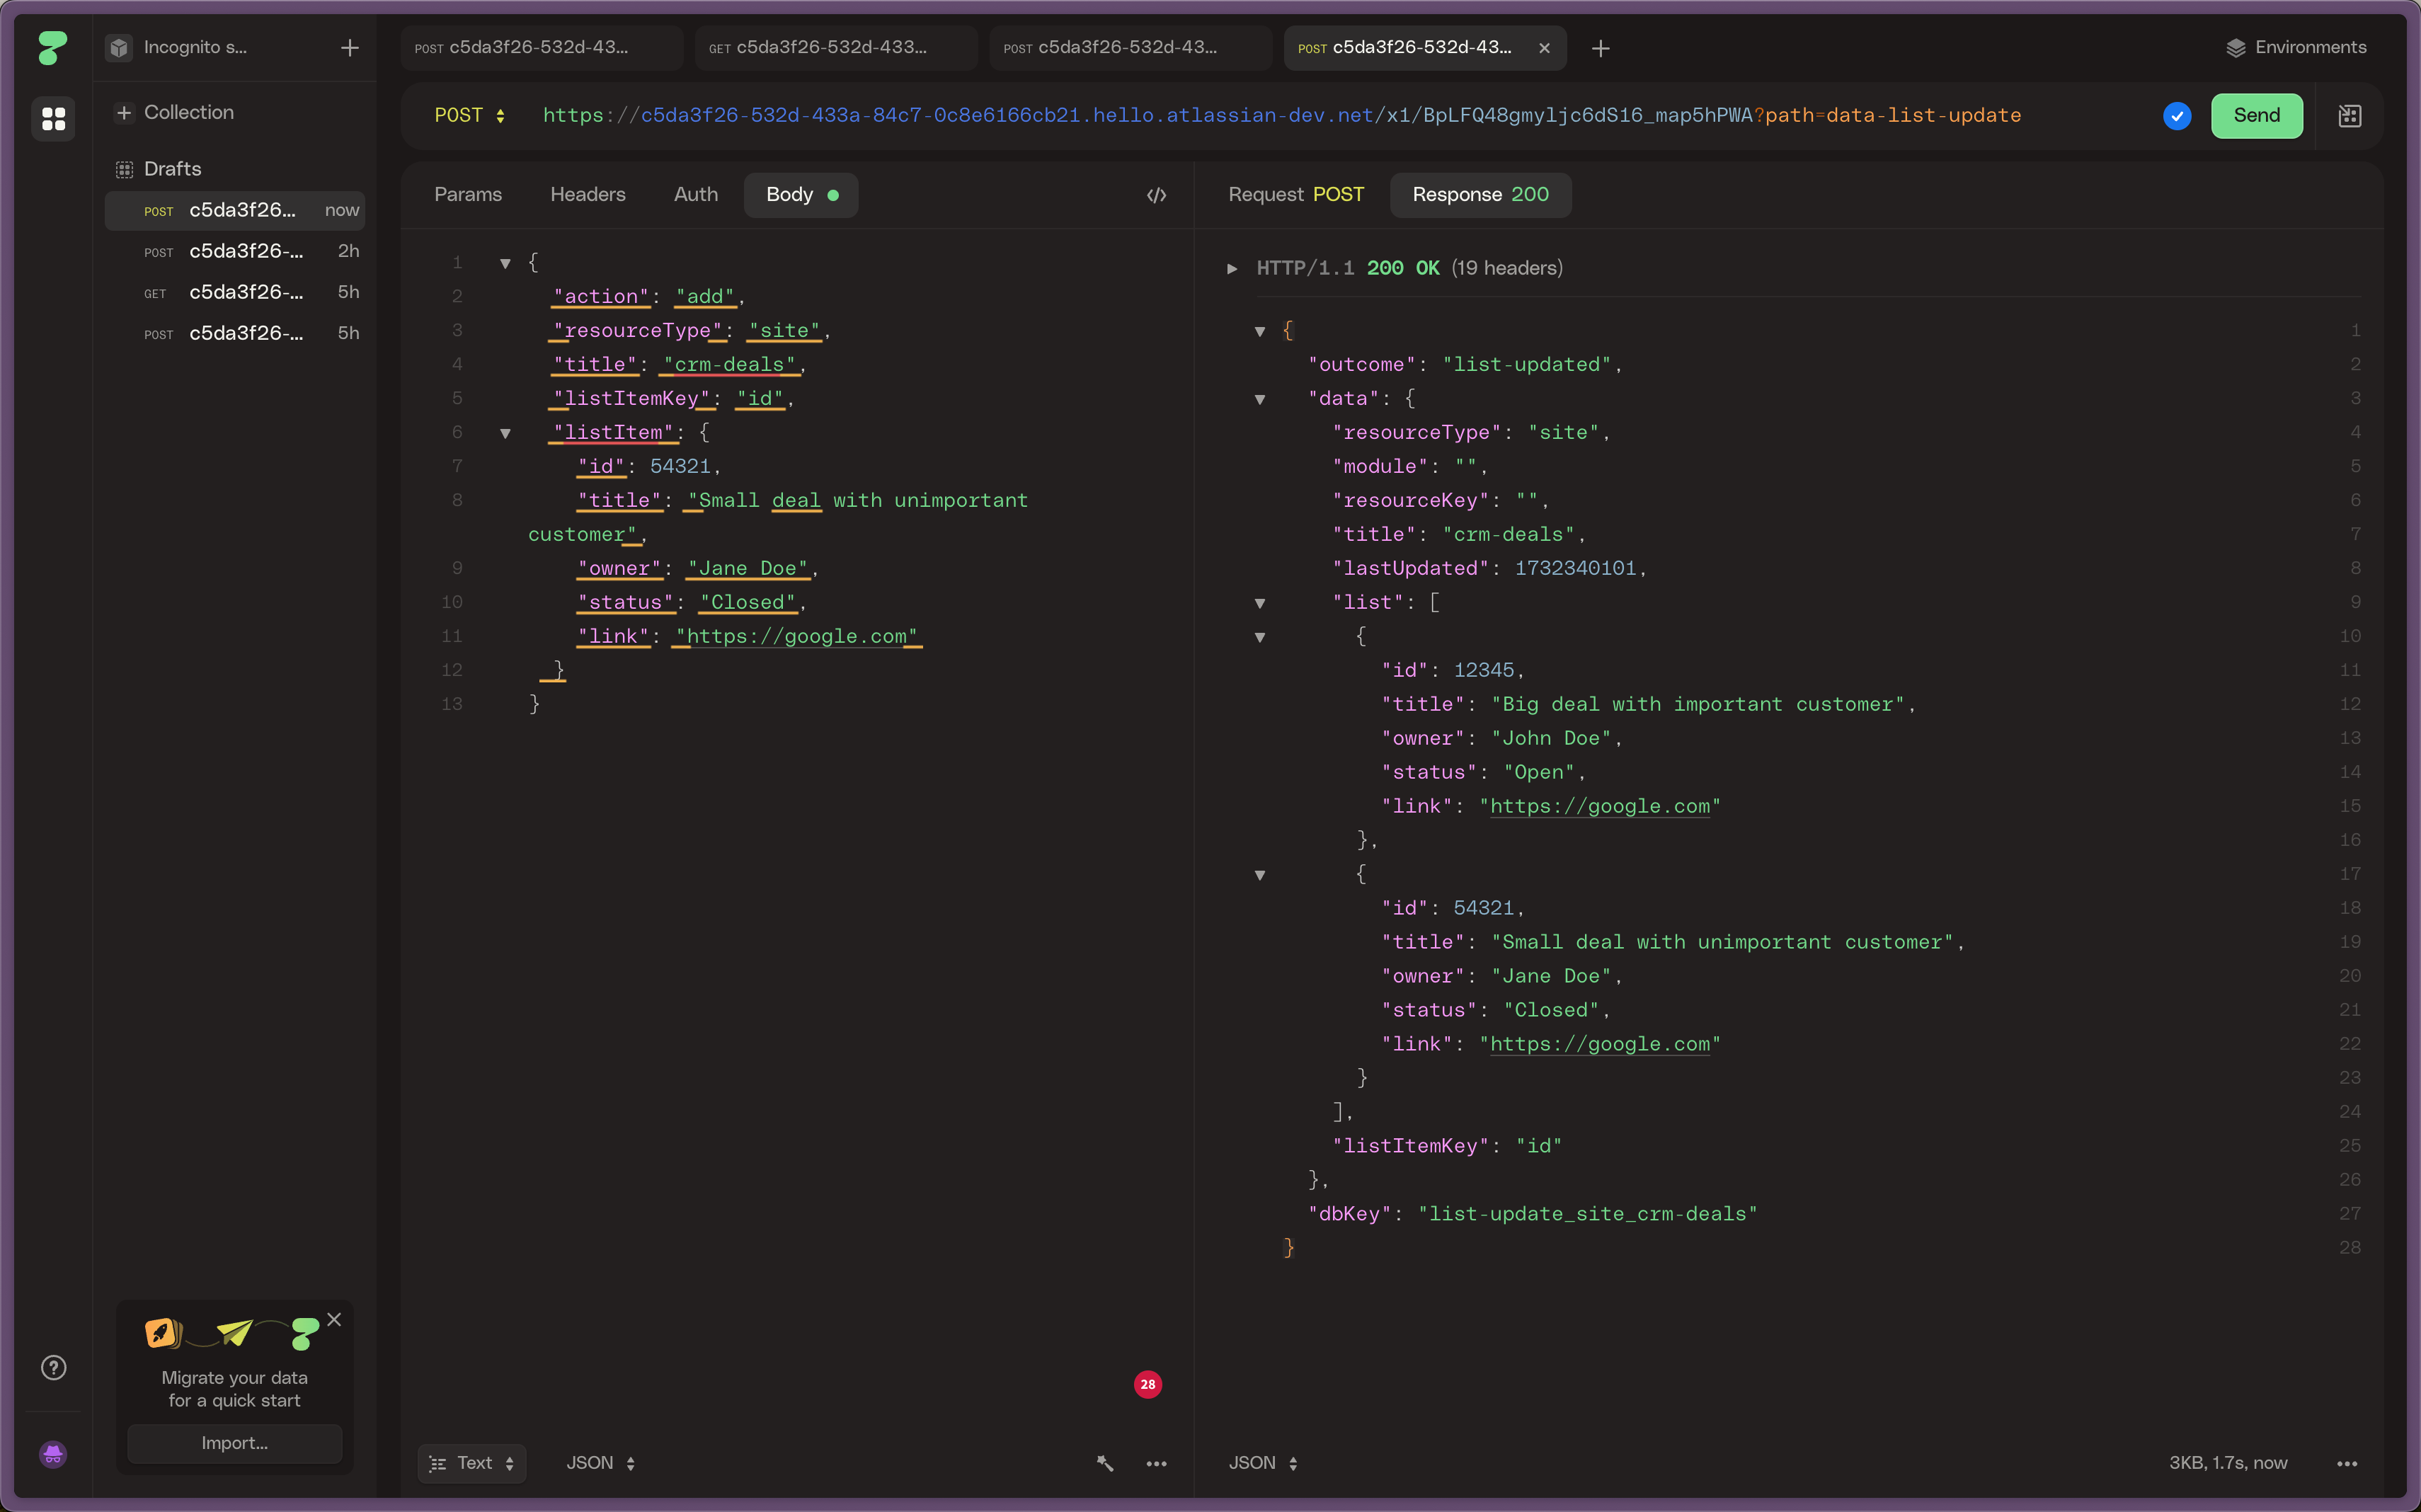
- Once you've sent the request, you should get a response that looks like:
Data List update response
json
{
	"outcome": "list-updated",
	"data": {
		"resourceType": "site",
		"module": "",
		"resourceKey": "",
		"title": "crm-deals",
		"lastUpdated": 1725957033,
		"list": [
			{
				"id": 12345,
				"title": "Big deal with important customer",
				"owner": "John Doe",
				"status": "Open",
				"link": "https://google.com"
			}
		],
		"listItemKey": "id"
	},
	"dbKey": "list-update_site_crm-deals"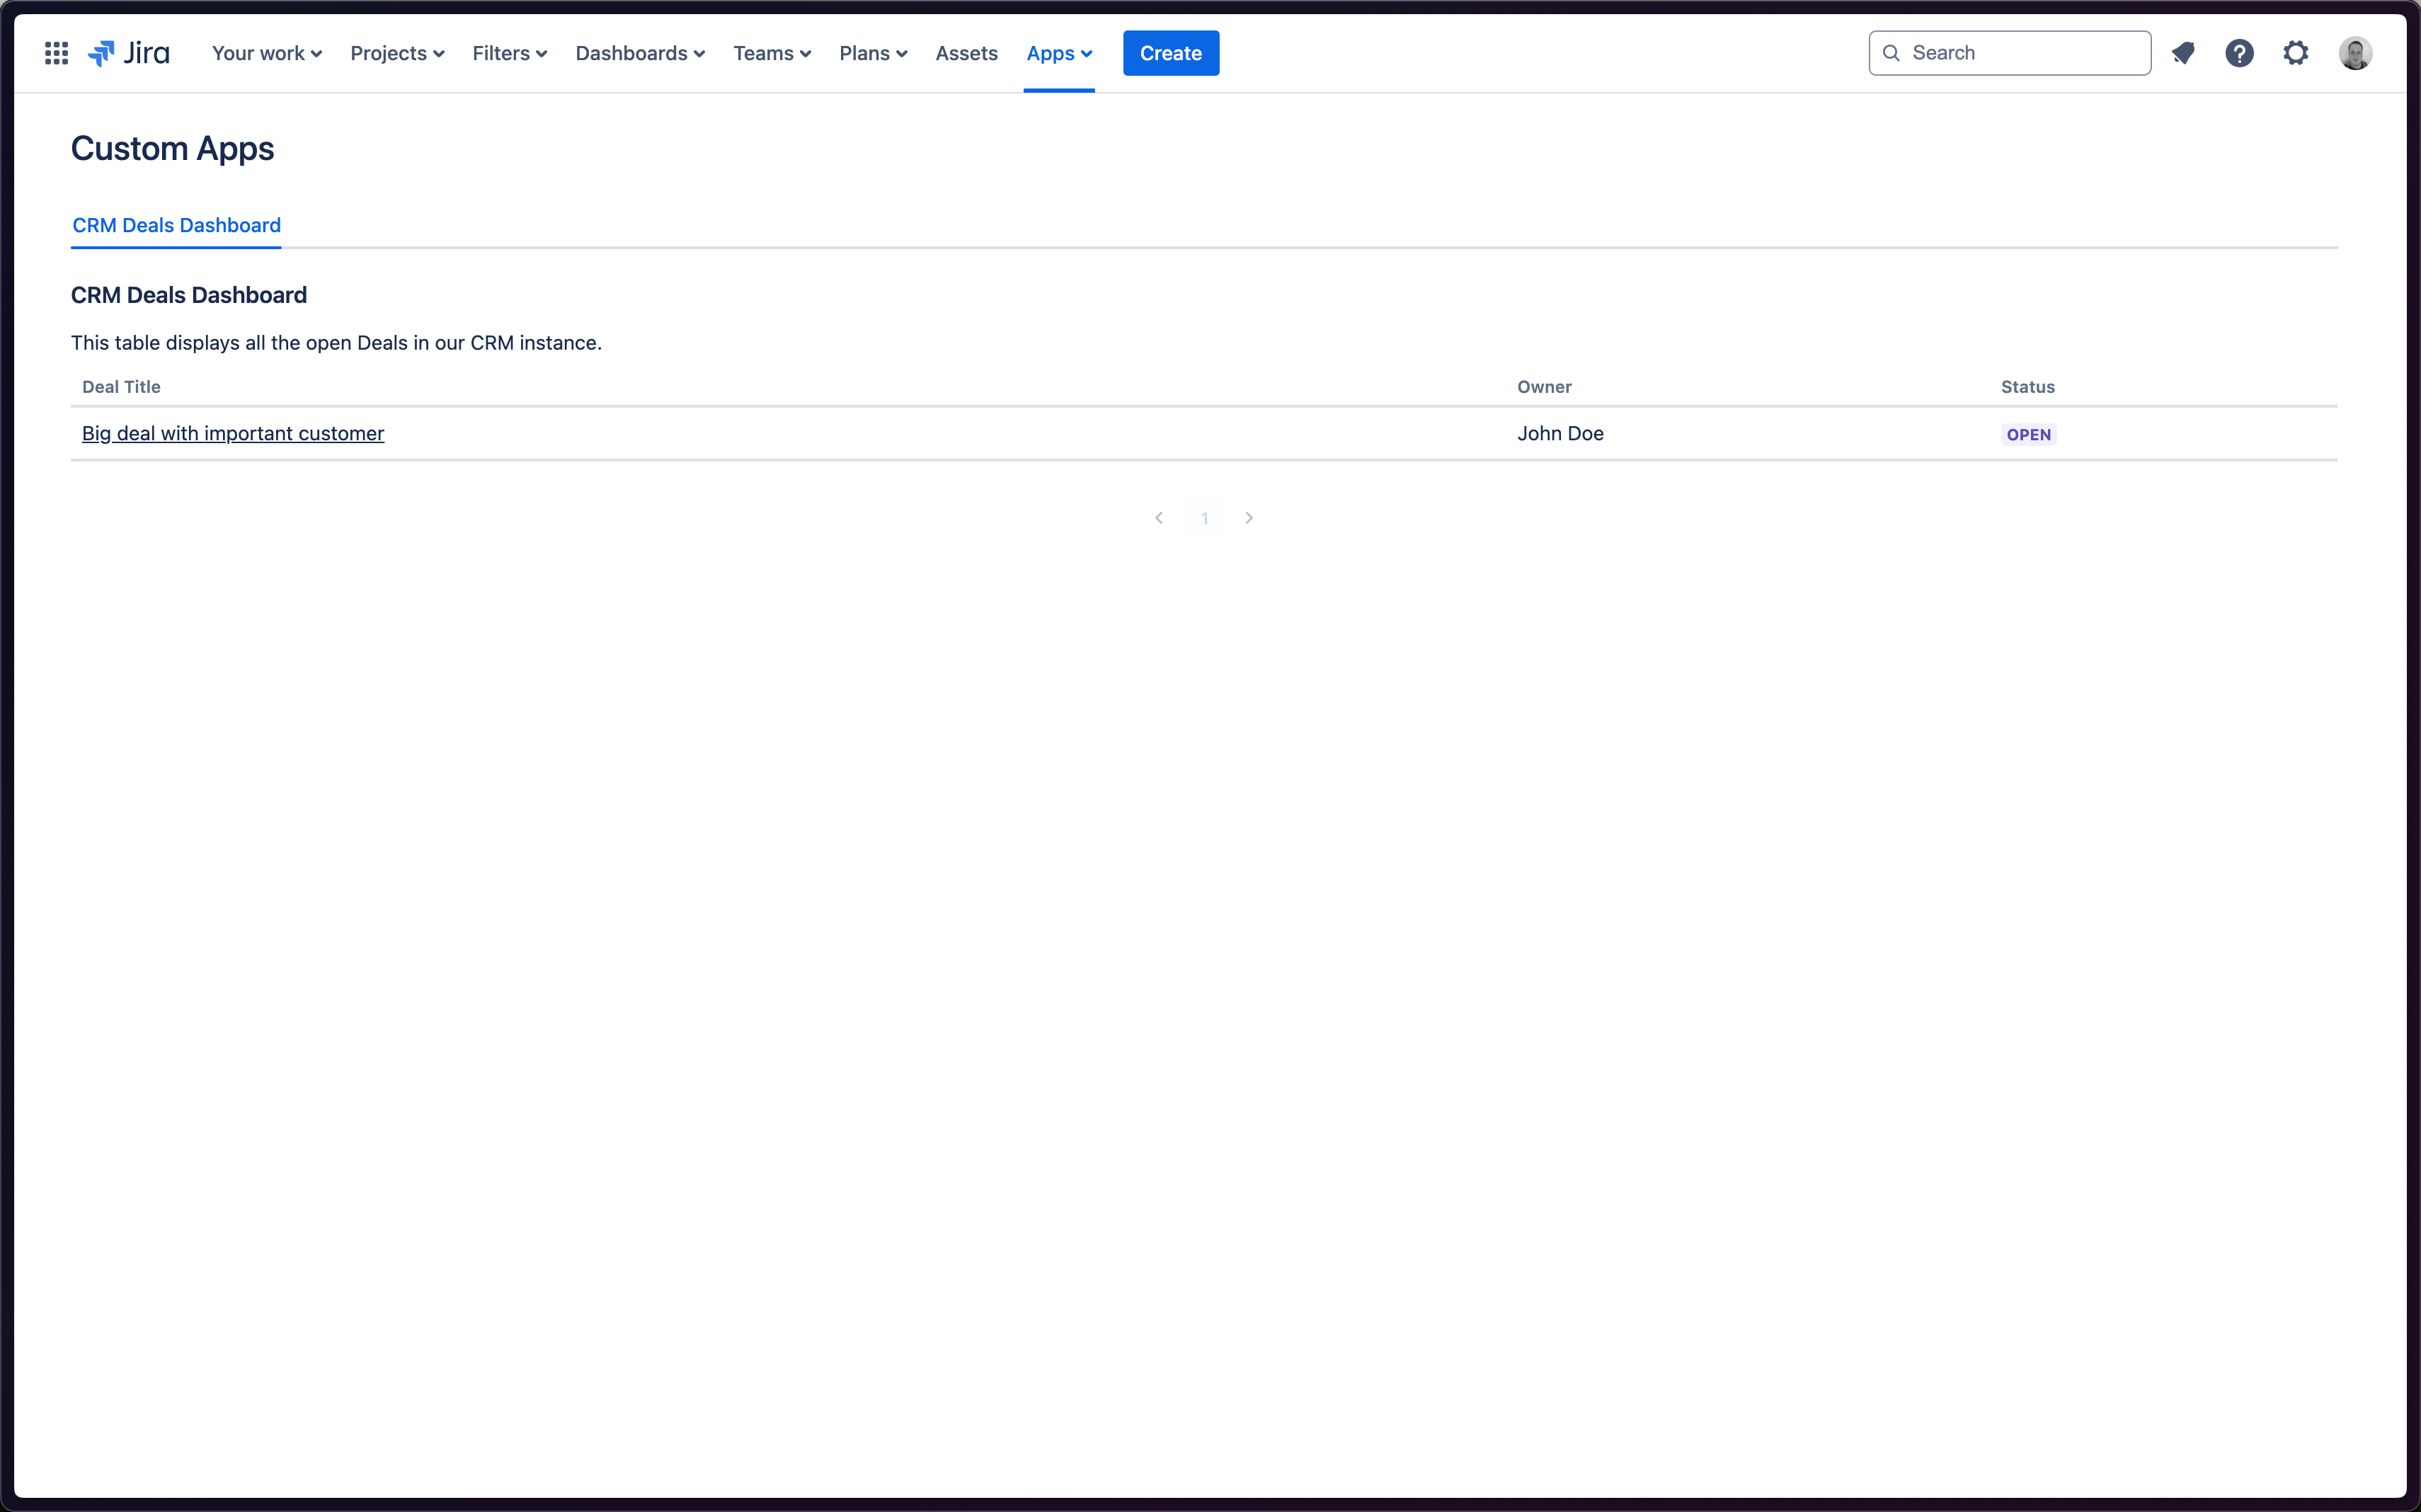
}- Now head back over to the Jira Global Page, and hit refresh. You should see the Deal you just added in the table.
Deals table with one row
Adding a Second Deal
- Now, lets add another Deal with a different
id,title,owner, andstatusso that we have a bit more data to work with (you can leave thelinkthe same for the sake of the example).- You can reuse the same API request, just update the
id,title,owner, andstatusfields. - By leaving all the top-level fields the same, you know the second item will be added to the same list.
- The list you add items to is defined by the combination of
resourceType,resourceKey(if scoped to a"project"or"issue"), andtitle.
- You can reuse the same API request, just update the
Second Data List item
json
{
  "action": "add",
  "resourceType": "site",
  "title": "crm-deals",
  "listItemKey": "id",
  "listItem": {
    "id": 54321,
    "title": "Small deal with unimportant customer",
    "owner": "Jane Doe",
    "status": "Closed",
    "link": "https://google.com"
  }
}
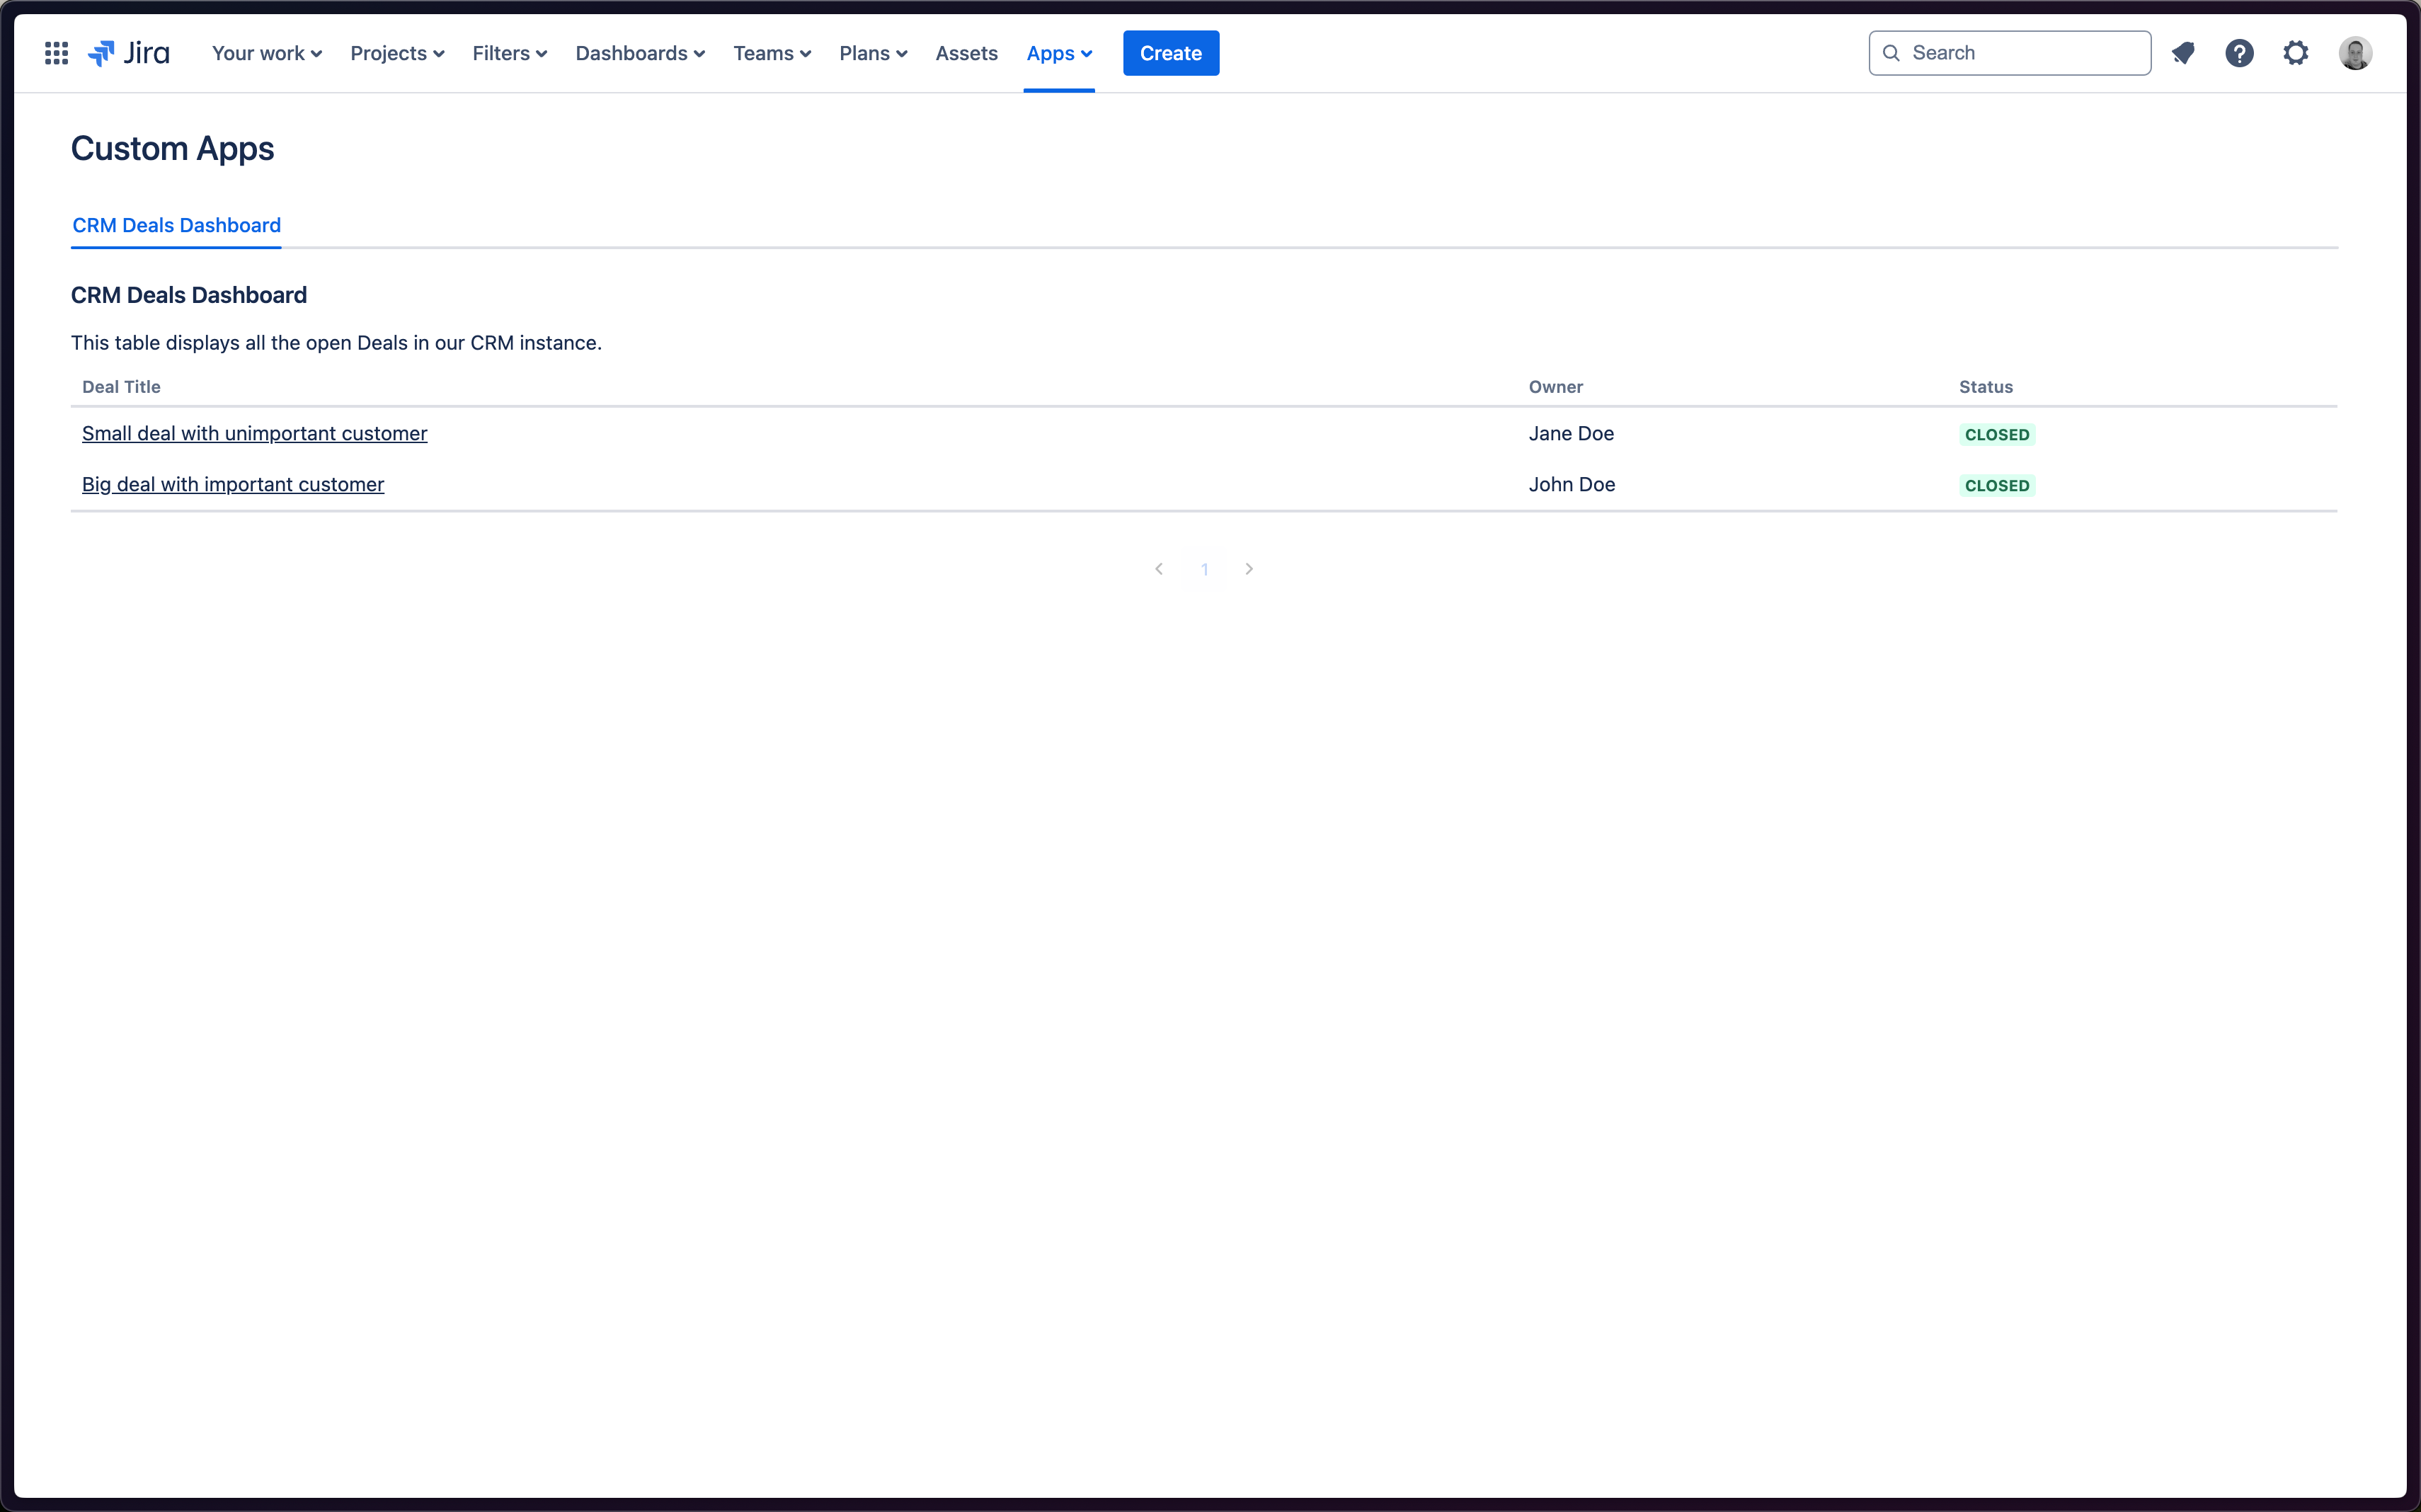
- Head back to Jira, refresh, and you should now have two deals in the table.
Deals table with two rows

Updating Records in the List:
- Next, we're going to update the status of the first Deal we added to the list and set its status to
Closed. - To update records you use the same
actionas you do for adding them. This way, you don't need to know if a record already exists in the list or not when you get data from an external tool, you just use theaddaction and App Maker will figure out the rest. - Head back over to your API client, and update the body of the request:
- Everything is going to be the same as when we first created the Deal, except the
statusfield, which we're going to set toClosed.
- Everything is going to be the same as when we first created the Deal, except the
Update Deal request
json
{
  "action": "add",
  "resourceType": "site",
  "title": "crm-deals",
  "listItemKey": "id",
  "listItem": {
    "id": 12345,
    "title": "Big deal with important customer",
    "owner": "John Doe",
    "status": "Closed",
    "link": "https://google.com"
  }
}- Then send the request, and head back over to Jira and refresh the page. You should see that the status of the first Deal has been updated to
Closed.
Deals table with updated row
- How this works is App Maker uses the value of the property specified by
listItemKeyto identify the record in the list, and then updates the rest of the properties with the values you provide in thelistItemobject.- So in this case, it looked up the existing record with the
idof12345, and updated it to the new information we provided.
- So in this case, it looked up the existing record with the
Removing Records from the List:
- Finally, we're going to remove all the Deals we added to the list.
- To remove records, you simply set the
actiontoremove, and provide a value for whatever property you specified as thelistItemKey(idin our case).- App Maker will then find the record in the list with that value, and remove it.
- Once the last record is removed from a list, the list itself will also be removed.
- Don't worry, if you need to add more records later, App Maker will automatically recreate the list as soon as the first record is added.
- Head back over to your API client, update the body of the request, and send it:
Data List remove request
json
{
  "action": "remove",
  "resourceType": "site",
  "title": "crm-deals",
  "listItemKey": "id",
  "listItem": {
    "id": 12345
  }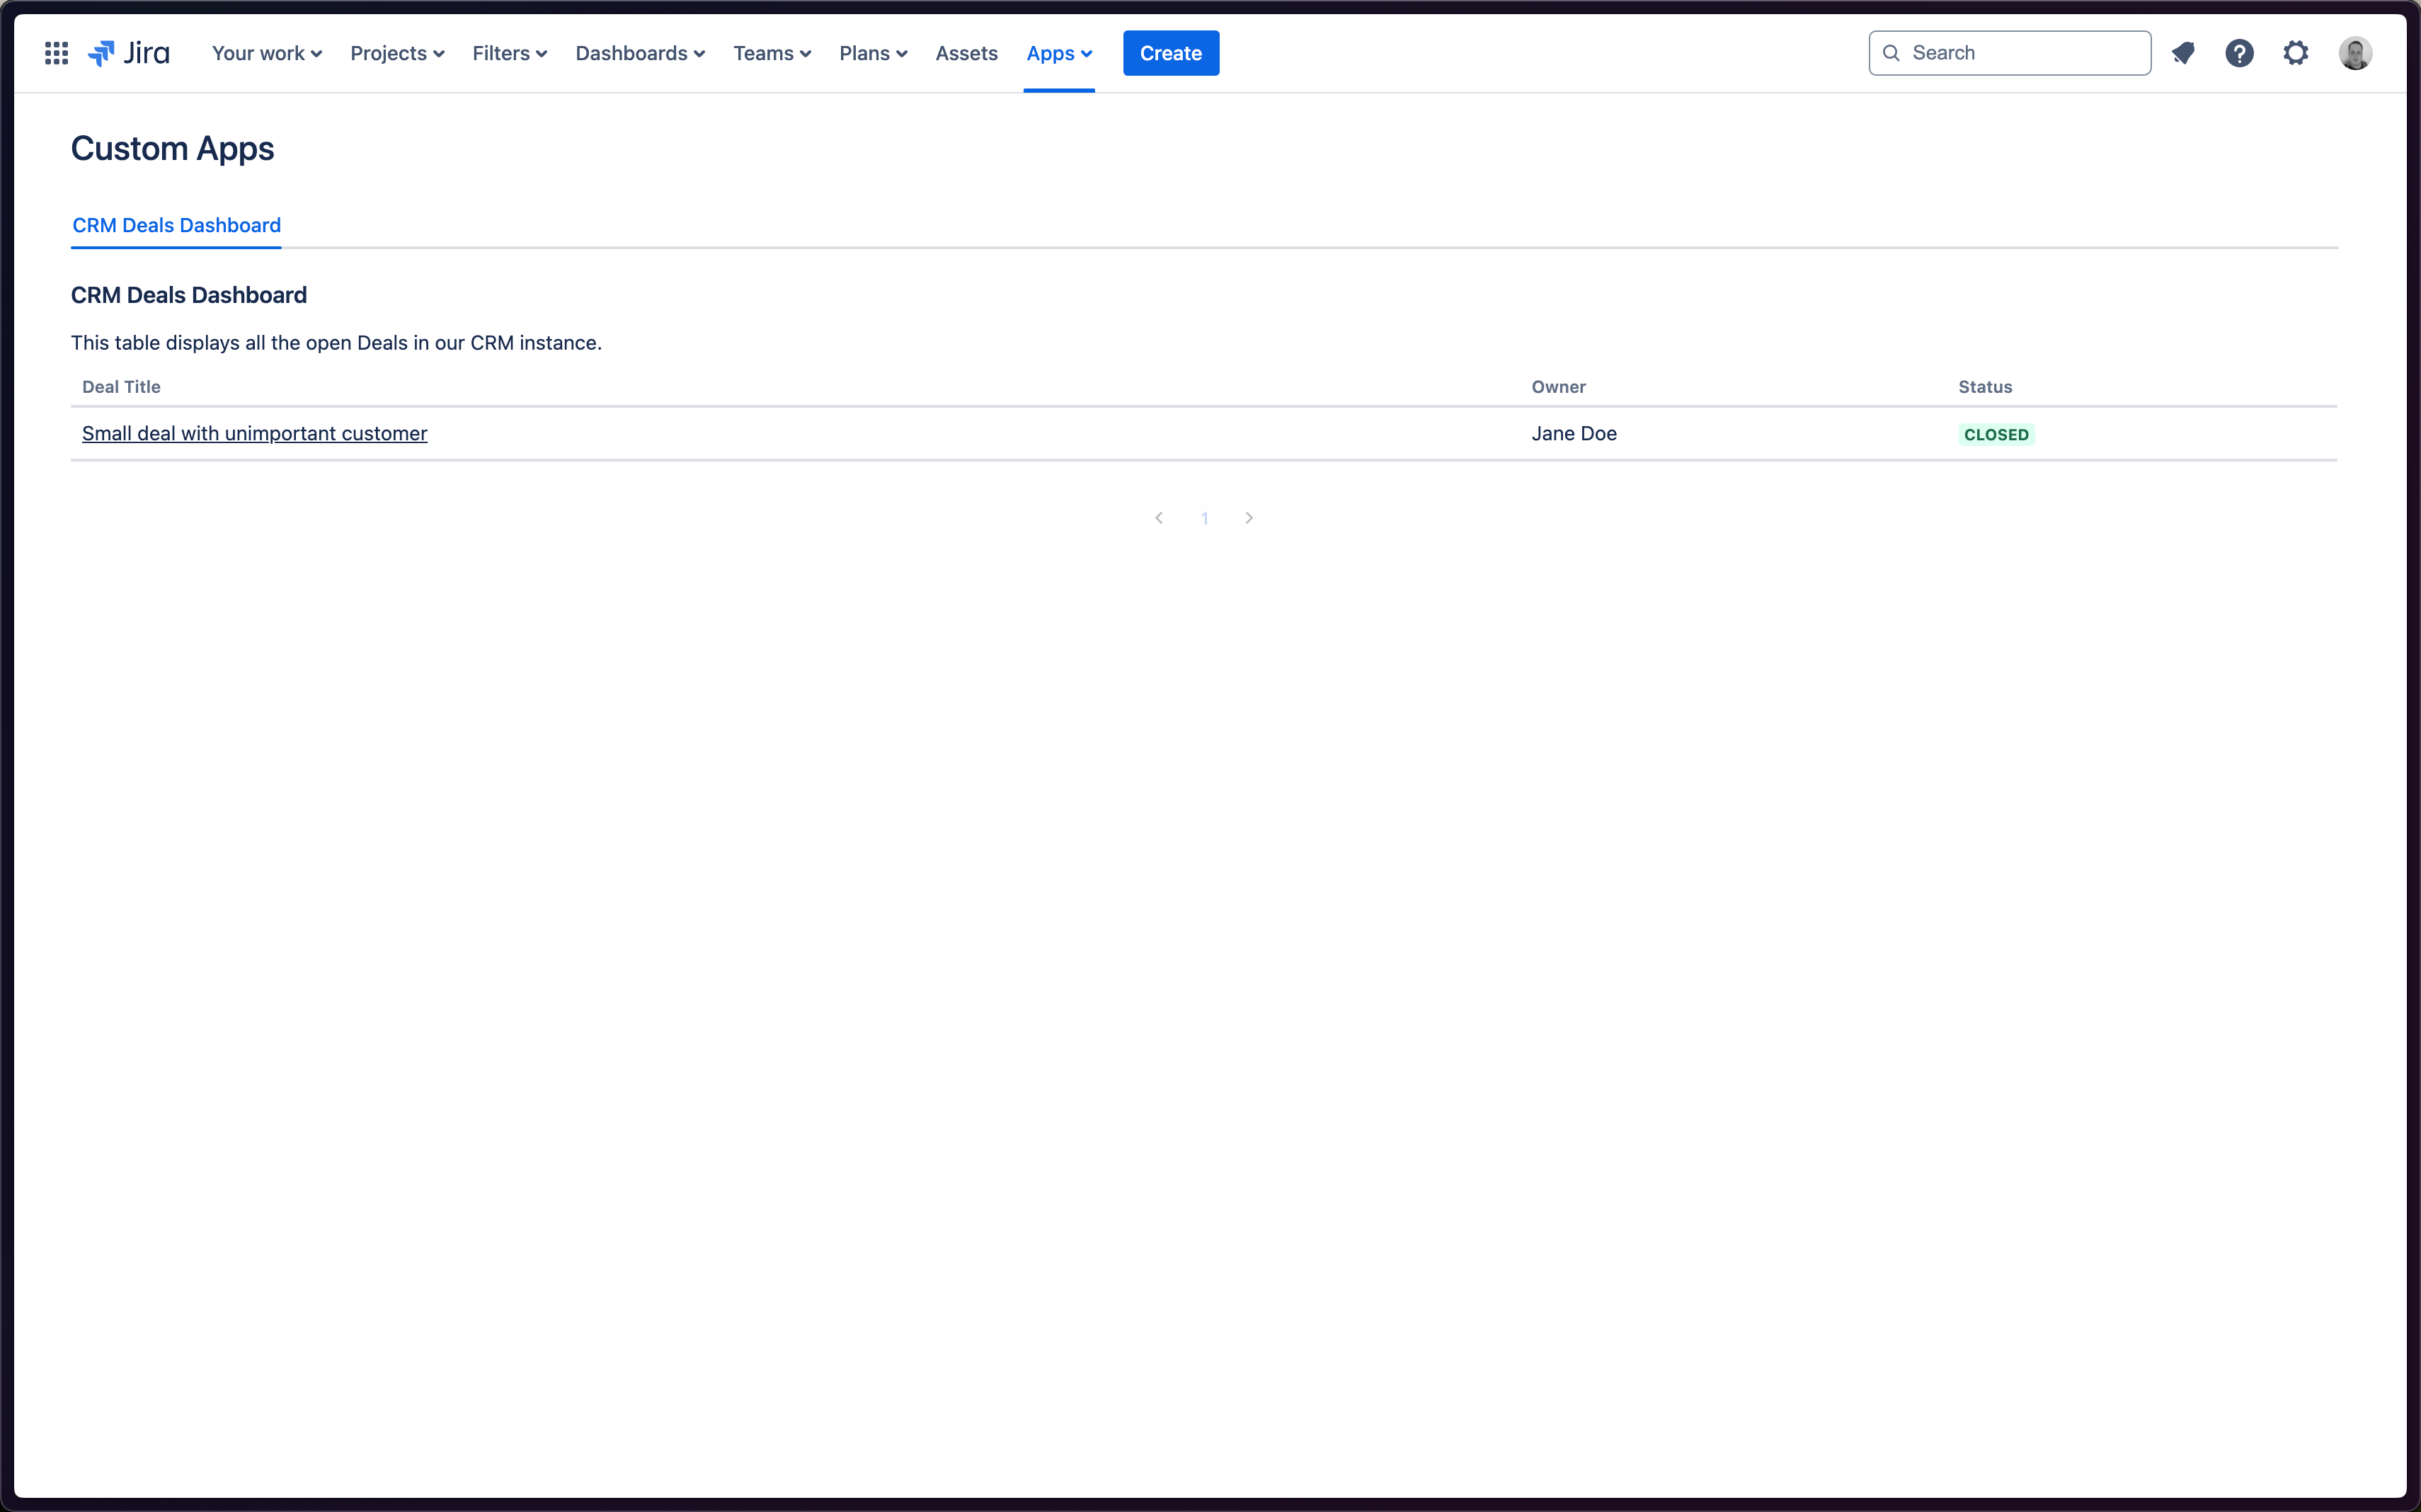
}- Now, head back to Jira and refresh the page. You should see that the first Deal is now gone from the table.
Deals table with first deal removed
- Finally, remove the second Deal from the list by sending the same request, but with the
idset to54321.
Second Data List remove request
json
{
  "action": "remove",
  "resourceType": "site",
  "title": "crm-deals",
  "listItemKey": "id",
  "listItem": {
    "id": 54321
  }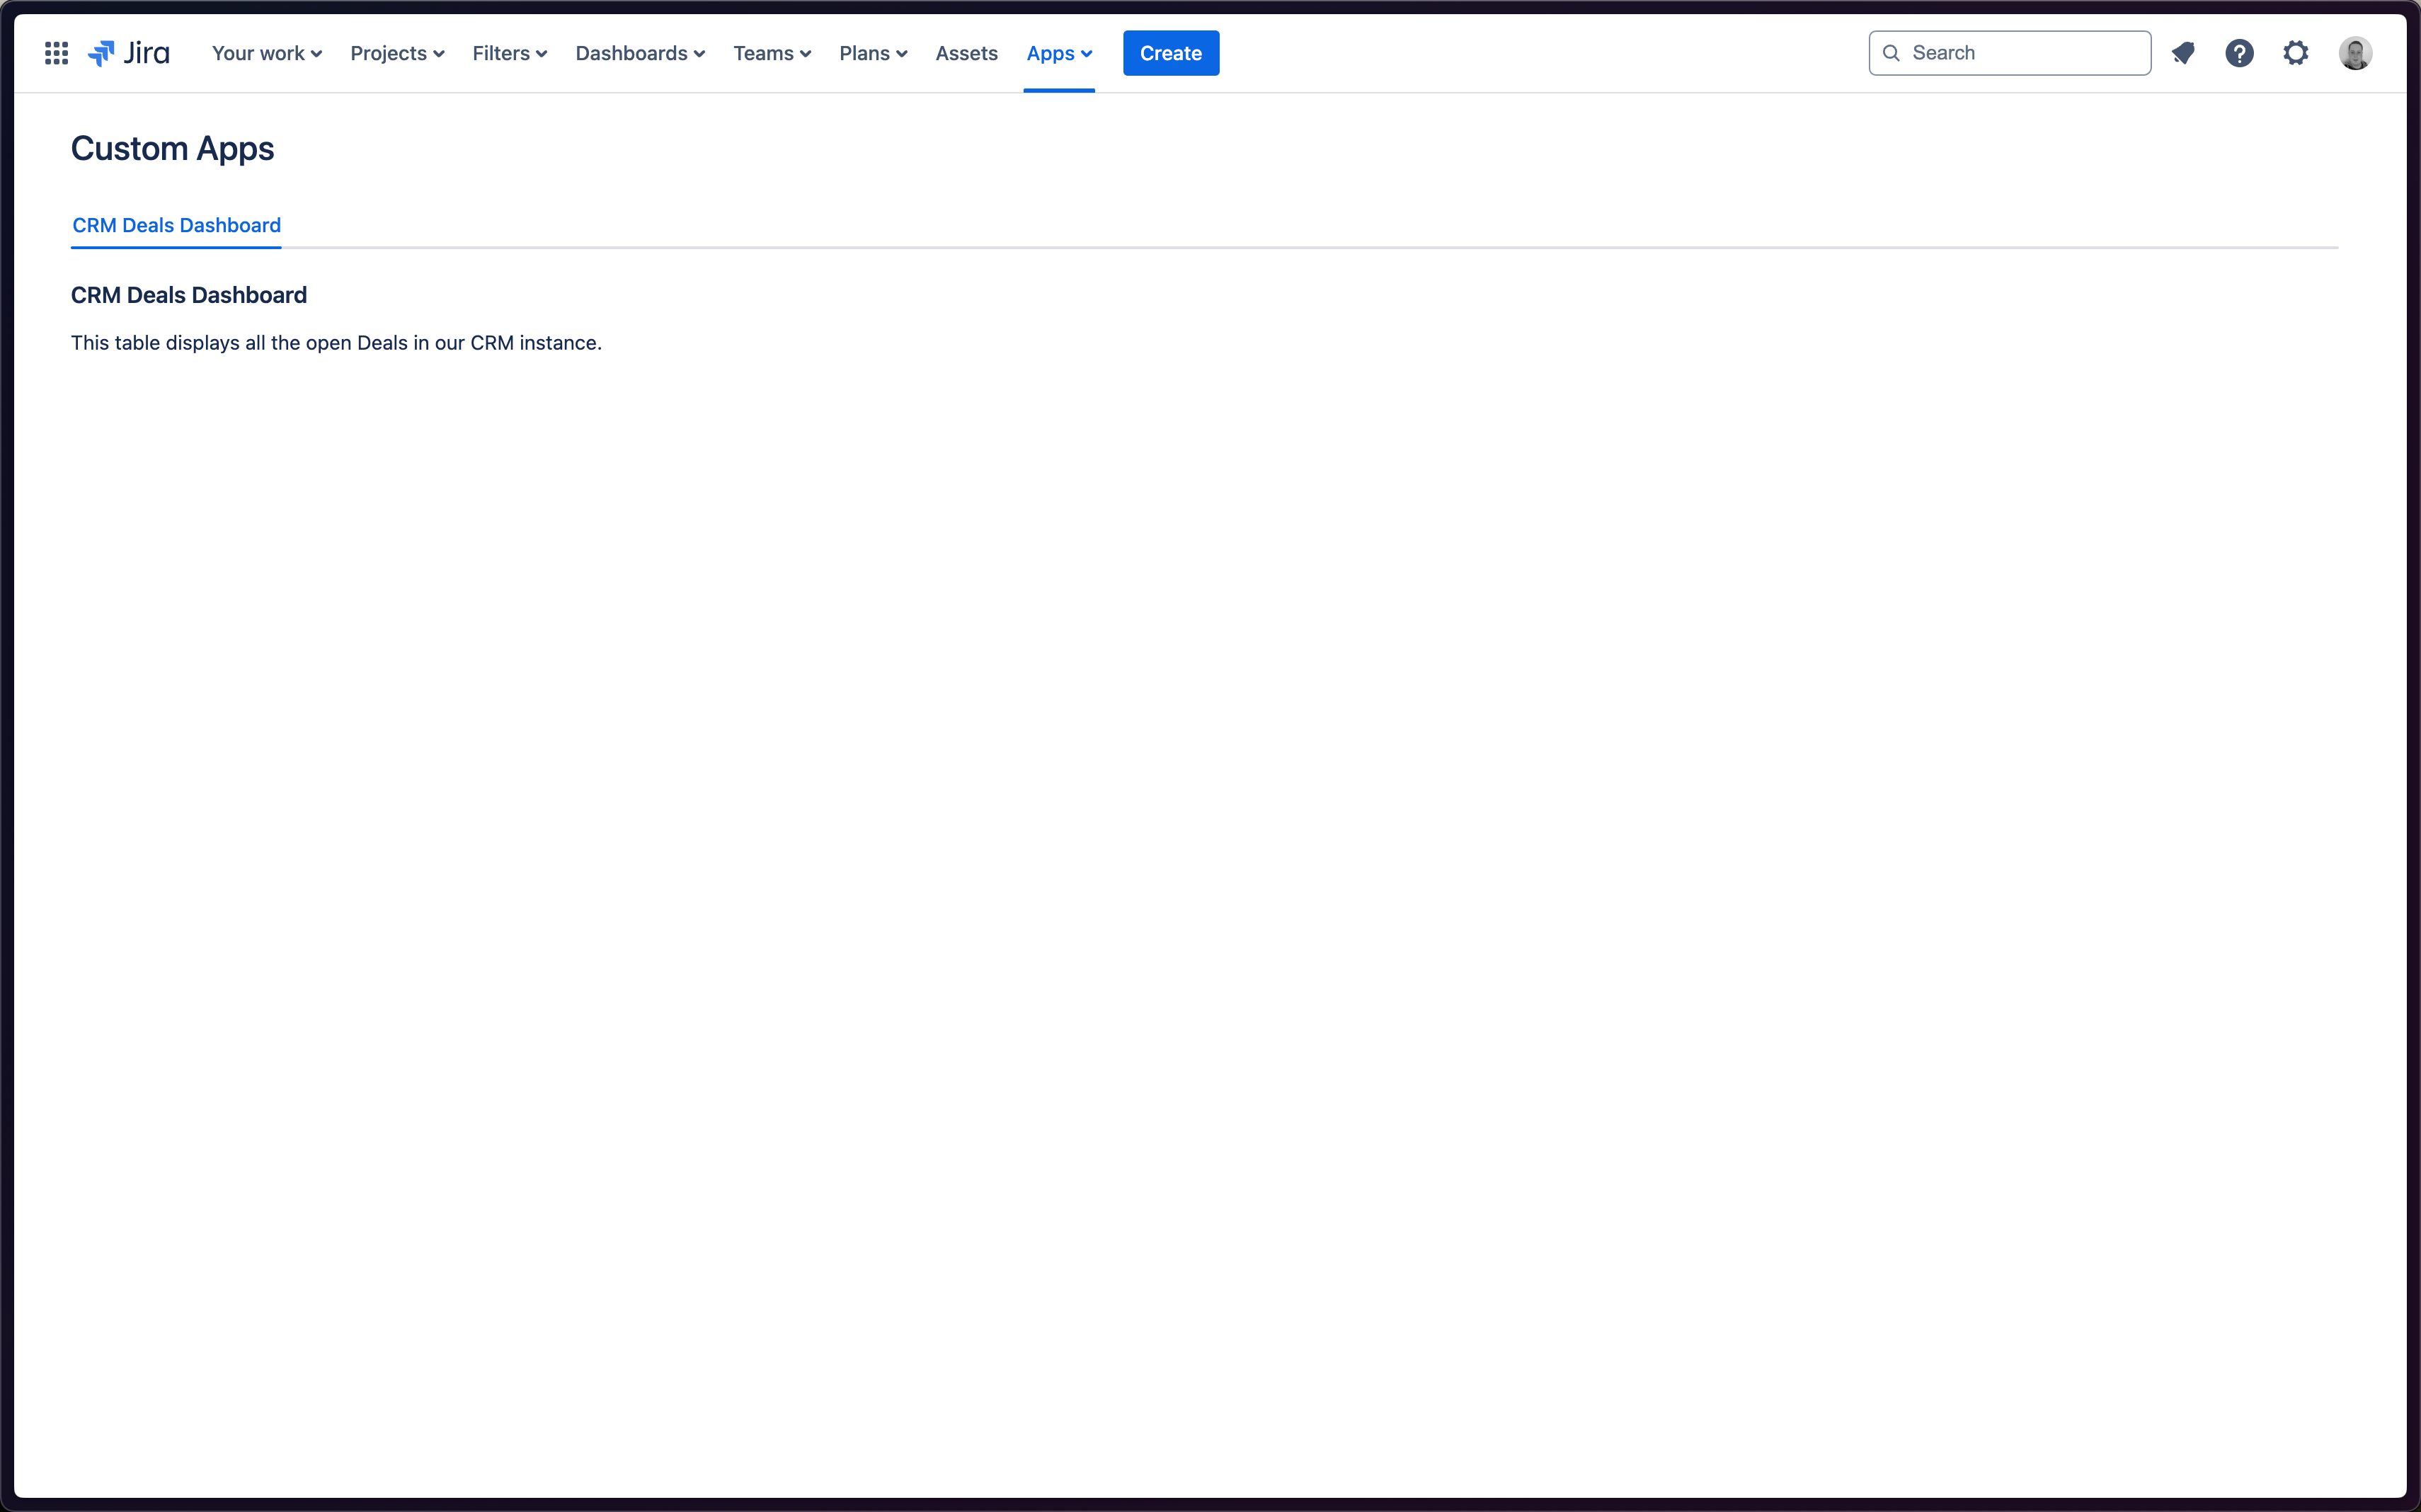
}- Once you've sent the request, head back to Jira and refresh the page. You should now have an empty table again.
Deals table with all Deals removed
Next Steps
From here, we hope you can see how the Data Object/List system, combined with Webhook Transforms, allows you to build powerful, dynamic, and data-driven Apps in Jira that can be used to consolidate & manage your systems in a way that suits your team's needs.
The next section of the guide will go into more detail on how to use Dynamic Tables to fully take advantage of Data Lists for building powerful data-driven apps.