Appearance
Getting Started
Installation
App Maker for Jira is available with a 30-day free trial for all Jira sites.
- Head to the App Maker For Jira listing on the Atlassian Marketplace.
- Click the "Try it free" button in the top-right of the page.
- Follow the prompts to install App Maker into your Jira Cloud instance.
Once you've installed App Maker into your Atlassian product, you're ready to start building your first app!
Build Your First App
What You Will Need
- Admin access to your Jira site
Create Your First UI Component
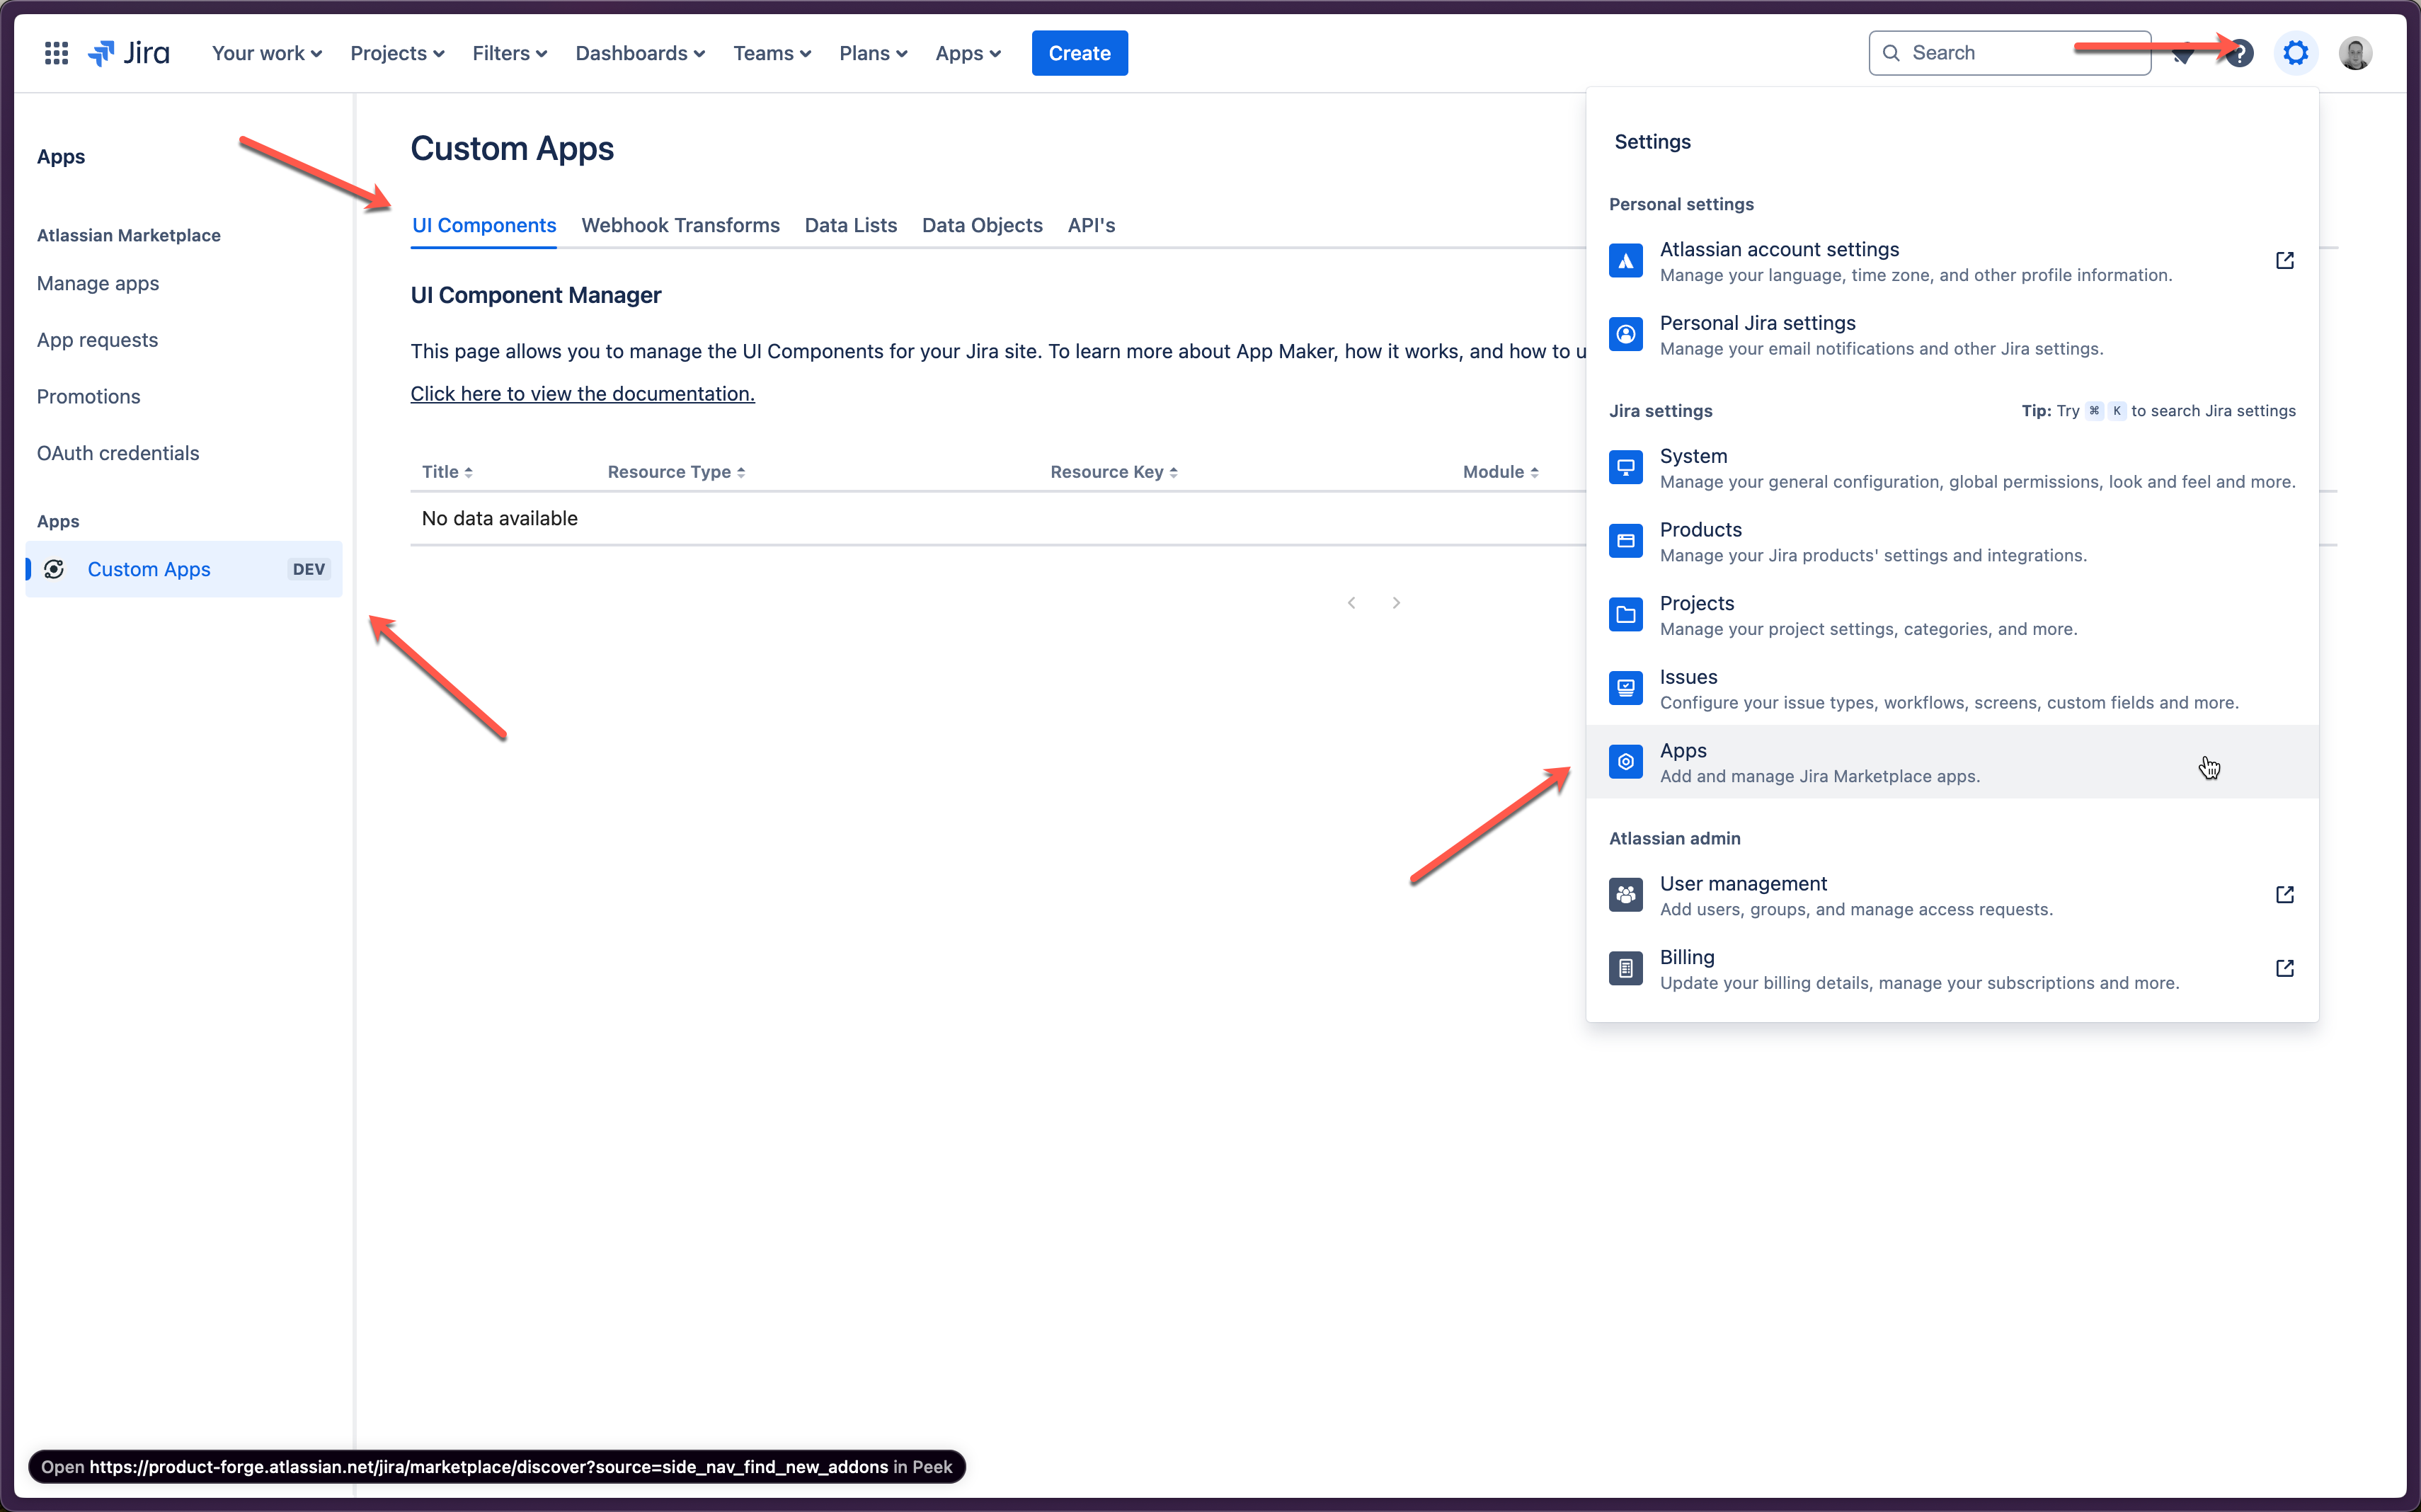
- Navigate to the App Maker page in your Jira Settings section.
- Click the settings cog icon at the top-right of your screen.
- Select Apps under the Jira Settings heading and wait for the page to load.
- Select Custom Apps from the left-side menu.
- Click UI Components from tab menu underneath the Custom Apps heading.
App Maker settings page
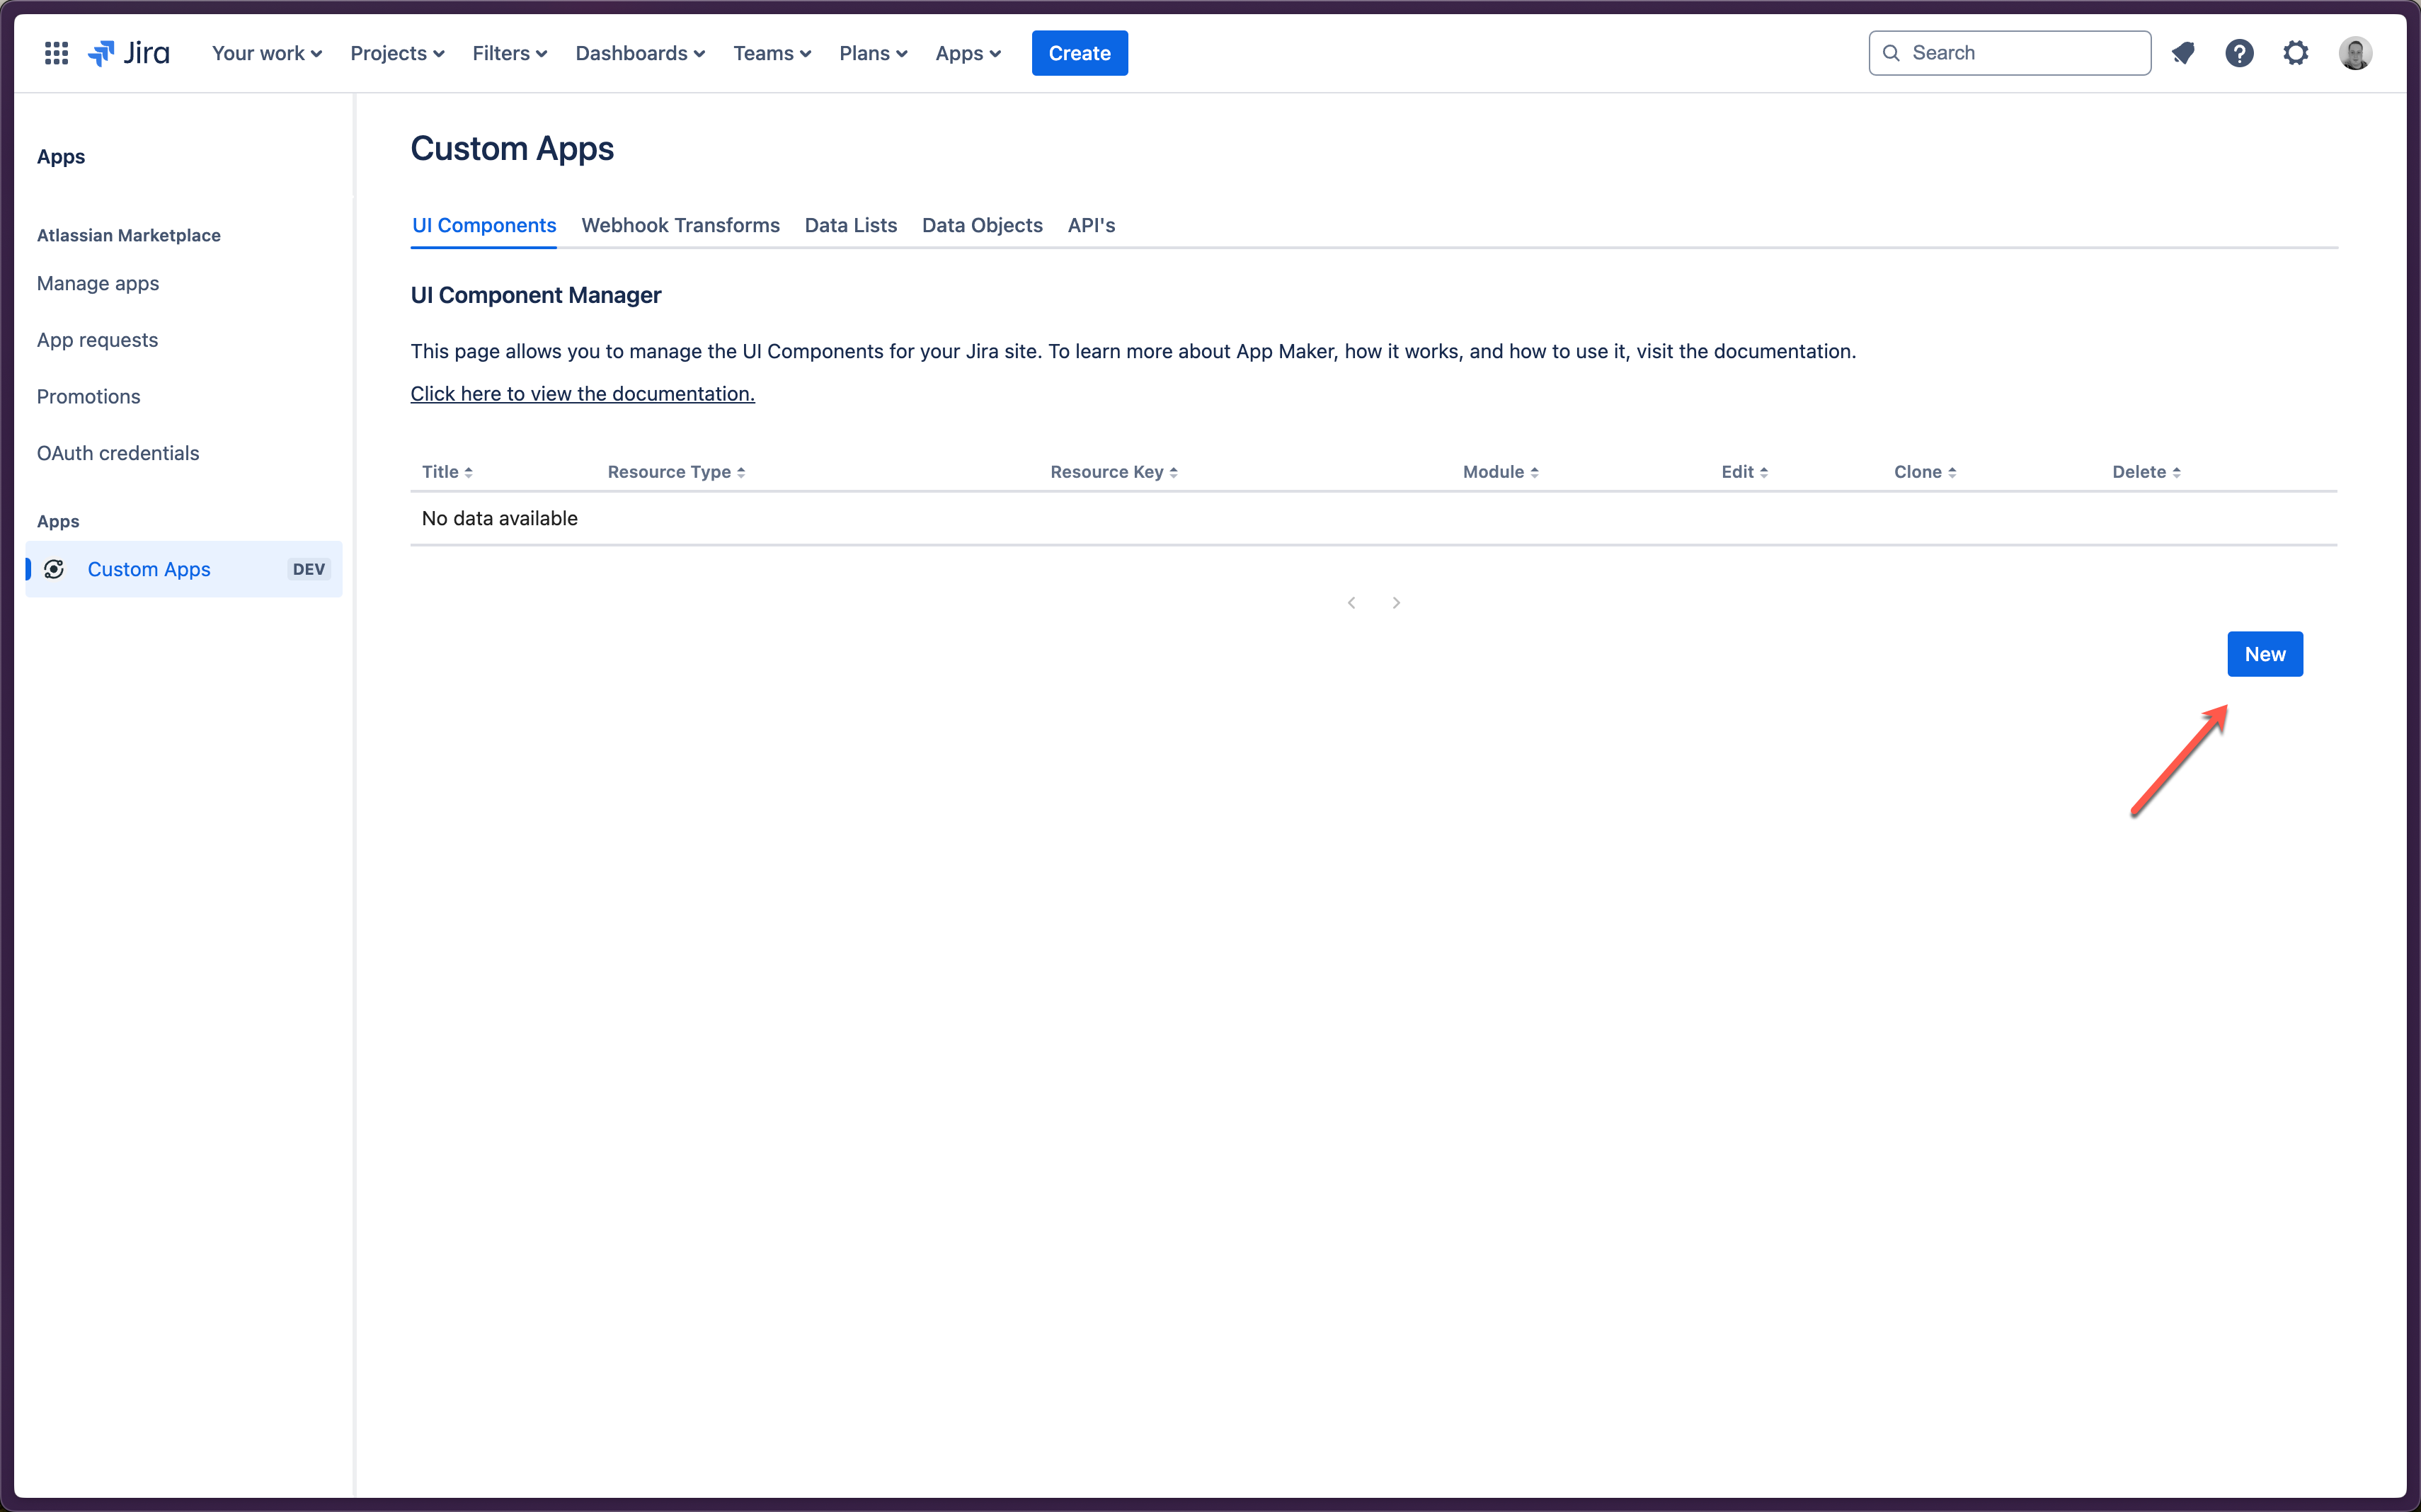
- Click New in the bottom-right of the page.
New UI Component Button
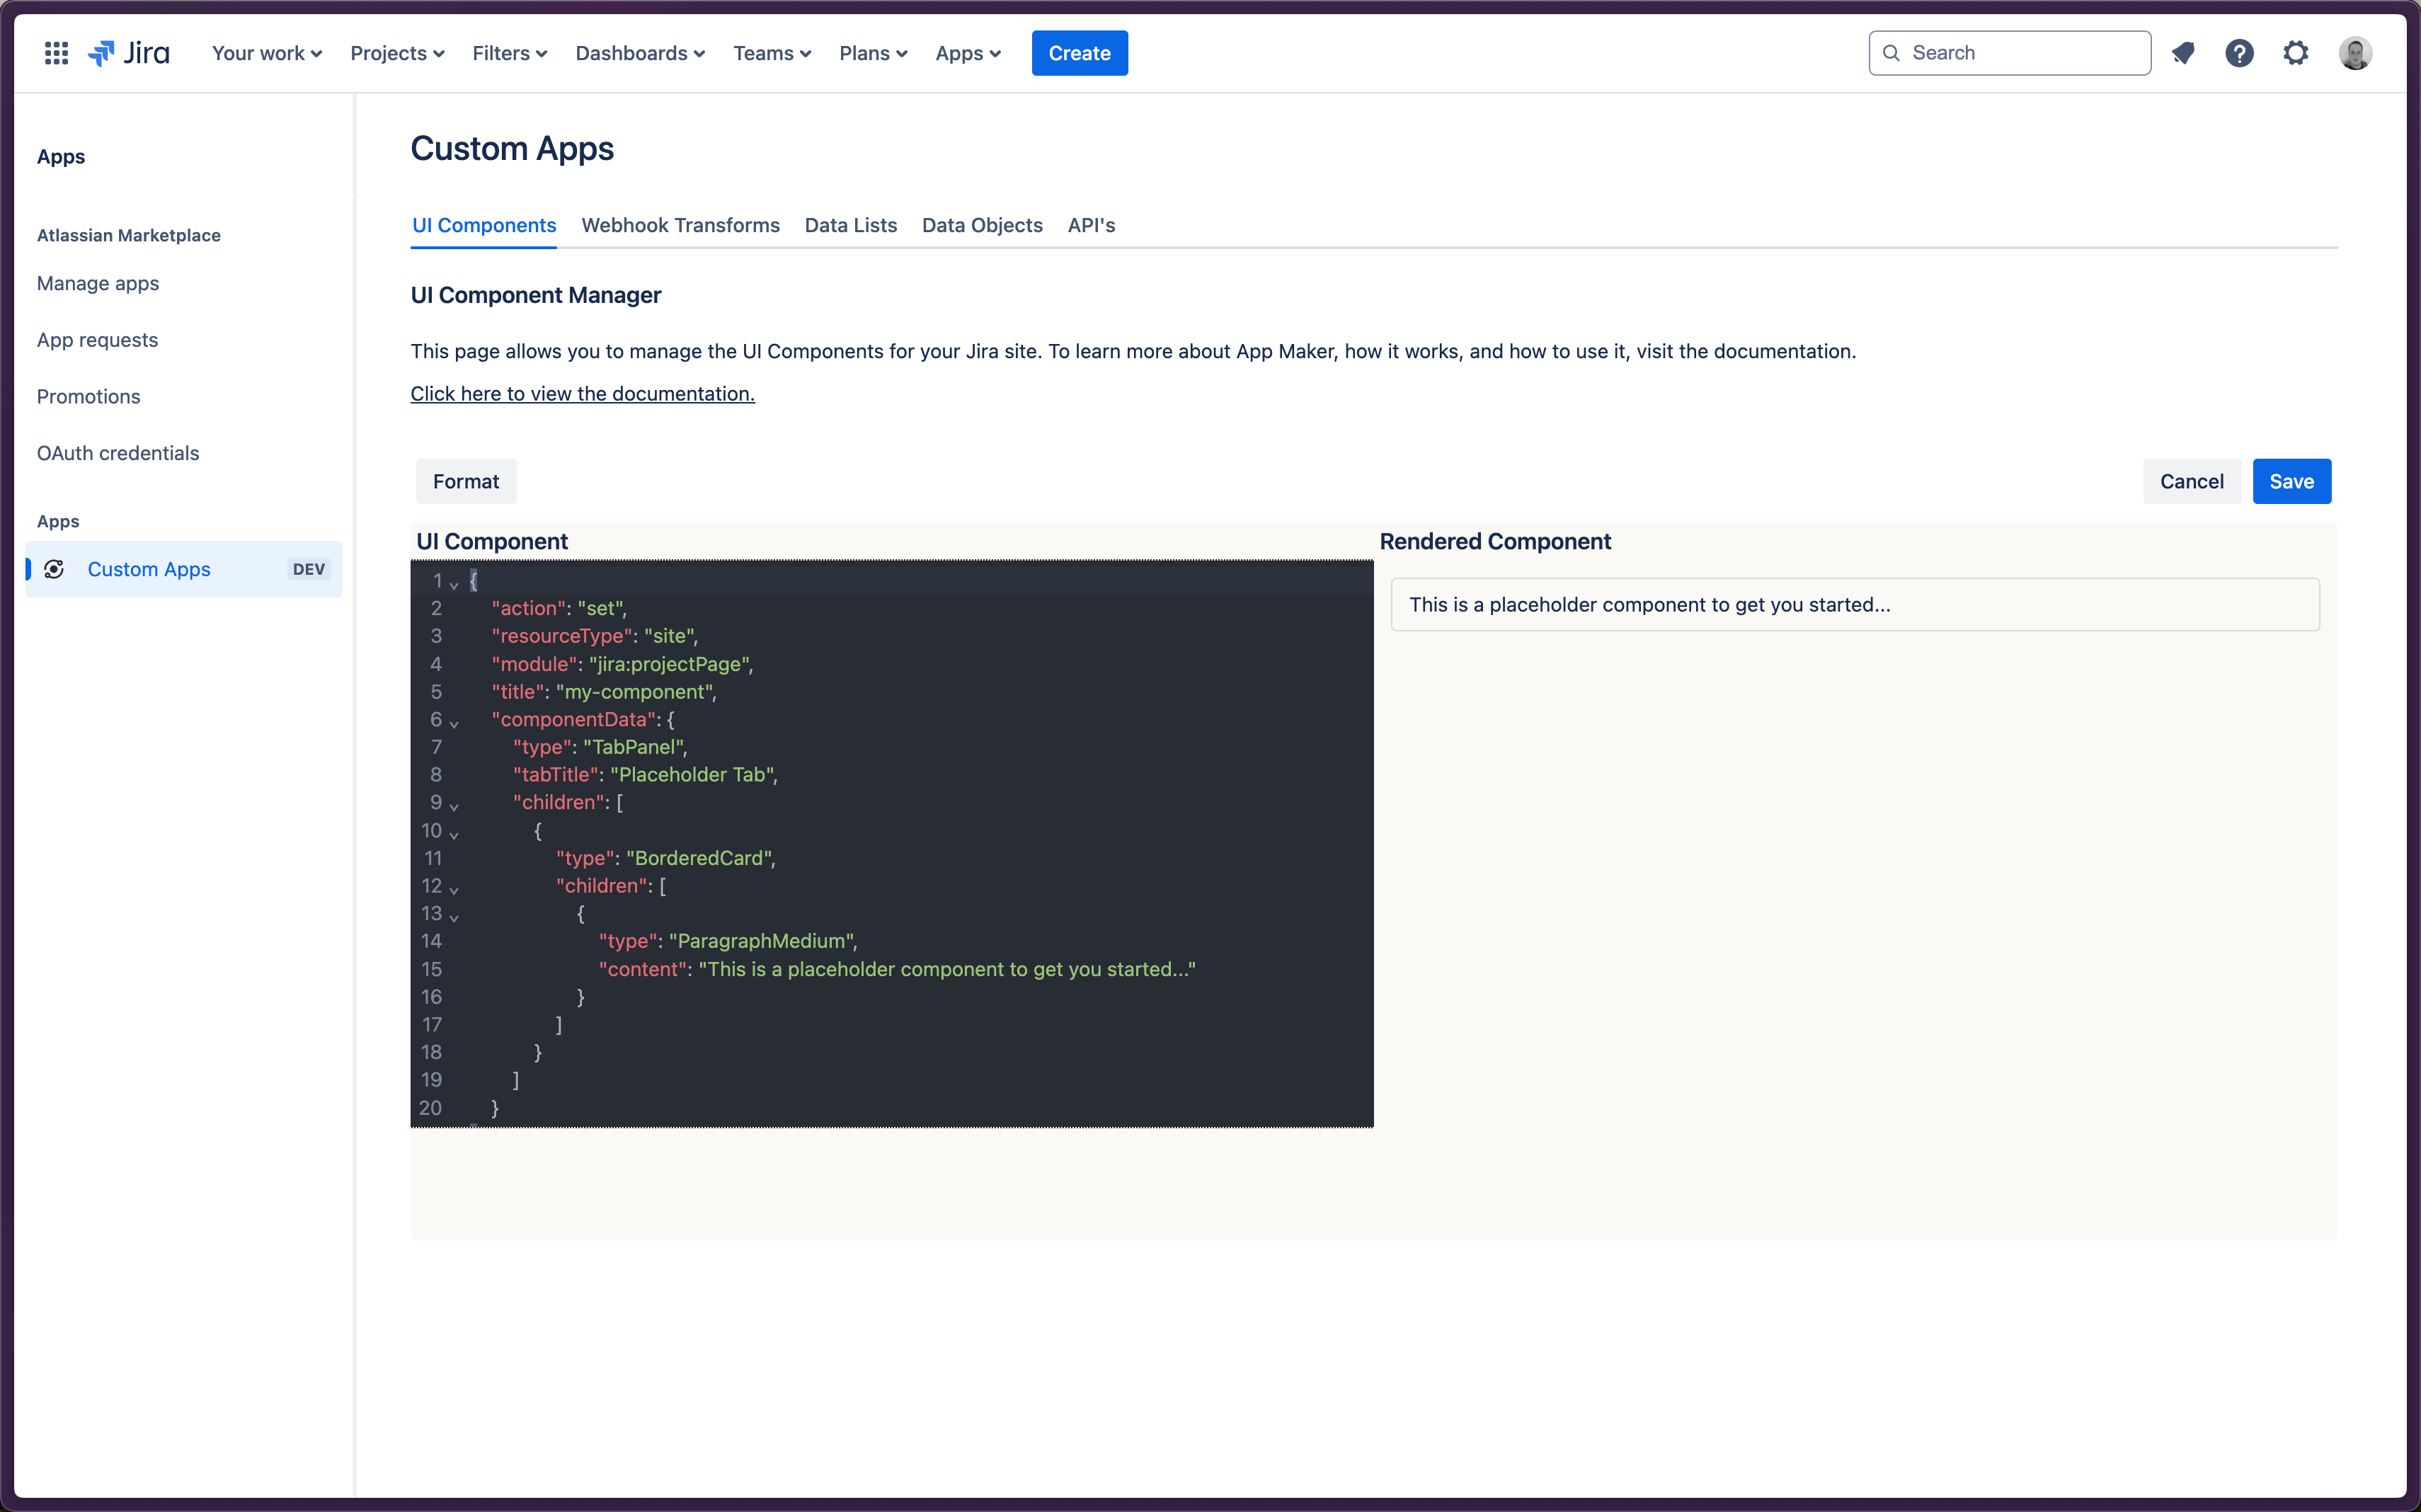
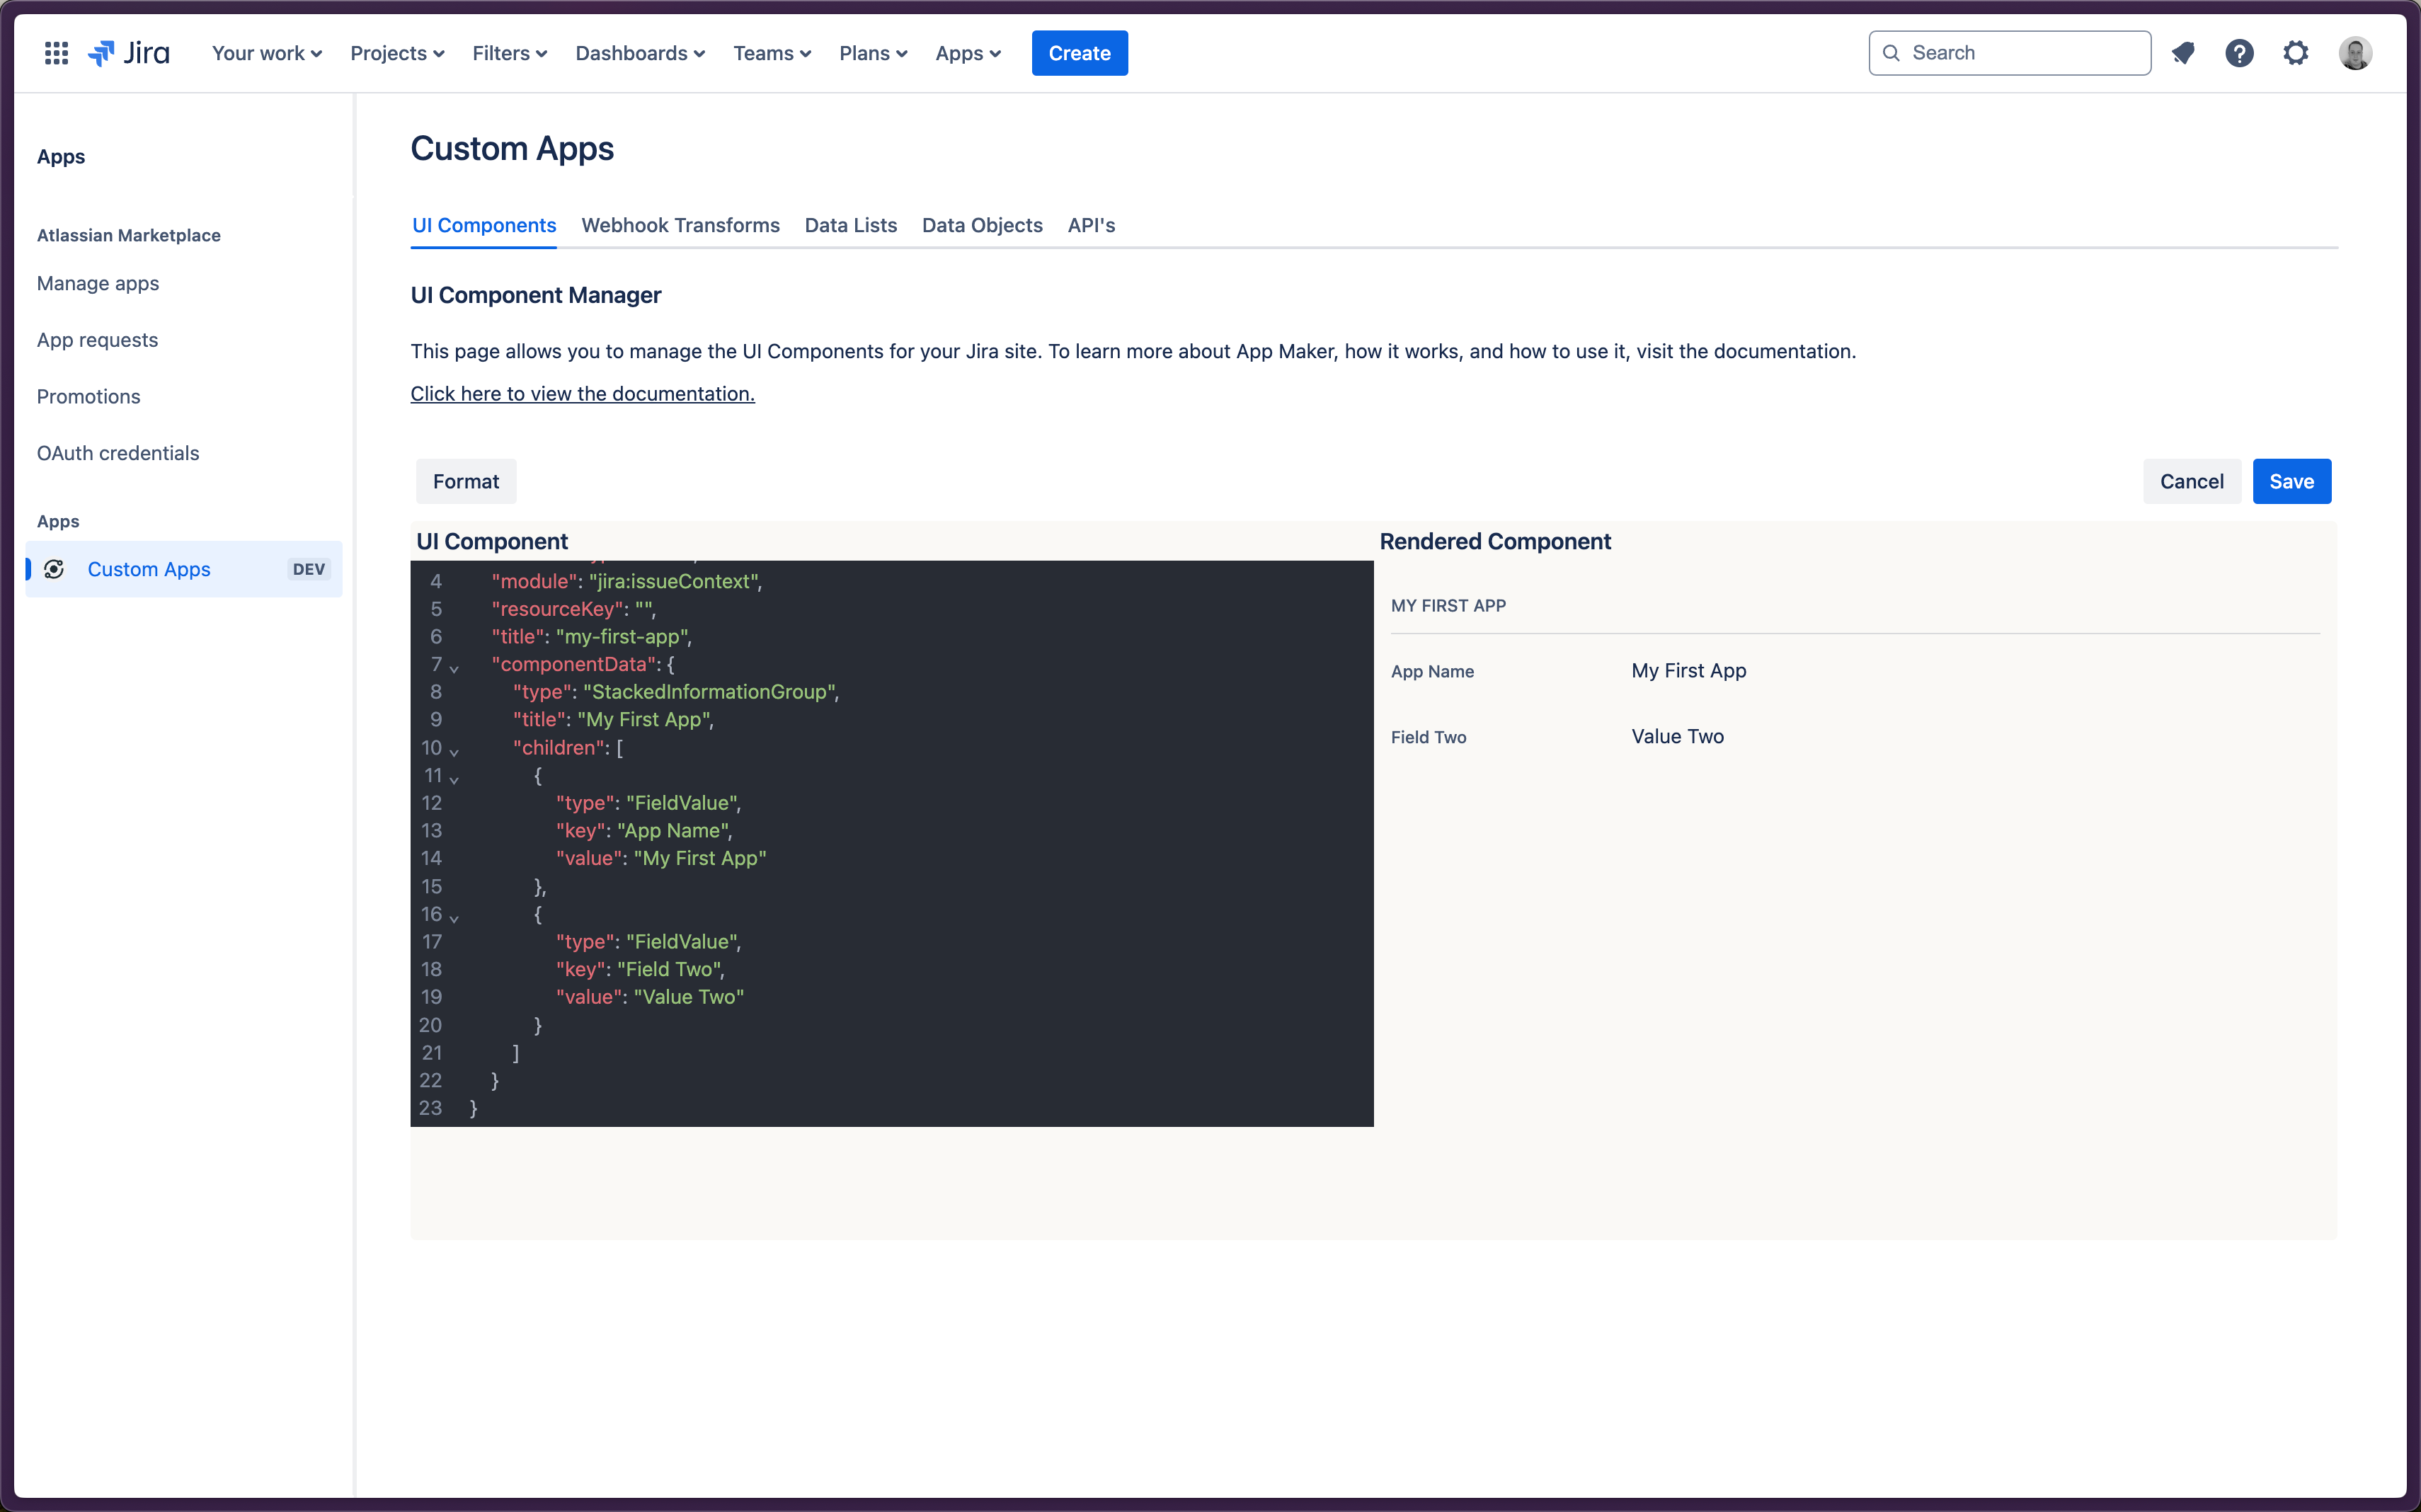
- Take a look at the UI Component Editor.
- On the left is the JSON editor, where you define the structure and content of your UI Component.
- On the right is a live preview of the UI Component you're building.
- Notice that there is a basic example JSON object already in the editor that you can use to get you started.
UI Component Editor
- In the editor on the left, replace the example JSON with the JSON snippet below.
New UI Component JSON
json
{"resourceType": "site", "module": "jira:issueContext", "title": "my-first-app", "componentData": {"type": "StackedInformationGroup", "title": "My First App", "children": [{"type": "FieldValue", "key": "App Name", "value": "My First App"}]}}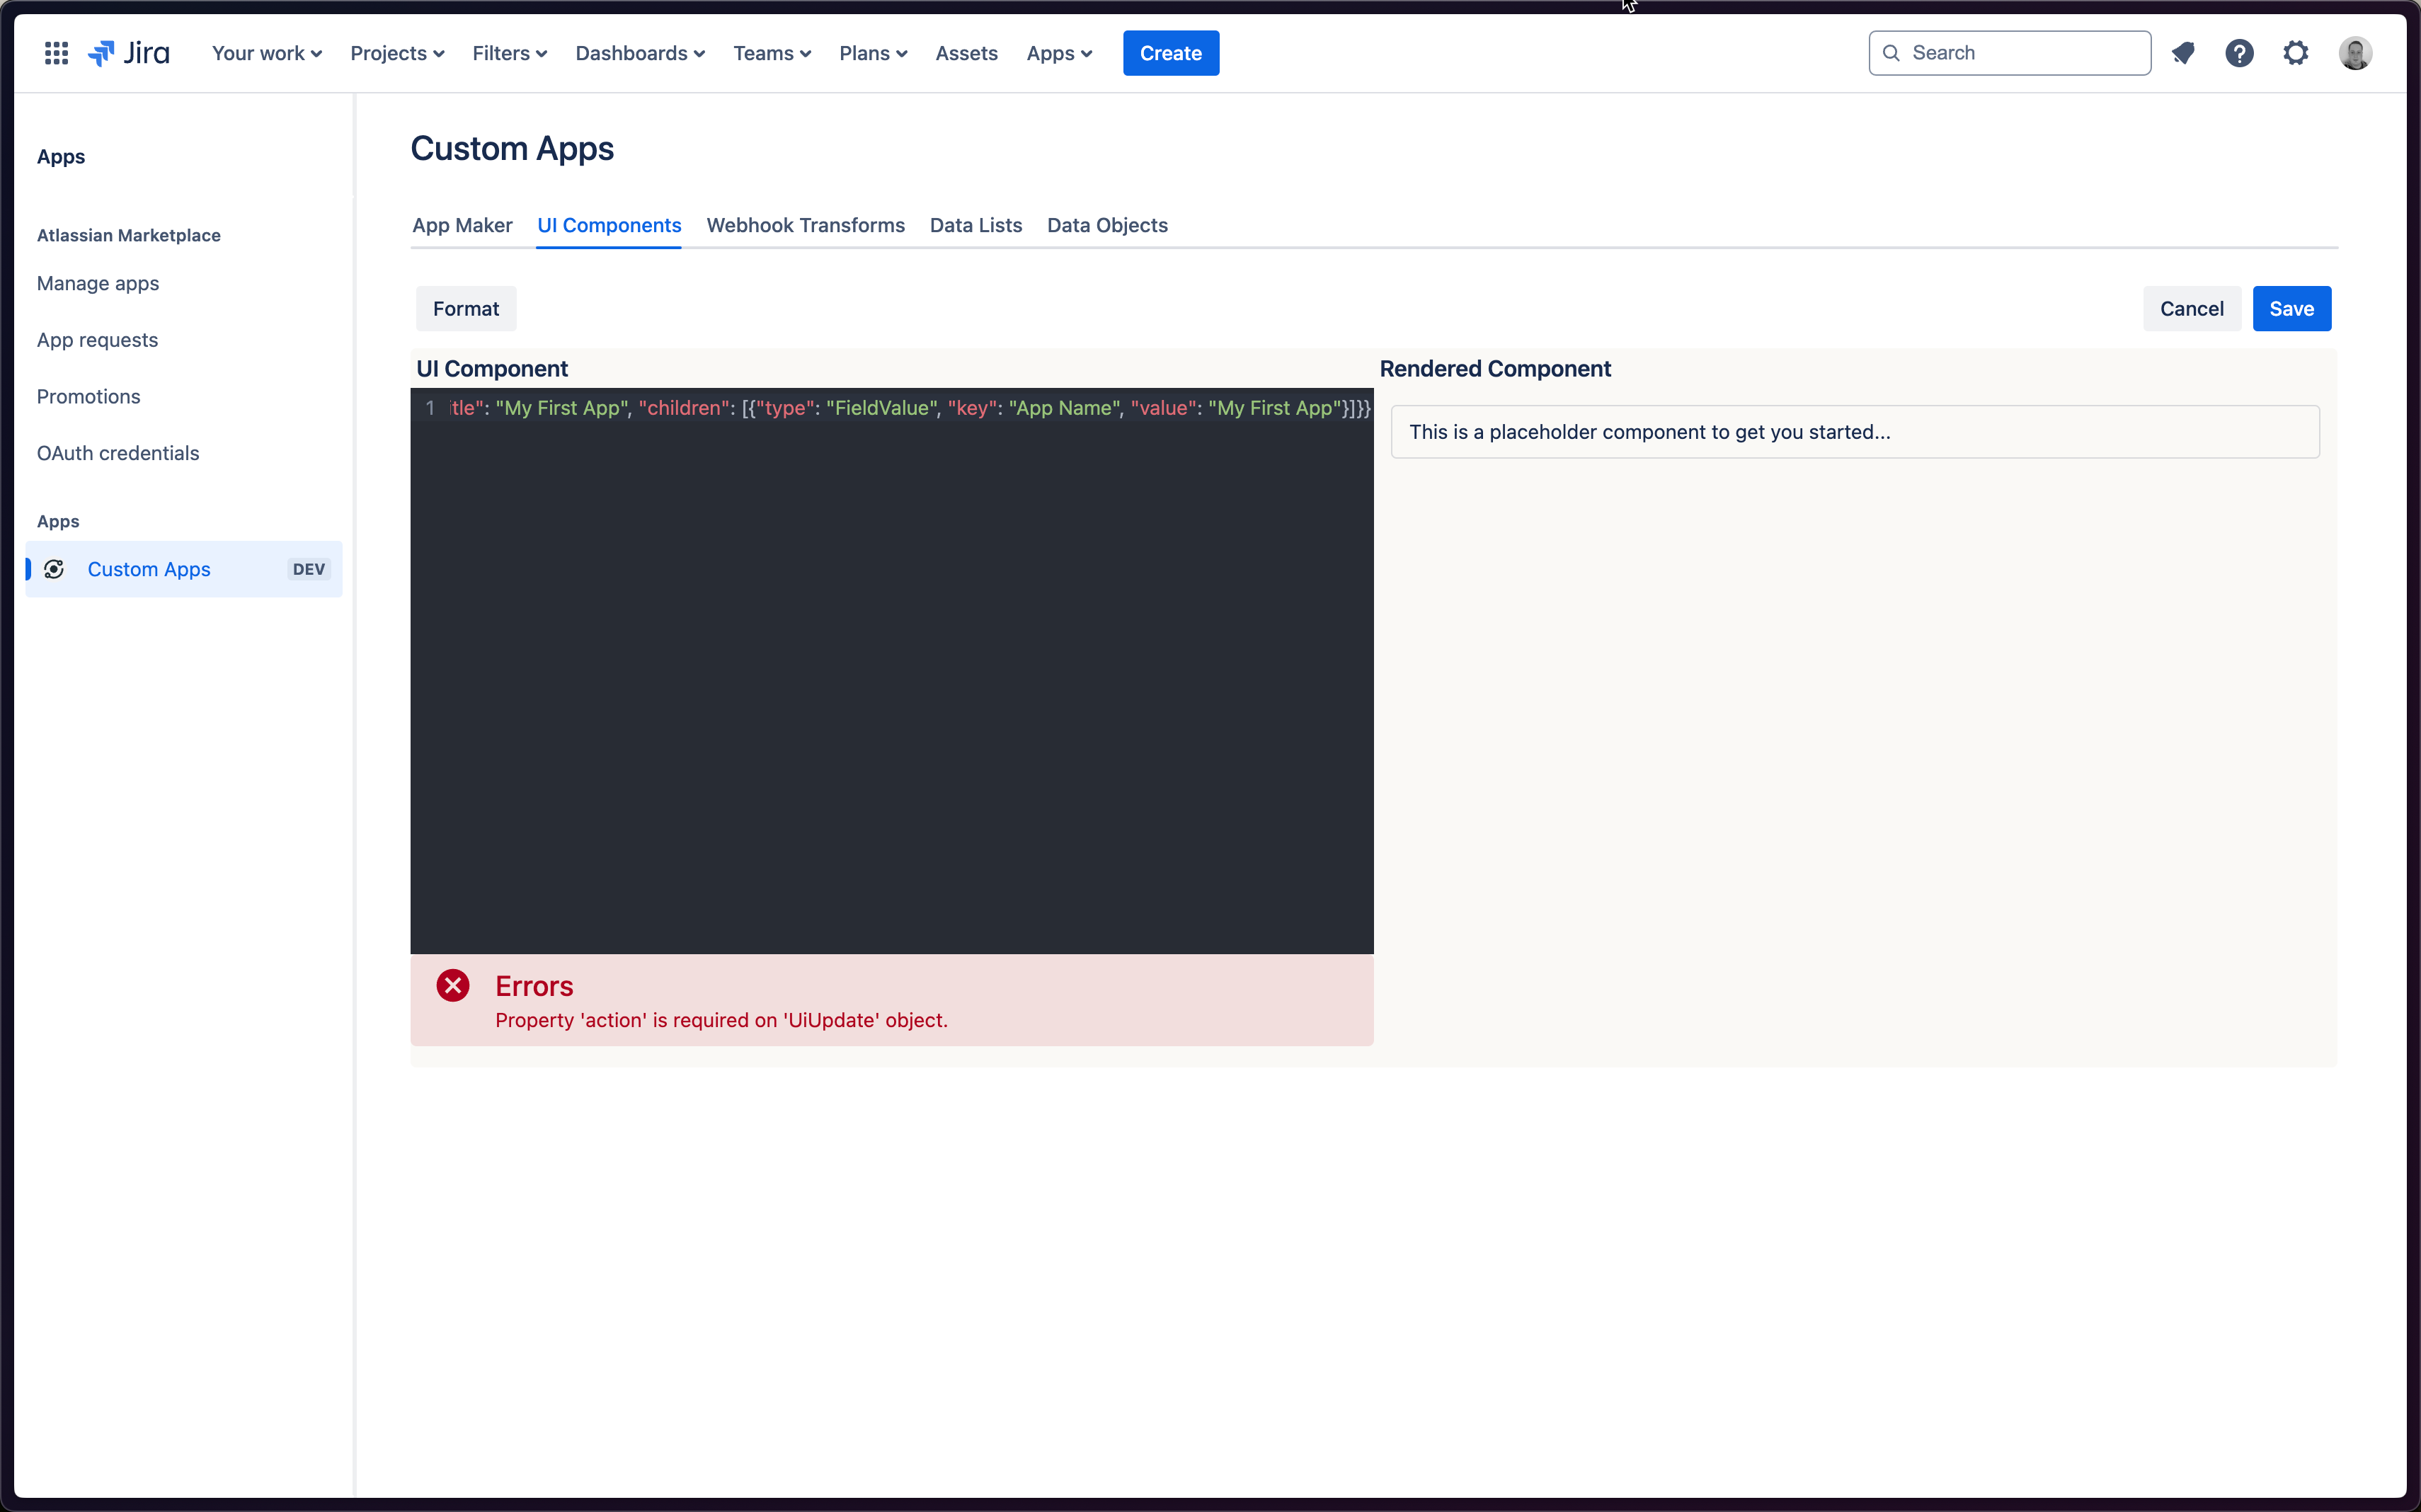
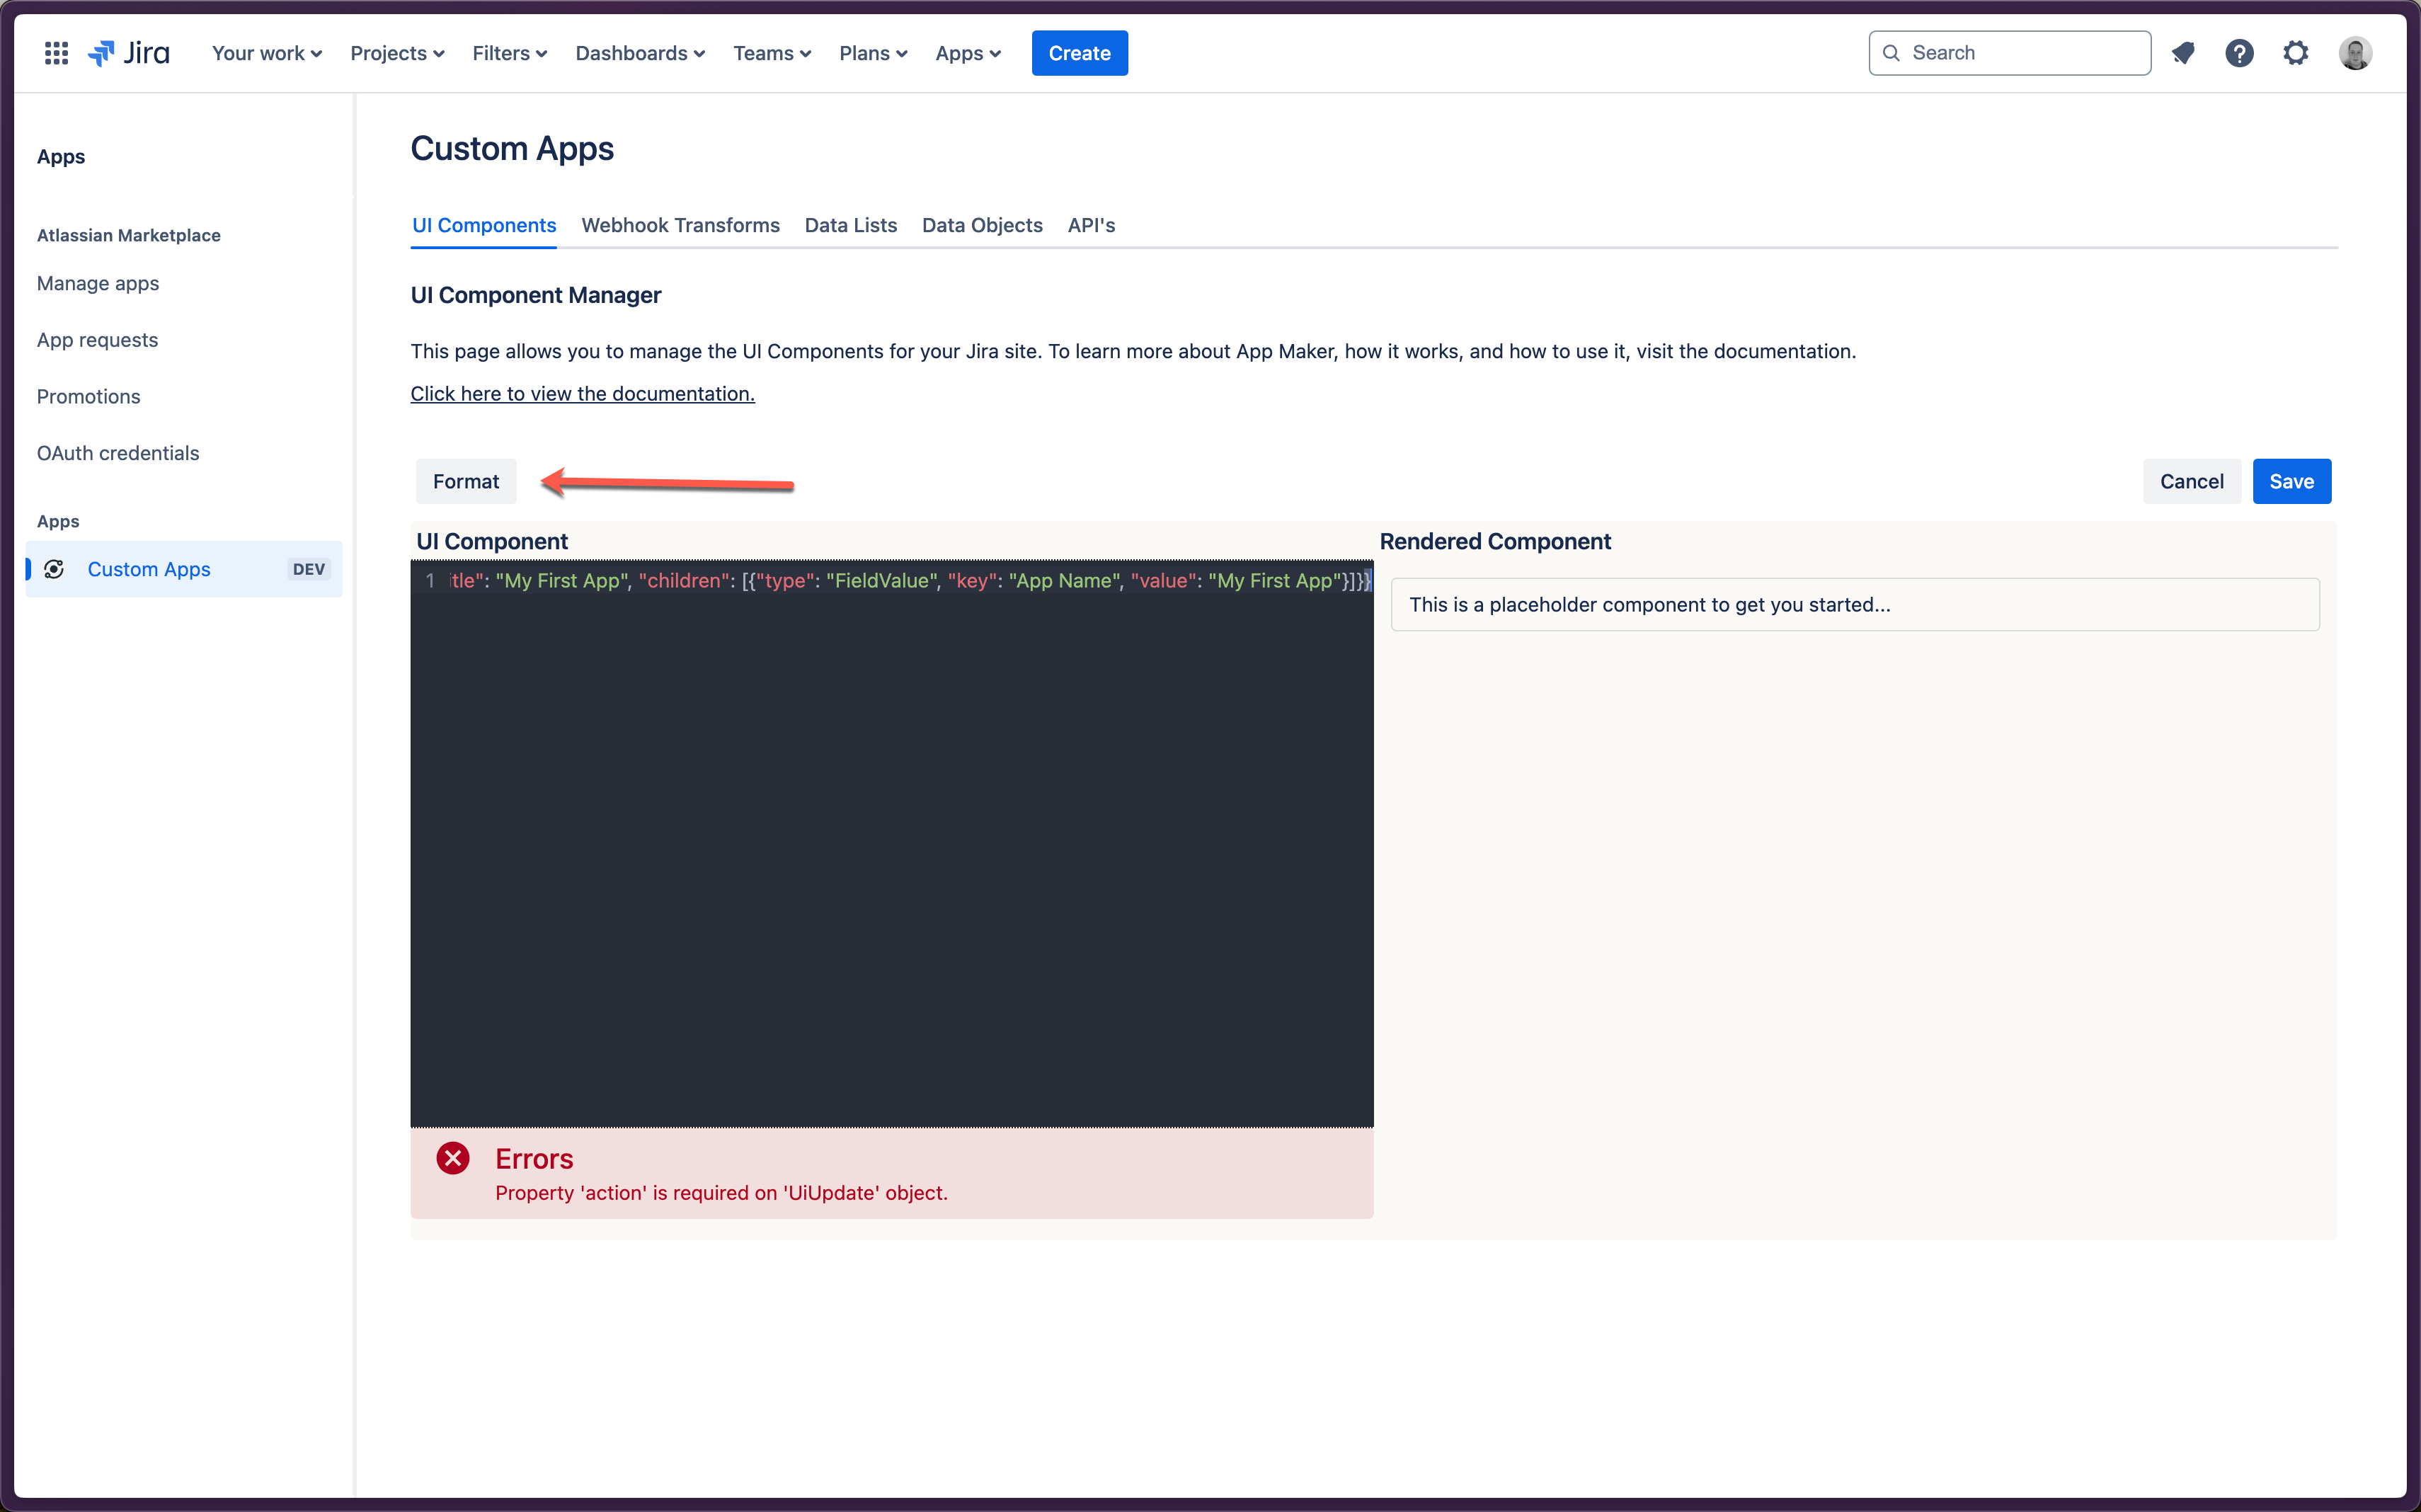
- Notice that there is an error displaying under the JSON Editor.
- App Maker gives you real-time feedback to help you structure your Apps correctly.
- This makes it easy to adopt and learn how to use the tool.
- It's also a bit hard to read the JSON in the editor because it's all on one line.
- Click the Format button at the top-left of the editor to format the JSON for easier reading.
Format JSON Button
- Add an
actionproperty to the top-level of the JSON object with a value of"set"(see example below).- Note that the error should now disappear.
Code Snippet
json
{
   "action": "set",
   "resourceType": "site",
   "module": "jira:issueContext",
   "title": "my-first-app",
   "componentData": {
      "type": "StackedInformationGroup",
      "title": "My First App",
      "children": [
         {
            "type": "FieldValue",
            "key": "App Name",
            "value": "My First App"
         }
      ]
   }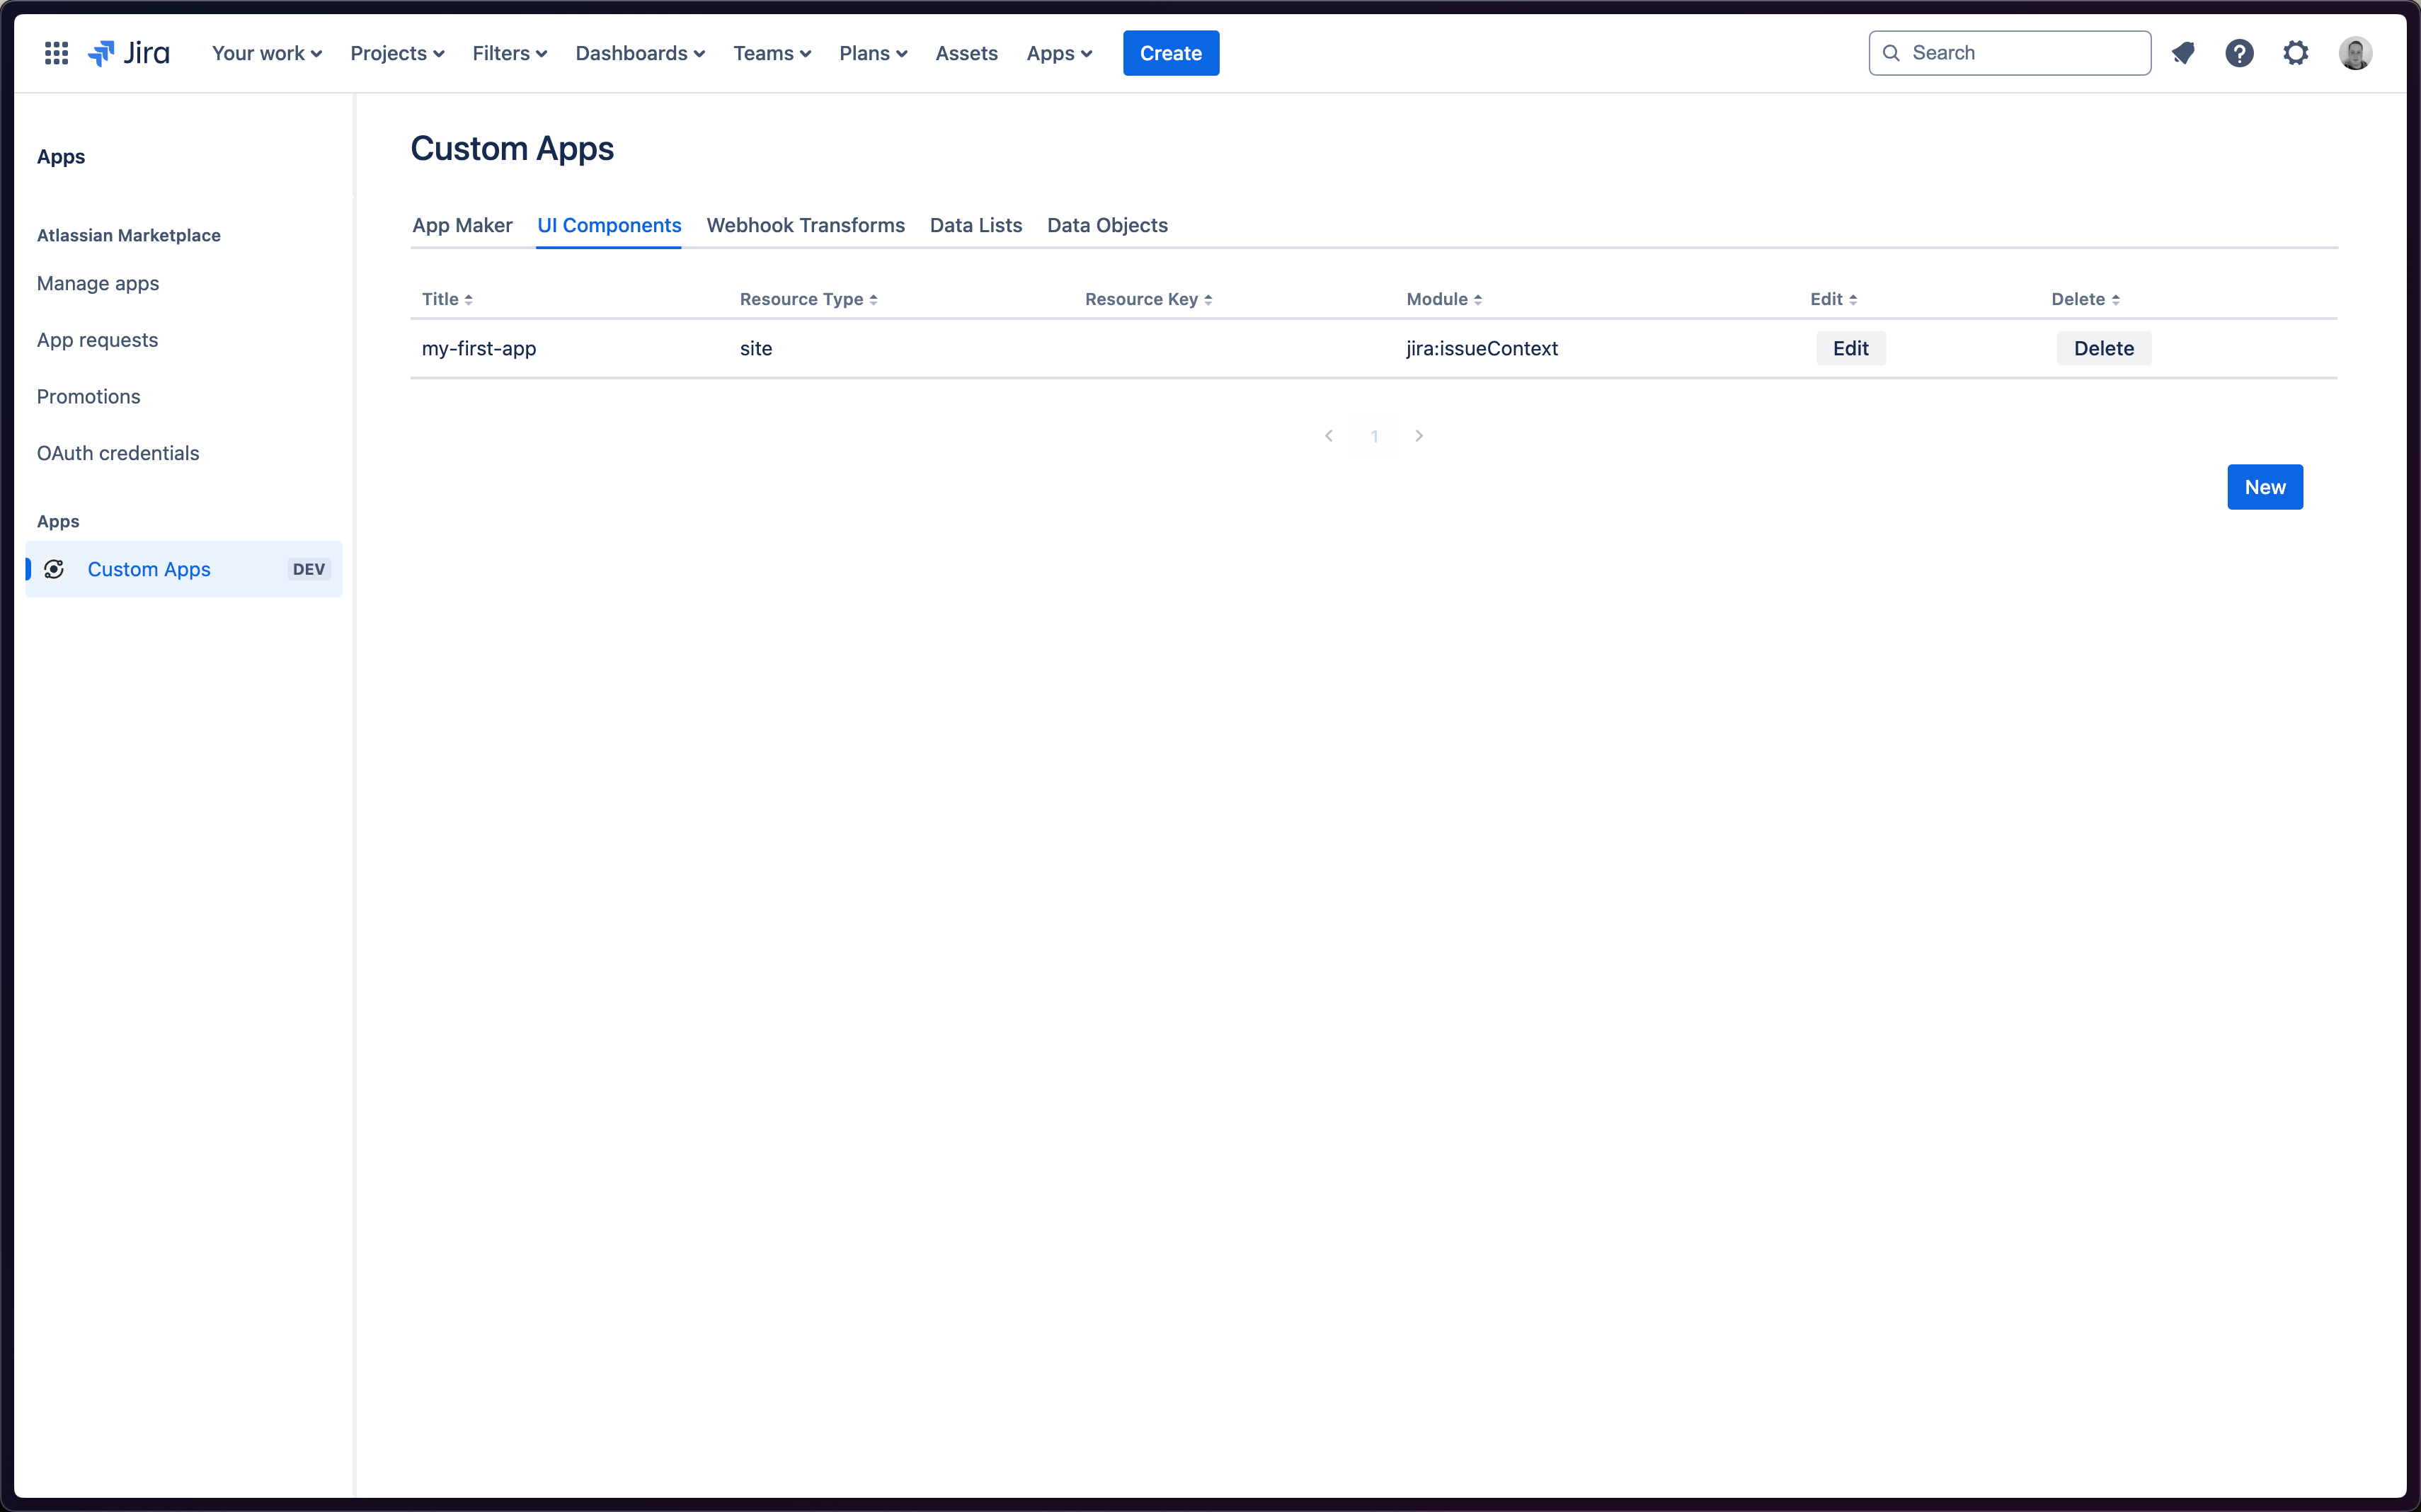
}- Finally, press the Save button at the top-right of the Editor.
- All done! You should now be redirected back to the UI Components page, where you can see your new UI Component called
my-first-applisted.
UI Component List
View Your New App in Jira
- Open a Jira Issue in any project.
- Notice the panel on the right side of the Issue.
- This is the Issue Context Panel, where your UI Component will be displayed.
TIP
Remember our JSON from before? The Module value sets where your UI Component will display!
json
{
"resourceType": "site",
"module": "jira:issueContext",
"title": "my-first-app",
"action": "set",
"componentData": {
"type": "StackedInformationGroup",
"title": "My First App",
"children": [
{
"type": "FieldValue",
"key": "App Name",
"value": "My First App"
}
]
}
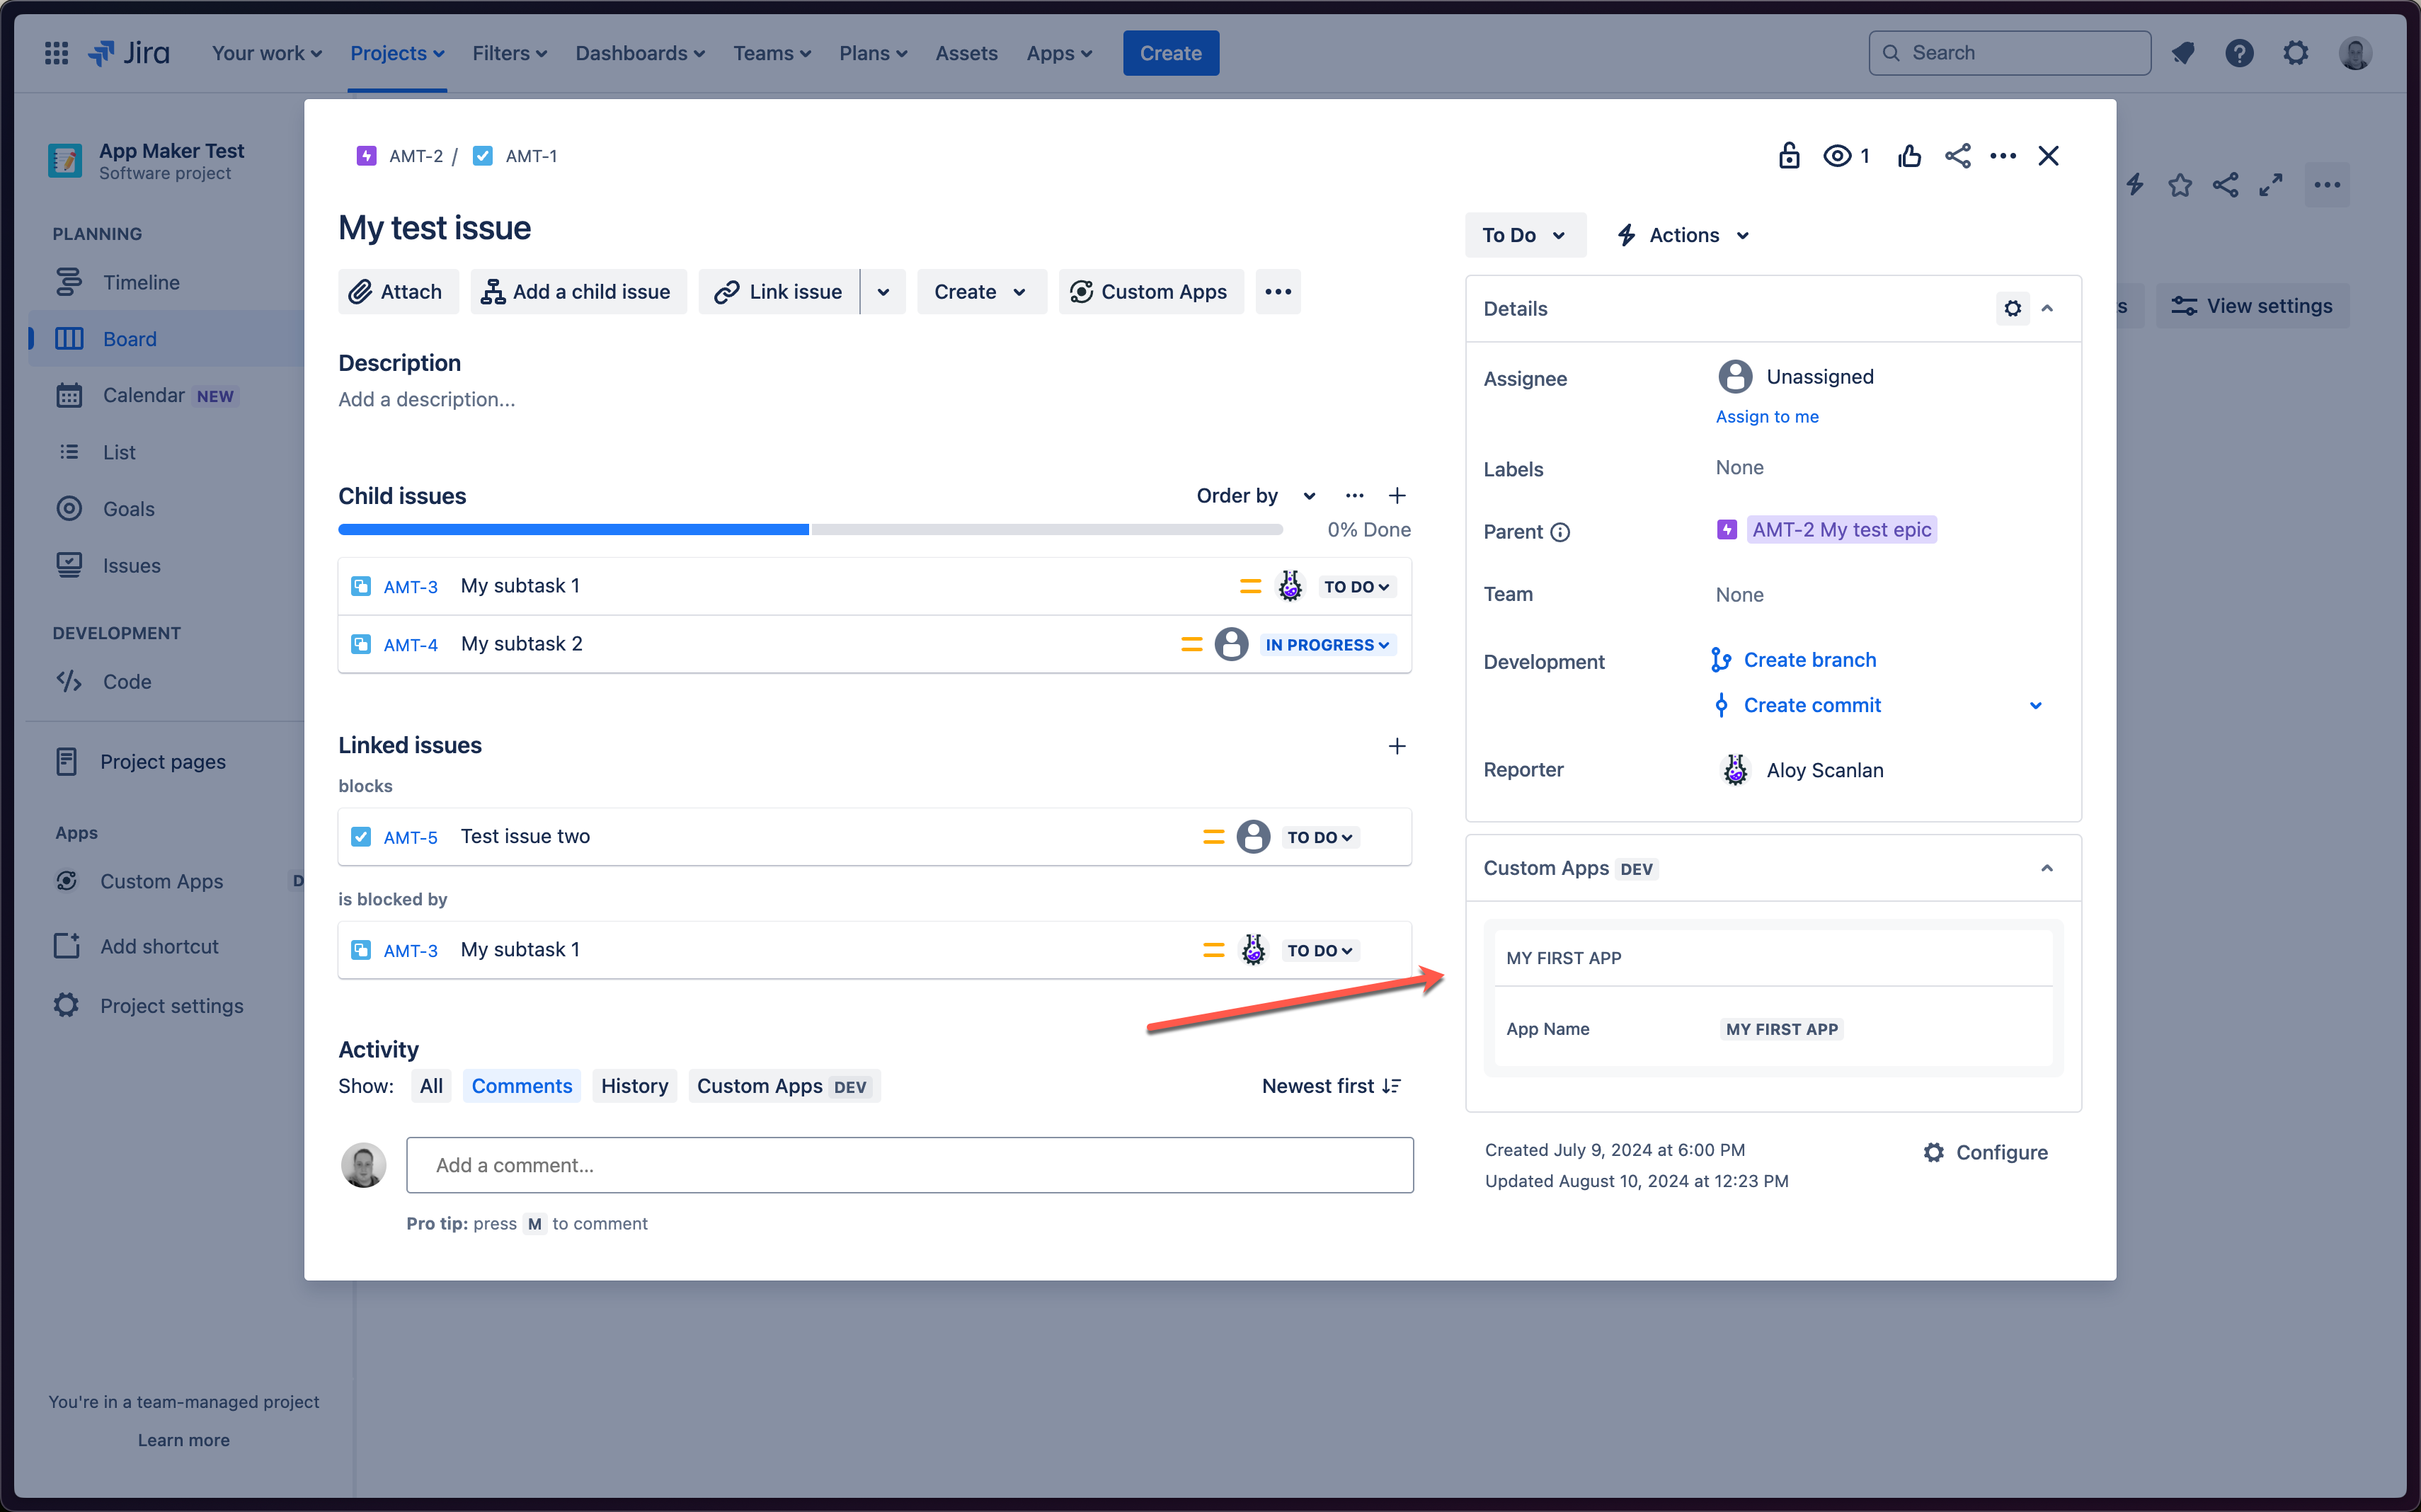
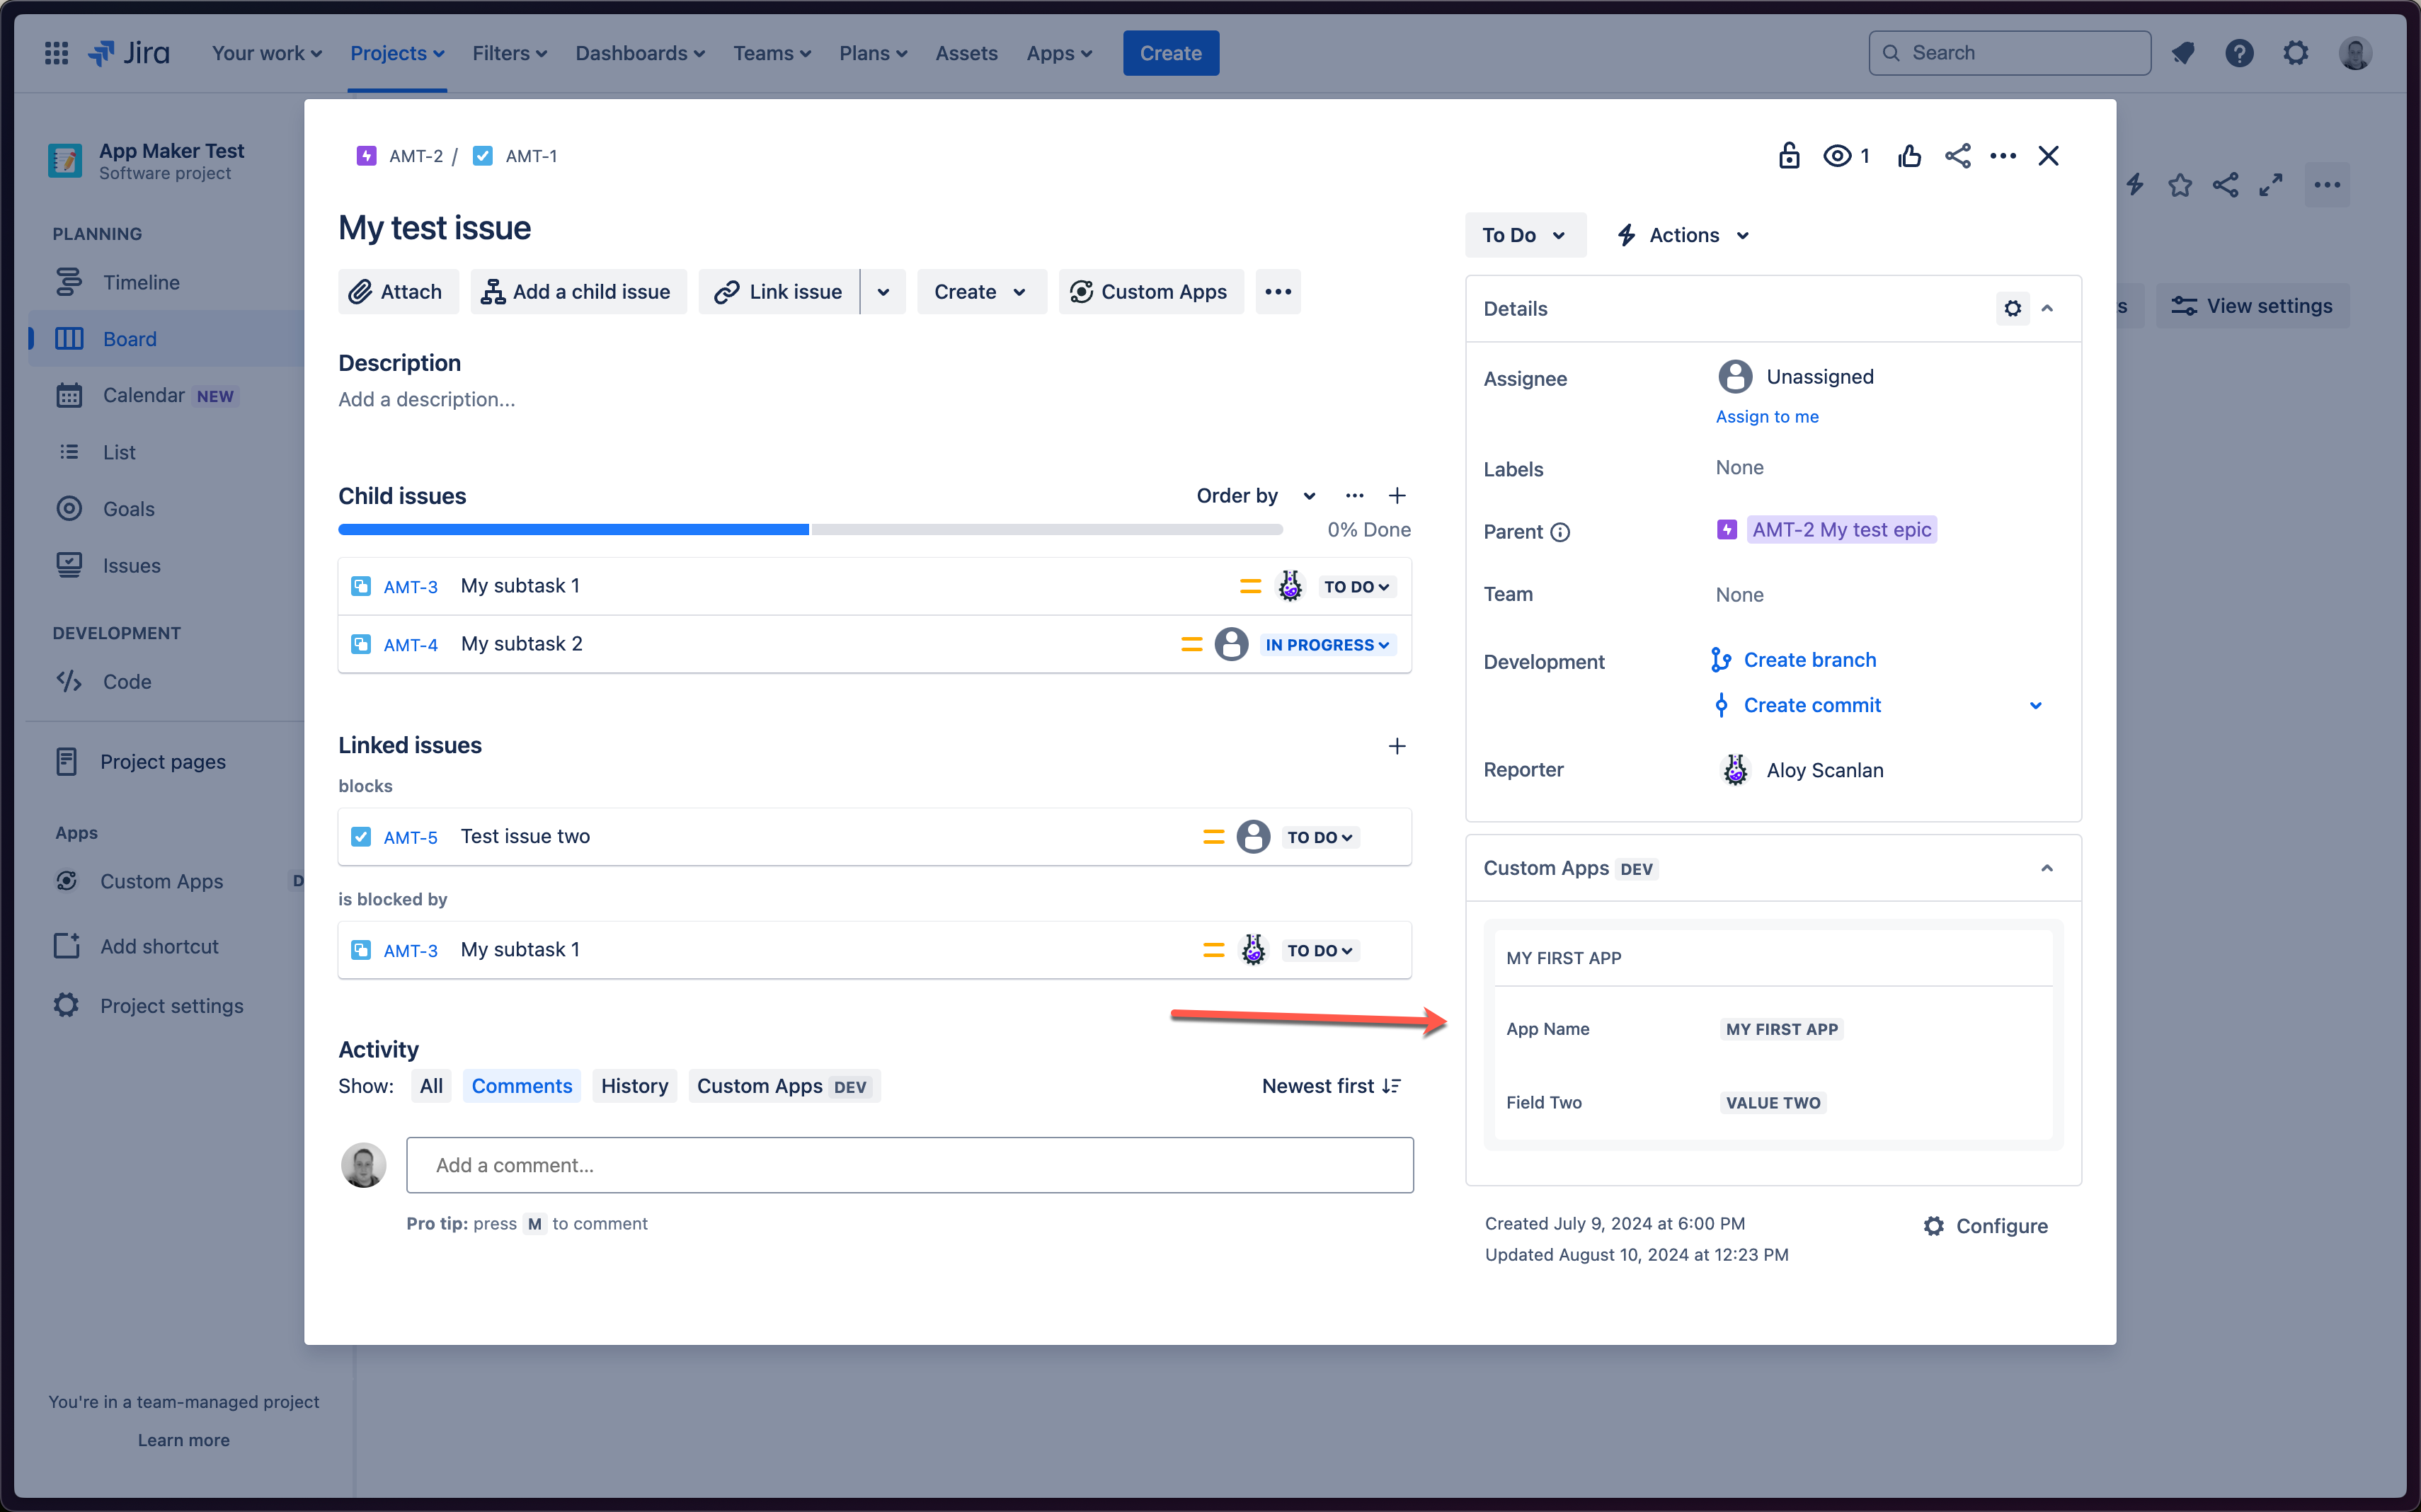
}- You should see a section called Custom Apps.
- Within that section, locate your new app called My First App.
Custom App in Jira
Updating Your First App
Now that you've finished building your first app, let's go and add some more content to it!
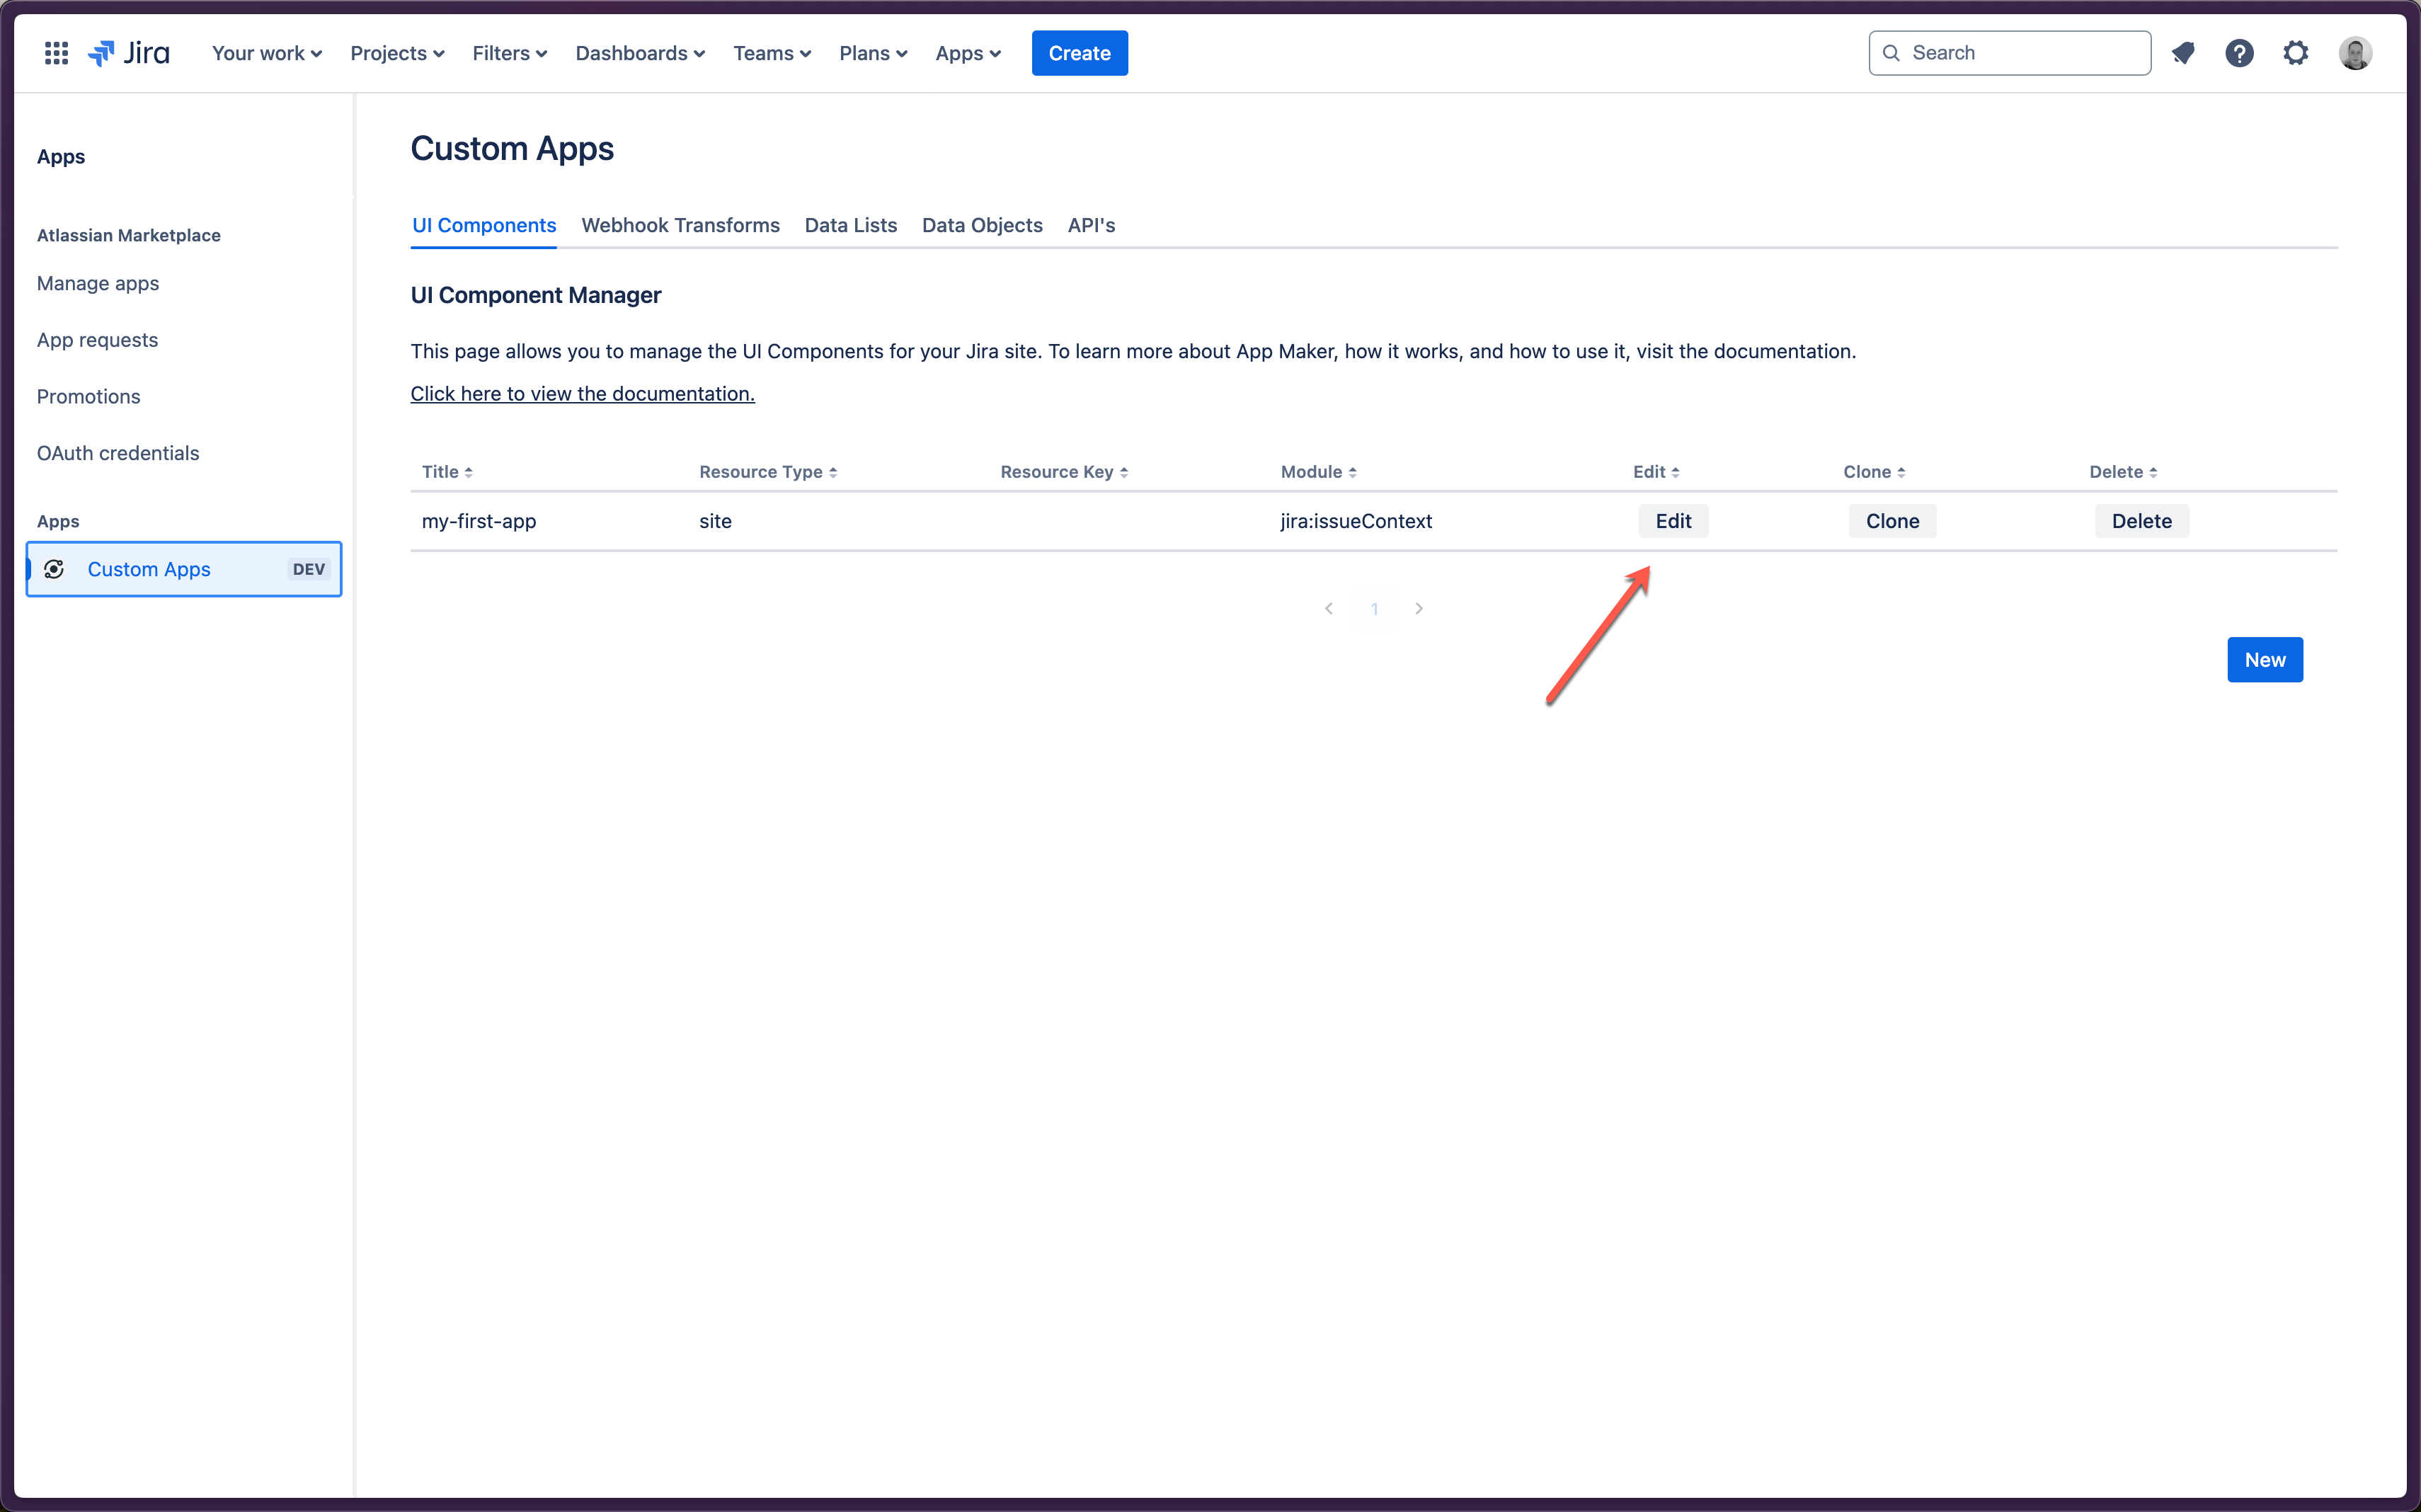
- Return to the App Settings page where you completed building your first UI Component.
- Select the UI Components tab, and click the "Edit" button on the row in the table for your app.
Edit UI Component Button
- This will load the UI Component editor, with the JSON for your component on the left, and live preview on the right.
Editing existing UI Component

- In the
childrenlist undercomponentData, add a second object with a:typeof"FieldValue"keyof"Field Two"valueof"Value Two"
- Your UI Component JSON should now look like this:
- The live-preview on the right should also update to show the new content.
Heads Up
- Each item in a JSON list needs to be seperated by a comma.
- Make sure you add a comma after the first object in the
childrenlist before adding the second object.
Code Snippet
json
{
  "resourceType": "site",
  "module": "jira:issueContext",
  "title": "my-first-app",
  "action": "set",
  "componentData": {
    "type": "StackedInformationGroup",
    "title": "My First App",
    "children": [
      {
        "type": "FieldValue",
        "key": "App Name",
        "value": "My First App"
      },
      {
        "type": "FieldValue",
        "key": "Field Two",
        "value": "Value Two"
      }
    ]
  }
}
- Press Save again.
- Return to your Jira Issue and refresh the page.
- You should see that your app has now updated to include the new content!
Updated app in Jira
Deleting Your First UI Component
You probably don't want to have this demonstration app hanging around in your Jira forever, as fancy as it may be ✨, so let's do some cleaning.
- Return to the App Settings page where you completed building your first UI Component.
- Select the UI Components tab, and click the "Delete" button on the row in the table for your UI Component.
Delete UI Component Button
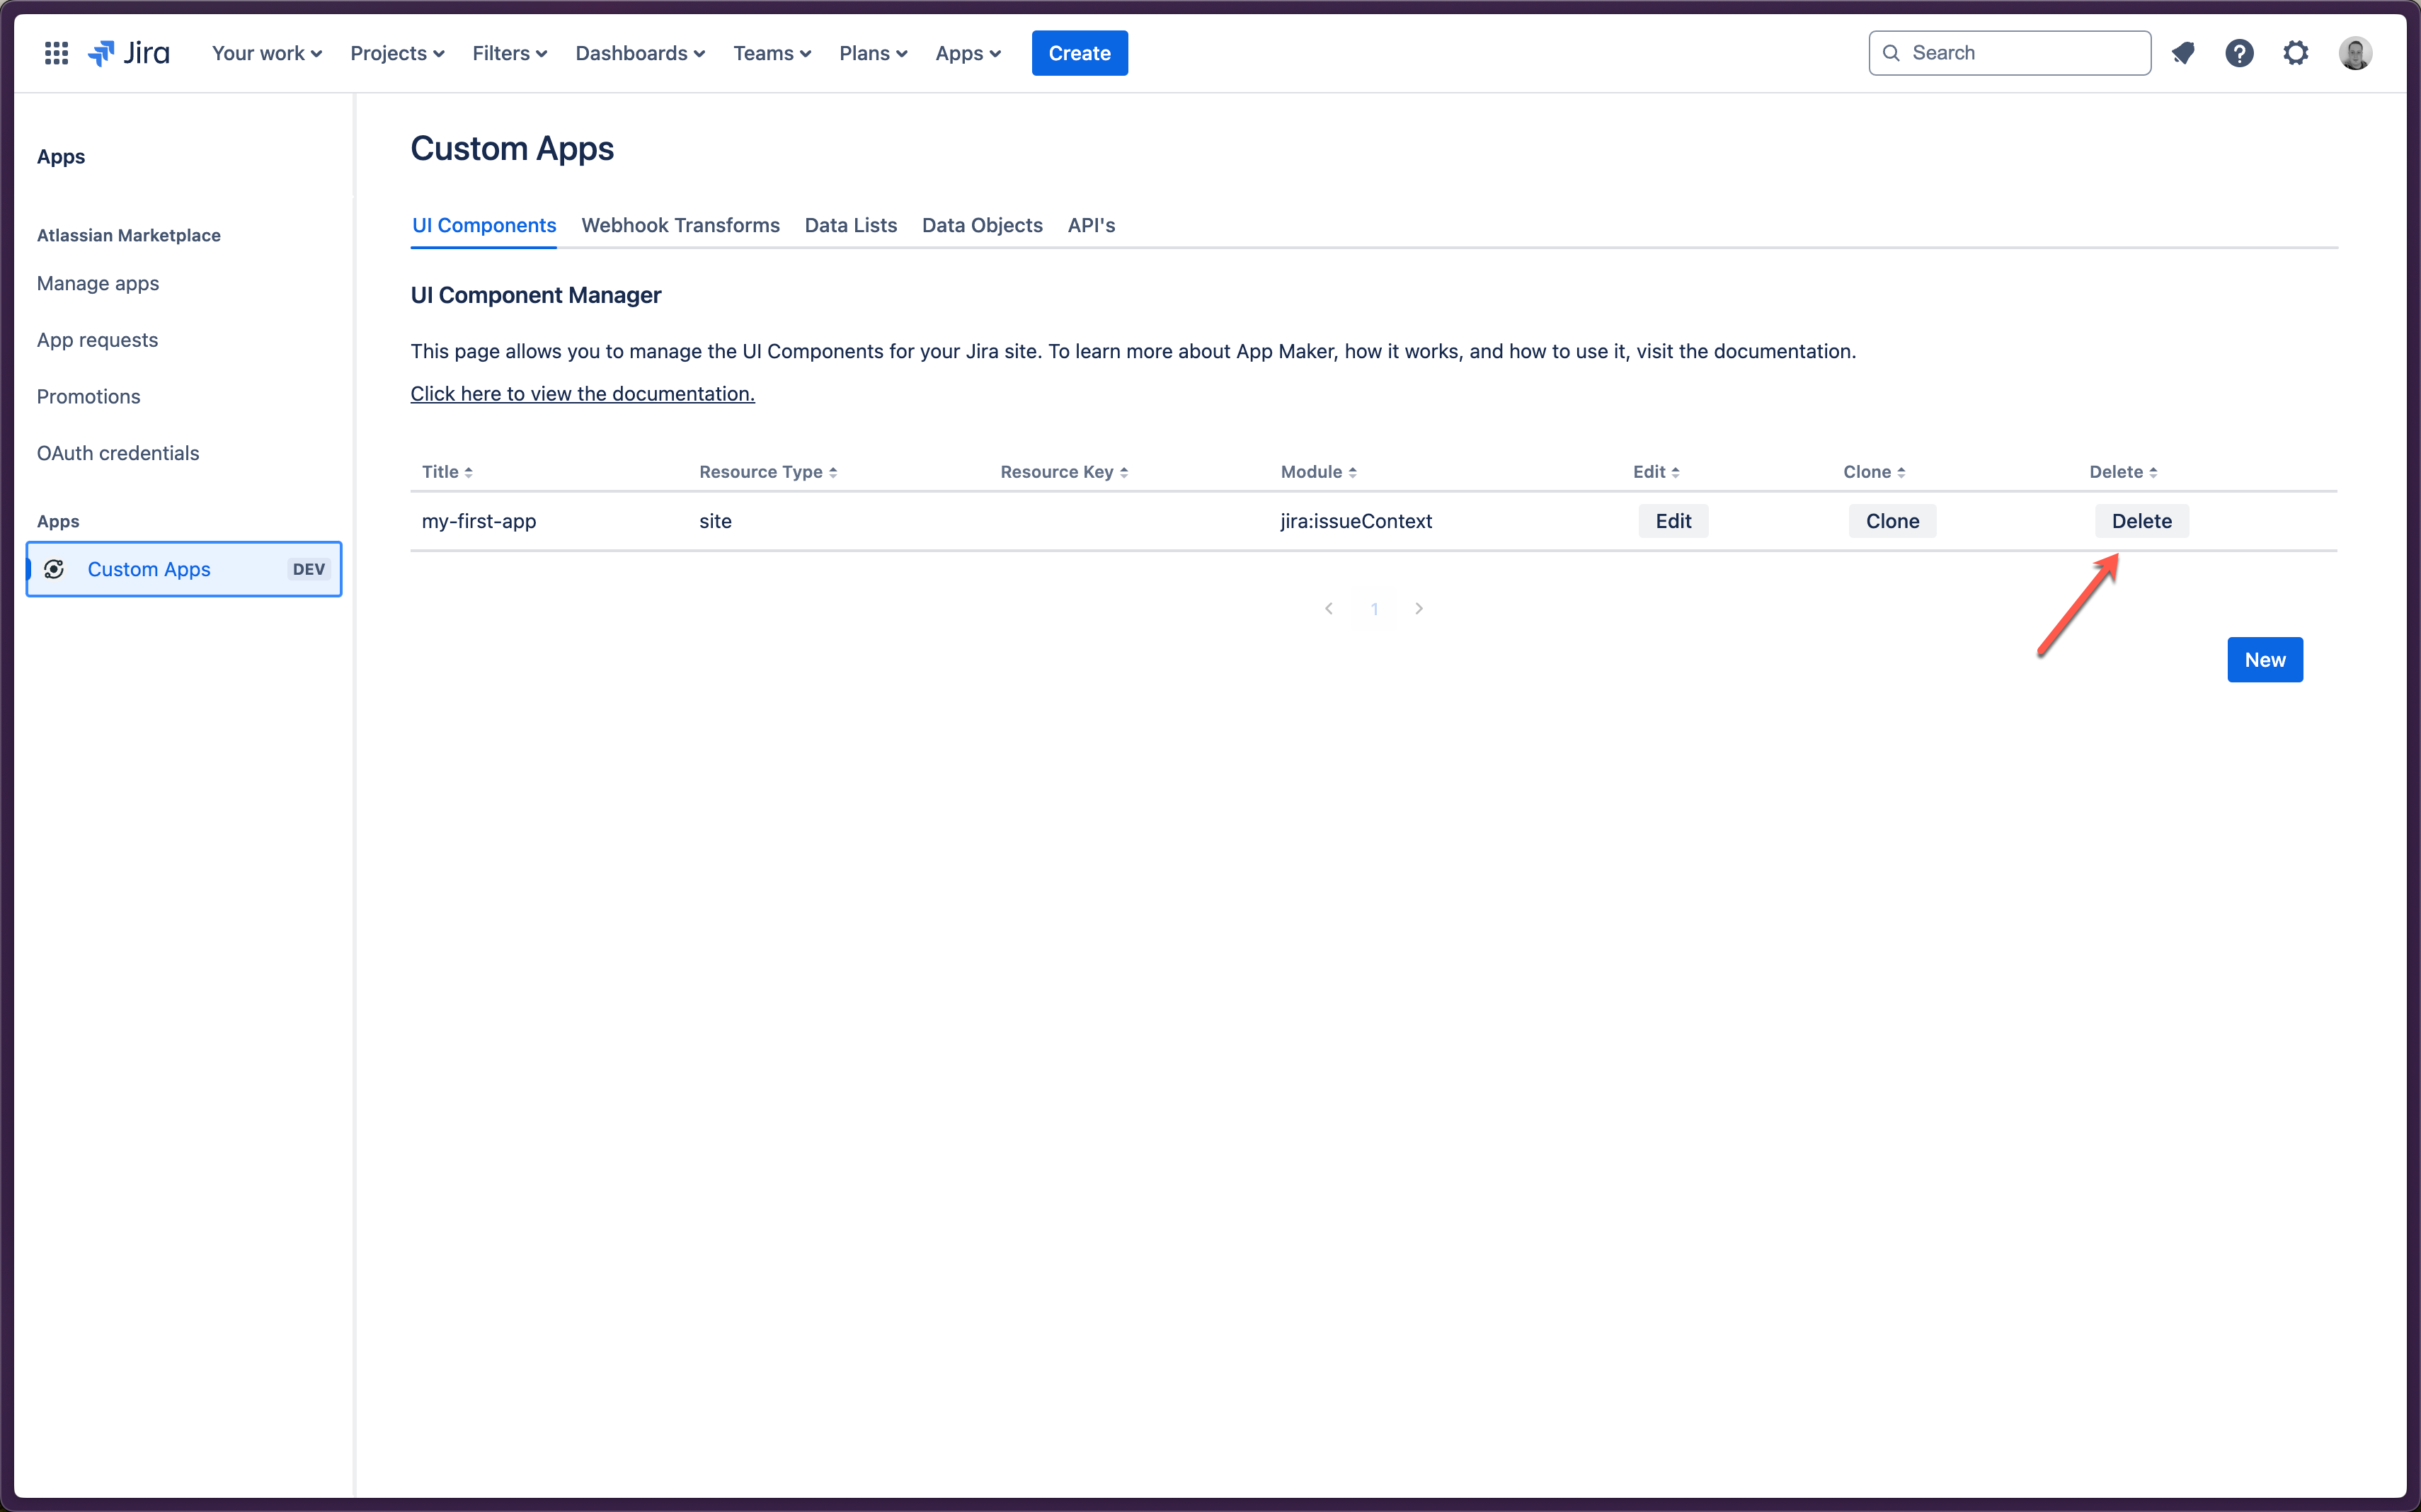
- The table should refresh after a few seconds, and your UI Component should no longer be listed.
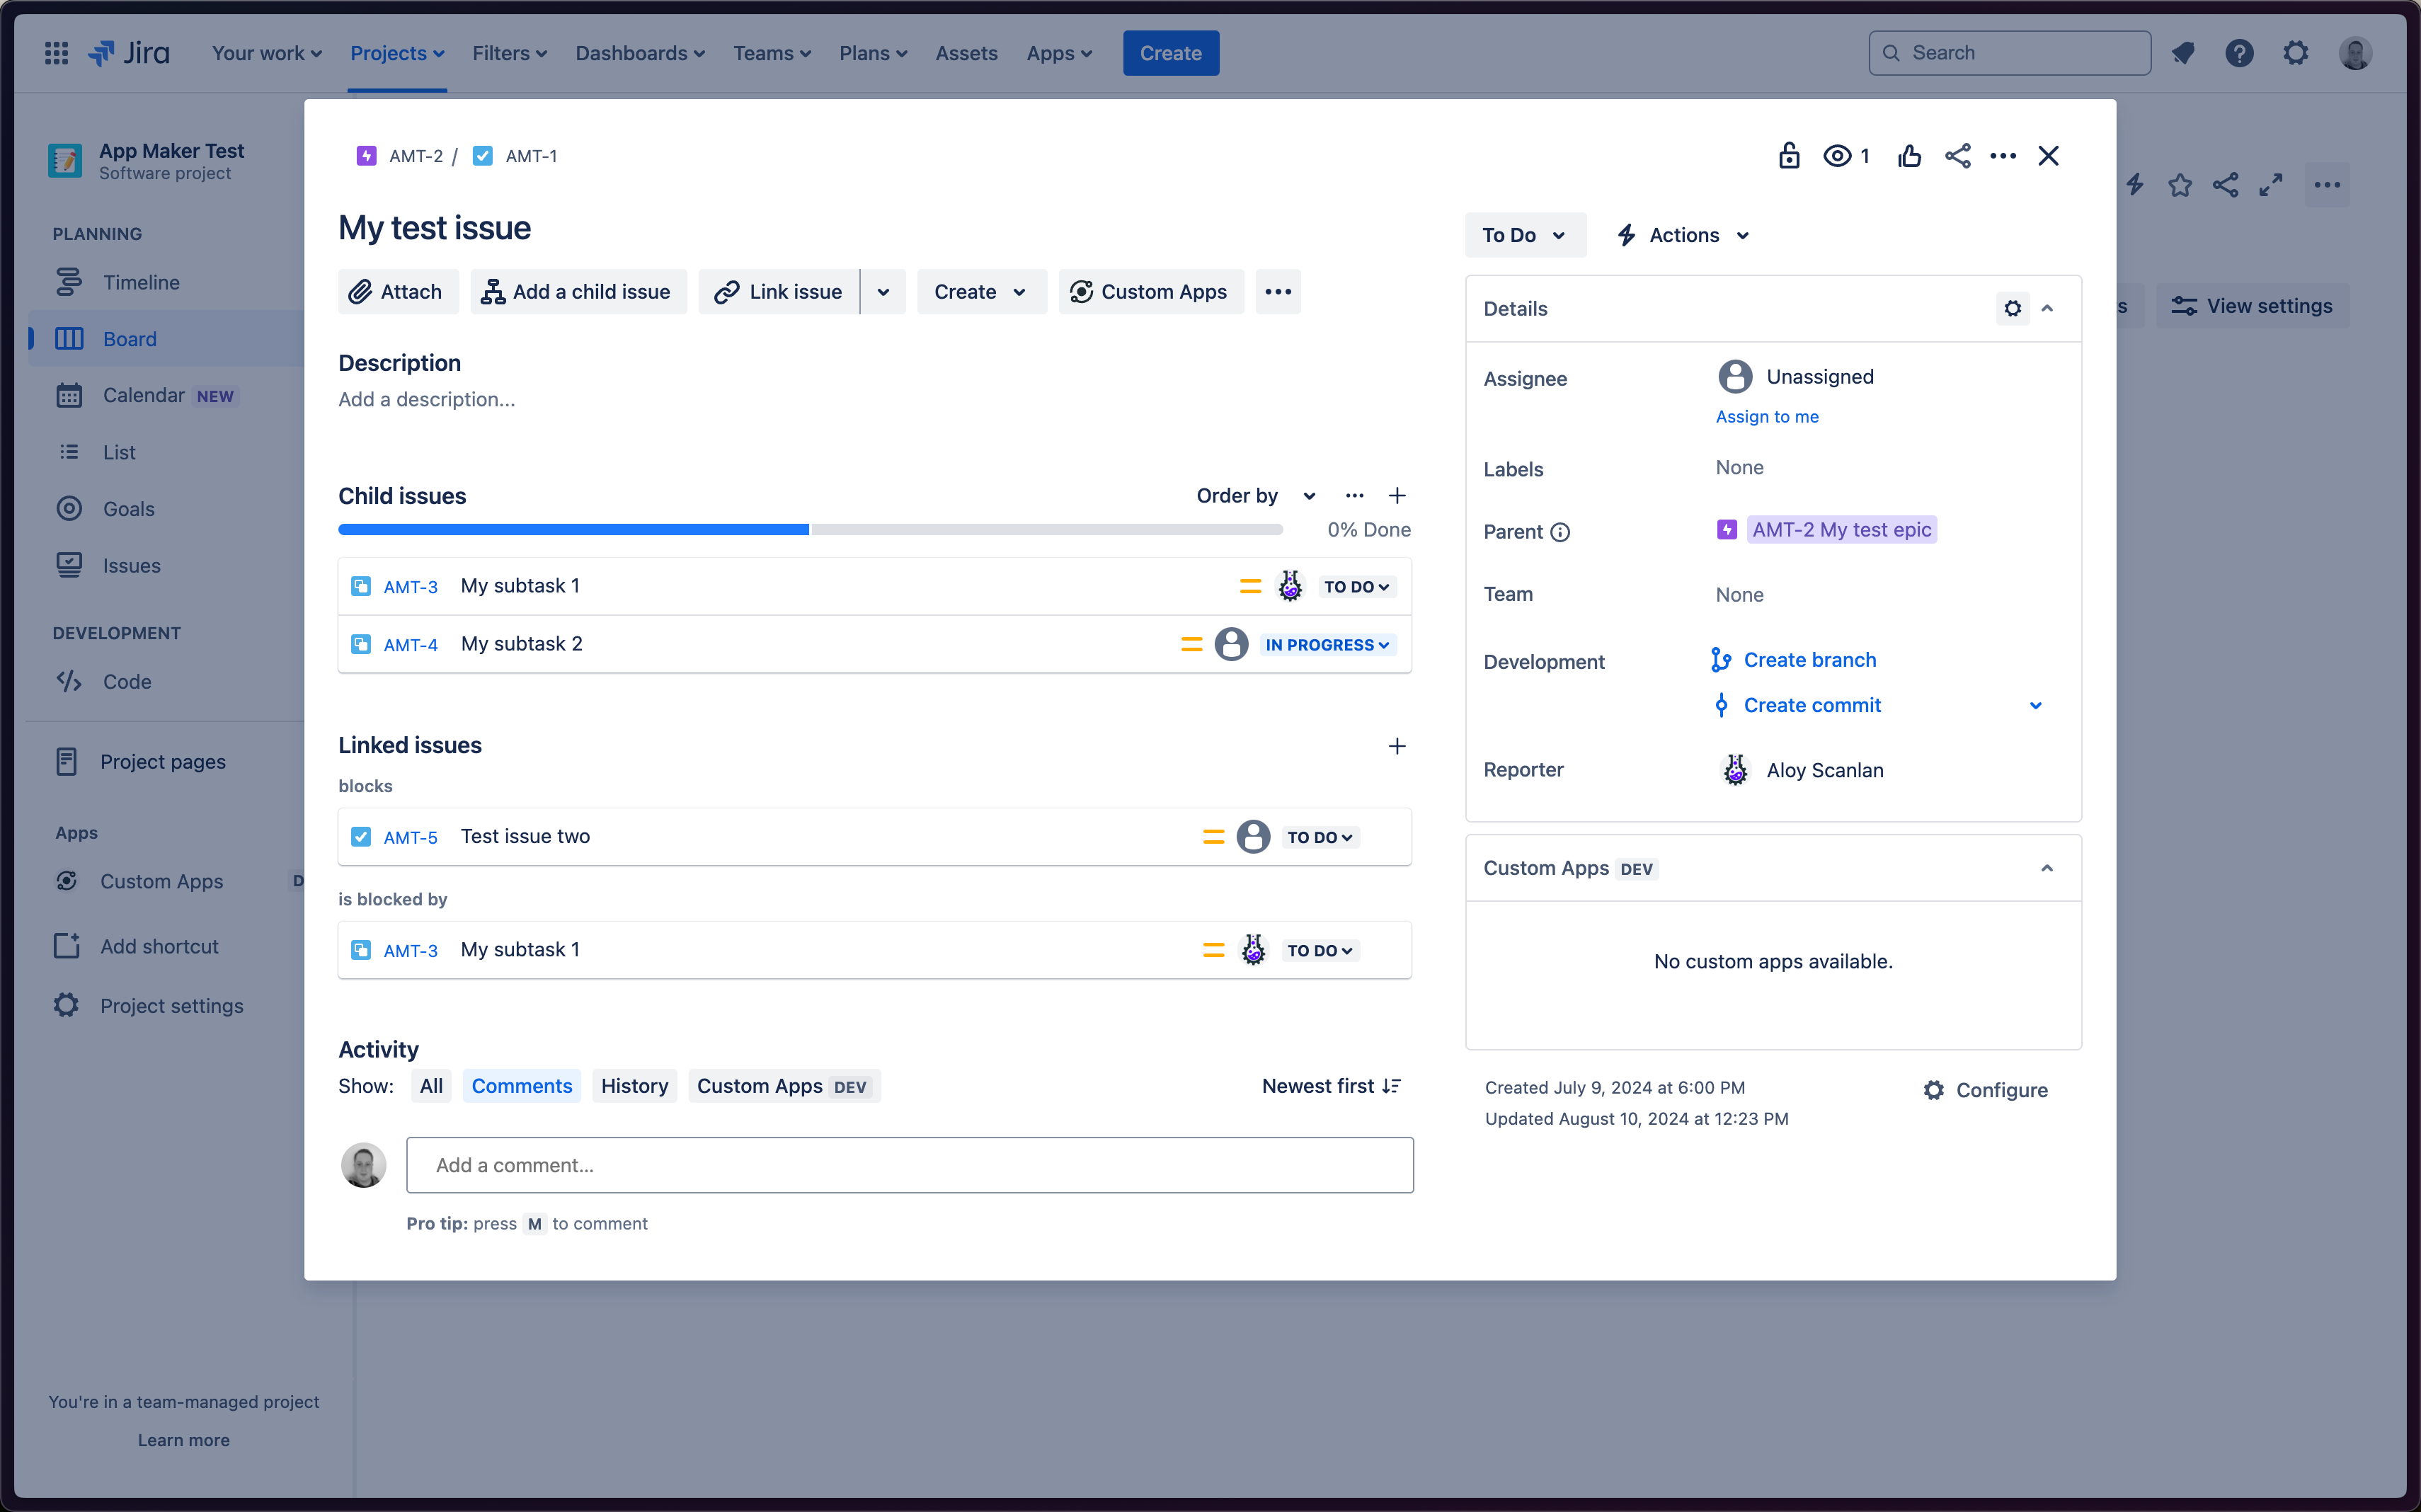
- Return to your Jira Issue and refresh the page.
- You should see that your app has now been removed!
Deleted app in Jira
Next Steps
Congratulations! ✨ You've just built, updated, and removed your first app using App Maker.
Now that you've got the basics down, you can start building more complex apps with multiple components, additional modules, and dynamic content.